Ga door naar hoofdinhoud

iRobot Roomba 655 Pet Series Internal Faceplate Removal

Wat je nodig hebt

  1. iRobot Roomba 655 Pet Series Internal Faceplate Removal, Front Face Plate: stap 1, afbeelding 1 van 2 iRobot Roomba 655 Pet Series Internal Faceplate Removal, Front Face Plate: stap 1, afbeelding 2 van 2
    • Remove the dust bin by pushing on the button for the dust bin removal

    • Pull the dust bin out

  2. iRobot Roomba 655 Pet Series Internal Faceplate Removal: stap 2, afbeelding 1 van 2 iRobot Roomba 655 Pet Series Internal Faceplate Removal: stap 2, afbeelding 2 van 2
    • Pull up on the silver handle to release the top protectant plastic

    • Remove the top plastic carefully

  3. iRobot Roomba 655 Pet Series Internal Faceplate Removal, Front Bumper: stap 3, afbeelding 1 van 2 iRobot Roomba 655 Pet Series Internal Faceplate Removal, Front Bumper: stap 3, afbeelding 2 van 2
    • Remove the ten 11mm screws that hold the front bumper to the plastic bumper protector with your Phillips #1 screwdriver.

    • Pull the plastic bumper protector up and off of the bumper.

  4. iRobot Roomba 655 Pet Series Internal Faceplate Removal: stap 4, afbeelding 1 van 3 iRobot Roomba 655 Pet Series Internal Faceplate Removal: stap 4, afbeelding 2 van 3 iRobot Roomba 655 Pet Series Internal Faceplate Removal: stap 4, afbeelding 3 van 3
    • Flip the Roomba back over, so you are viewing the top.

    • Pull up on the front bumper to remove it.

    • Be careful not to pull too hard because there is wiring attached to the bumper.

    • Remove the two 7mm screws with your Phillips #1 screwdriver, holding the wire sensors in place to the front bumper.

  5. iRobot Roomba 655 Pet Series Internal Faceplate Removal, Internal Faceplate: stap 5, afbeelding 1 van 3 iRobot Roomba 655 Pet Series Internal Faceplate Removal, Internal Faceplate: stap 5, afbeelding 2 van 3 iRobot Roomba 655 Pet Series Internal Faceplate Removal, Internal Faceplate: stap 5, afbeelding 3 van 3
    • The outside six - 10mm screws and the inside set of four - 10mm screws are the same here, use your Phillips head #2 to remove them

    • Use your Phillips head #0 to remove the one - 7mm bottom center screw

    • Use your Phillips head #2 to remove the two - 8mm screws by the handle

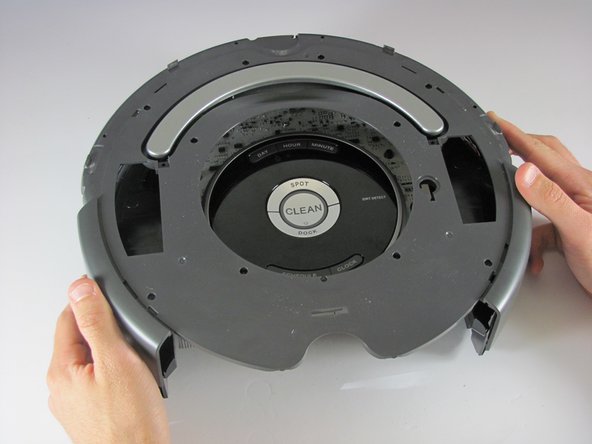
    • Push down the two release points to pull the plastic piece up

    • Pull the plastic piece up

Conclusie

To reassemble your device, follow these instructions in reverse order.

Rhett

Lid sinds: 01/22/15

1.329 Reputatie

7 handleidingen geschreven

Team

Cal Poly, Team 21-20, Maness Winter 2015 Lid van Cal Poly, Team 21-20, Maness Winter 2015

CPSU-MANESS-W15S21G20

4 Leden

14 handleidingen geschreven

0 opmerkingen

Voeg opmerking toe

Weergavestatistieken:

Afgelopen 24 uren: 0

Afgelopen 7 dagen: 0

Afgelopen 30 dagen: 1

Altijd: 734