Ga door naar hoofdinhoud

iPod Touch 2nd Generation Headphone Jack Replacement

Gearchiveerde handleiding
Deze handleiding wordt enkel nog bijgehouden voor historische doeleinden. Gebruik de laatste versie van deze gids om uw reparatie uit te voeren.

Wat je nodig hebt

  1. Voorzichtig: stappen 1-4 komen van een handleiding die in bewerking is.

    iPod Touch 2nd Generation Headphone Jack Replacement, Front Panel: stap 1, afbeelding 1 van 2 iPod Touch 2nd Generation Headphone Jack Replacement, Front Panel: stap 1, afbeelding 2 van 2
    • Wedge the PX 3688 plastic opening tool between the glass front panel and the plastic frame. Start near the top where the volume control buttons are located and stay on one side of iPod.

    • Turn the tool in a hinge-like rotation away from the iPod and pry the glass panel out of its case.

    • Be careful to work at a slow and gentle pace. Avoid breaking anything inside the iPod, especially the screen.

  2. iPod Touch 2nd Generation Headphone Jack Replacement: stap 2, afbeelding 1 van 1
    • Make sure not to slide the tool along the edge once you’ve managed to wedge it between the screen and panel. Repeat the process of prying the tool into a point along one of the edges and remove the tool to insert it at another point.

  3. iPod Touch 2nd Generation Headphone Jack Replacement: stap 3, afbeelding 1 van 2 iPod Touch 2nd Generation Headphone Jack Replacement: stap 3, afbeelding 2 van 2
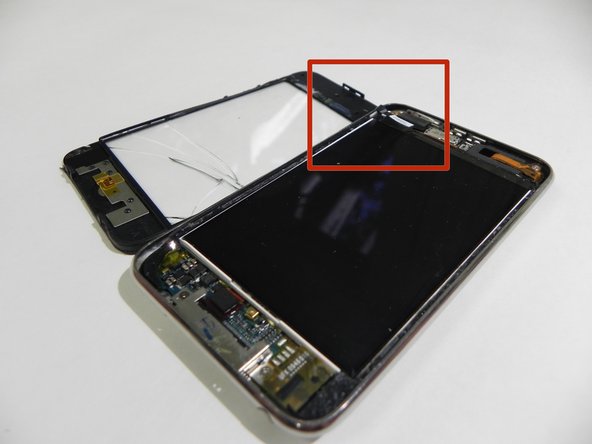
    • Work your way around the iPod, prying the front panel up, until it is completely separated from the clips.

    • Lift the front panel out of the bottom case.

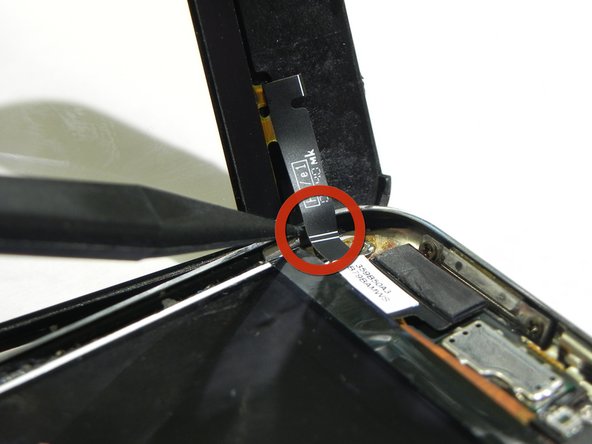
    • Be careful not to damage the touch screen connector cable still attached near the upper left corner of the iPod.

  4. iPod Touch 2nd Generation Headphone Jack Replacement: stap 4, afbeelding 1 van 1
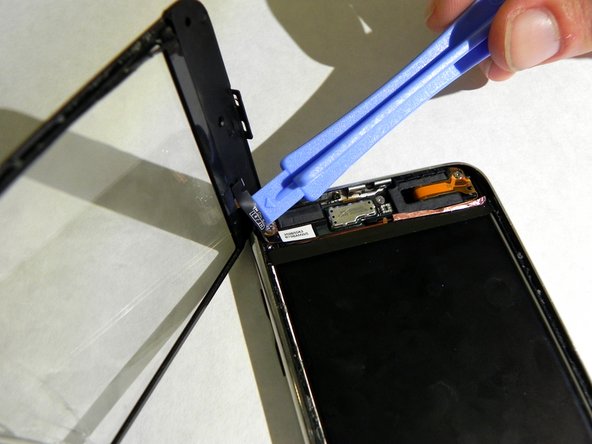
    • Using the PX 3688, pry the touch screen cable connector off the top logic board.

    • Check the front panel for any damage. Be careful not to scratch the front panel on the underside of the black portions.

    • Clean the face of the display and the inner face of the front panel.

  5. iPod Touch 2nd Generation Headphone Jack Replacement, Display: stap 5, afbeelding 1 van 1
    • Remove the Phillips screw in the top left corner attaching the metal tray to the rear panel.

  6. iPod Touch 2nd Generation Headphone Jack Replacement: stap 6, afbeelding 1 van 2 iPod Touch 2nd Generation Headphone Jack Replacement: stap 6, afbeelding 2 van 2
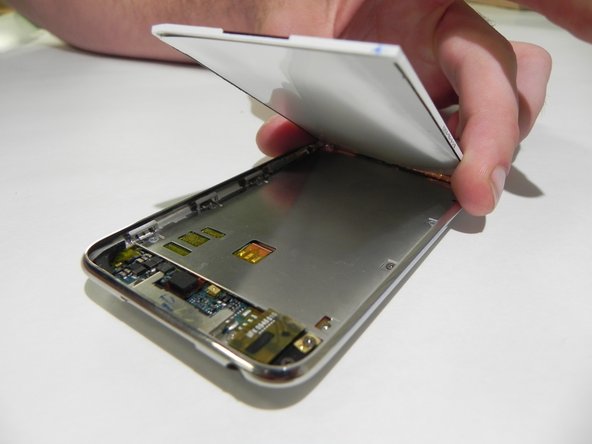
    • Insert a PX 3688 plastic opening tool with the edge angled up, toward the underside of the display, between the white plastic backlight and the metal beneath it.

    • Pry the lower edge of the display up until it's at about a 45 degree angle with the rest of the iPod.

    • Hold the display in this position with one hand for the next step to avoid damaging the display ribbon cable.

  7. iPod Touch 2nd Generation Headphone Jack Replacement: stap 7, afbeelding 1 van 1
    • Remove the seven Phillips screws securing the metal display tray to the rear panel with a Phillips #00 screwdriver.

    • Keep track of the screws for reassembly. The two darker screws belong in the holes in the tray nearest the bottom edge.

  8. iPod Touch 2nd Generation Headphone Jack Replacement: stap 8, afbeelding 1 van 1
    • Place the display back in the metal display tray.

    • Use a PX 3688 plastic opening tool to peel the copper tape off the top edge of the display.

    • Do not peel off the copper tape that is attached to the metal display tray.

  9. iPod Touch 2nd Generation Headphone Jack Replacement: stap 9, afbeelding 1 van 1
    • Lift the bottom of the display and rotate it towards the top edge of the iPod.

    • Use the spudger tool to lift the metal display tray and rotate it toward the top edge of the iPod on top of the display.

  10. iPod Touch 2nd Generation Headphone Jack Replacement: stap 10, afbeelding 1 van 1
    • Use a spudger tool to pry the display cable connector off its socket on the logic board.

    • The logic board is beneath where the Home button used to be.

  11. iPod Touch 2nd Generation Headphone Jack Replacement: stap 11, afbeelding 1 van 2 iPod Touch 2nd Generation Headphone Jack Replacement: stap 11, afbeelding 2 van 2
    • Lift the metal tray slightly (the battery is attached to the underside) and remove the display from the iPod.

    • Make sure the delicate cable is not caught. The display ribbon is under the metal display tray.

  12. Voorzichtig: stappen 12-20 komen van een handleiding die in bewerking is.

    iPod Touch 2nd Generation Headphone Jack Replacement, Logic Board: stap 12, afbeelding 1 van 1
    • Rotate the metal display tray to the top of the iPod, being careful of the ribbon connecting the battery to the logic board.

    • Use the flat end of a spudger to pry the battery off of the metal display tray.

    • Remove the metal display tray.

    • Place the battery back in the rear panel.

  13. iPod Touch 2nd Generation Headphone Jack Replacement: stap 13, afbeelding 1 van 1
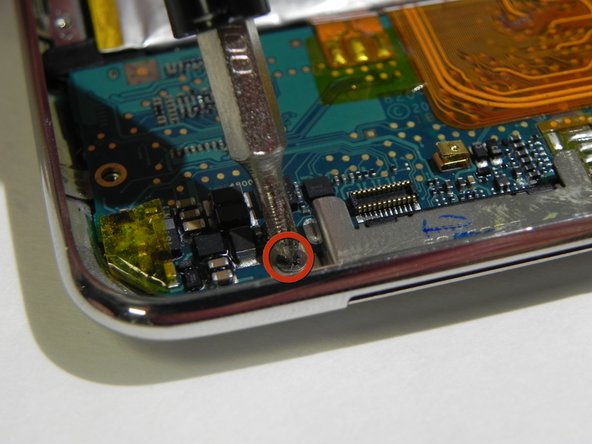
    • Unscrew the Phillips screw in the lower left side of the iPod Touch.

    • Remove the screw and the gold pressure contact piece.

  14. iPod Touch 2nd Generation Headphone Jack Replacement: stap 14, afbeelding 1 van 1
    • Unscrew the following Phillips screws in the bottom right corner that hold the logic board to the rear panel:

    • One 1.9 millimeter screw.

    • Two 2.3 millimeter screws.

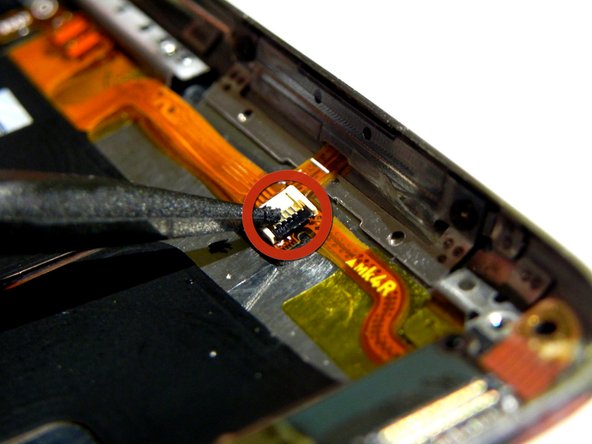
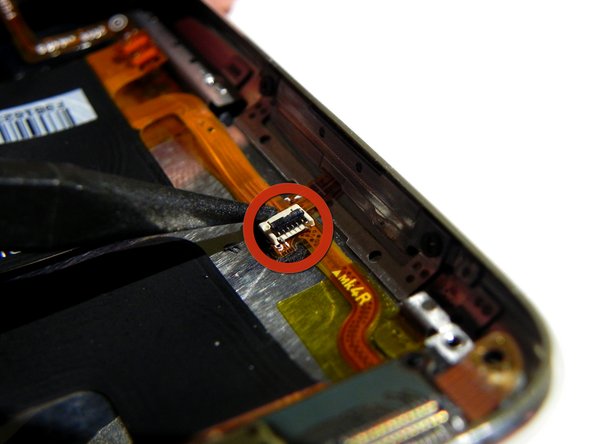
  15. iPod Touch 2nd Generation Headphone Jack Replacement: stap 15, afbeelding 1 van 3 iPod Touch 2nd Generation Headphone Jack Replacement: stap 15, afbeelding 2 van 3 iPod Touch 2nd Generation Headphone Jack Replacement: stap 15, afbeelding 3 van 3
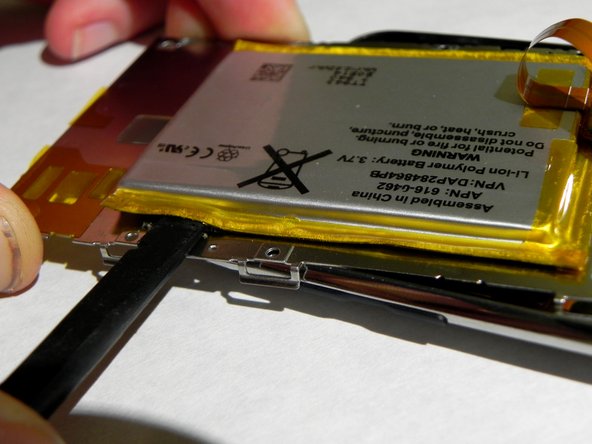
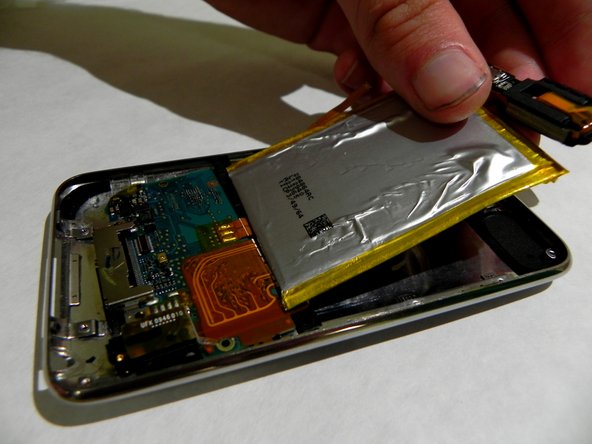
    • Insert the spudger beneath the battery and gently lift the battery towards you.

    • Grab the battery with your hand and gently lift it until it's at about a 45 degree angle with the rest of the iPod.

    • The battery will still be attached by the ribbon.

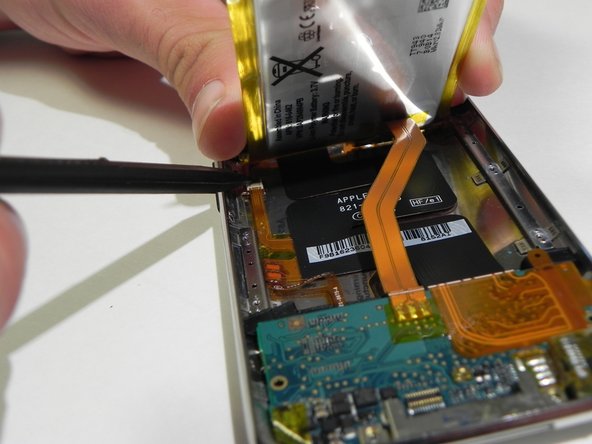
    • Using the spudger, flip the control button that holds down the ribbon.

    • Make sure you are flipping the switch and not prying the socket itself.

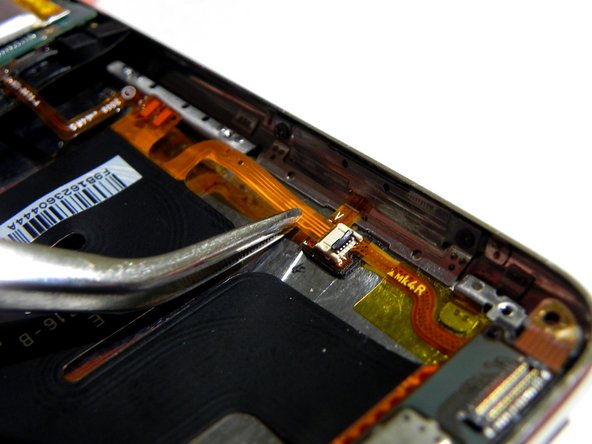
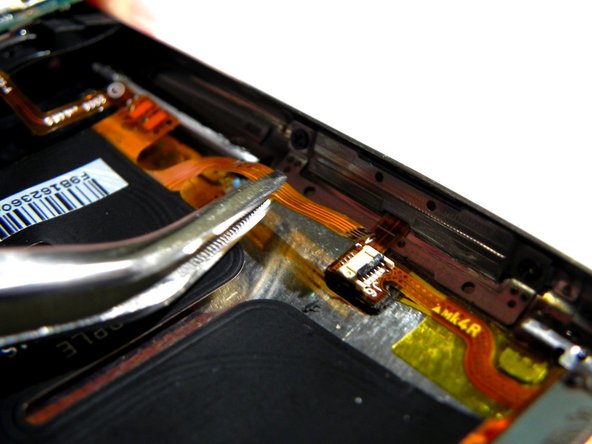
  16. iPod Touch 2nd Generation Headphone Jack Replacement: stap 16, afbeelding 1 van 2 iPod Touch 2nd Generation Headphone Jack Replacement: stap 16, afbeelding 2 van 2
    • Once the switch is flipped, remove the ribbon from its socket by gently pulling the ribbon straight out with tweezers.

  17. iPod Touch 2nd Generation Headphone Jack Replacement: stap 17, afbeelding 1 van 2 iPod Touch 2nd Generation Headphone Jack Replacement: stap 17, afbeelding 2 van 2
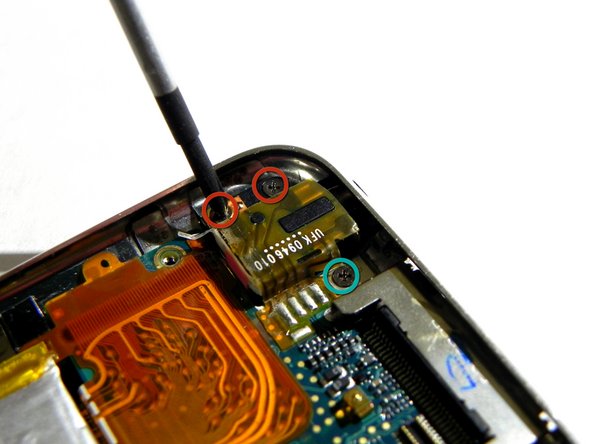
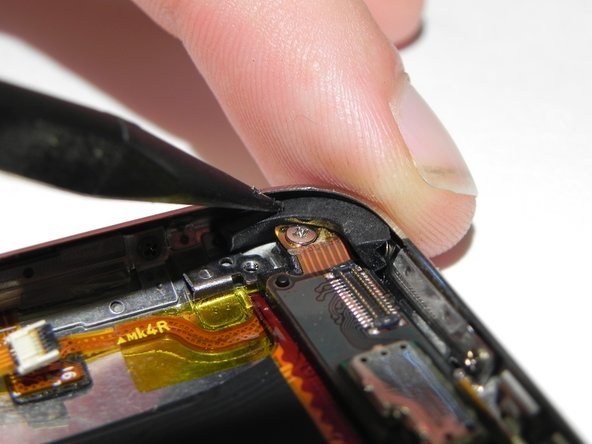
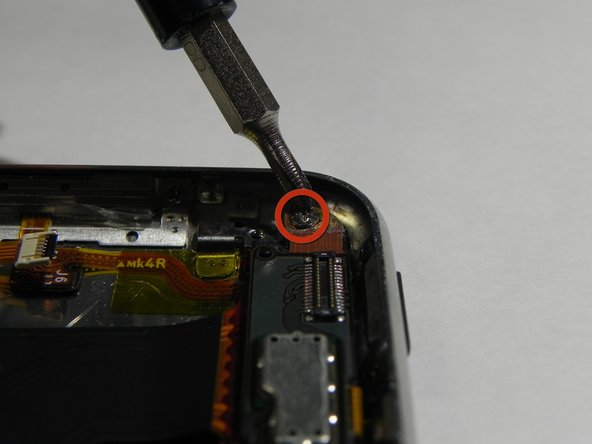
    • In the top left corner, peel back the protective rubber grommet.

    • Unscrew the Phillips screw underneath.

  18. iPod Touch 2nd Generation Headphone Jack Replacement: stap 18, afbeelding 1 van 1
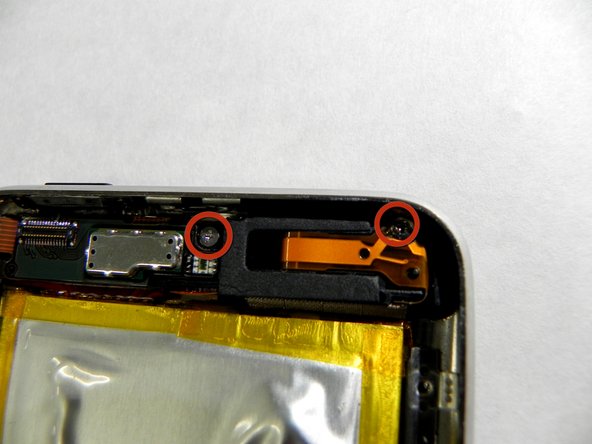
    • Remove the remaining two Phillips screws in the top right corner and the top center.

  19. iPod Touch 2nd Generation Headphone Jack Replacement: stap 19, afbeelding 1 van 1
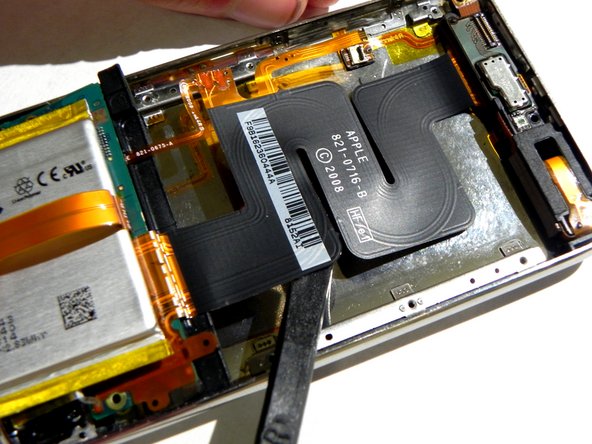
    • Use the flat edge of a spudger and remove the large black adhesive piece from the metal rear plate.

    • Use your hands if necessary.

  20. iPod Touch 2nd Generation Headphone Jack Replacement: stap 20, afbeelding 1 van 1
    • Gently pull the top part of the Logic Board up from the rear panel with your hands.

    • Gently lift out the lower part of the logic Board, paying close attention to any caught edges.

  21. iPod Touch 2nd Generation Headphone Jack Replacement, Headphone Jack: stap 21, afbeelding 1 van 1
    • The headphone jack is attached to the logic board at five points.

    • Remove the old headphone jack from the logic board by prying the headphone jack ribbon off the logic board with the spudger.

  22. iPod Touch 2nd Generation Headphone Jack Replacement: stap 22, afbeelding 1 van 1
    • Solder the new headphone jack onto the logic board, making sure to solder all five points.

Conclusie

To reassemble your device, follow these instructions in reverse order.

4 andere personen hebben deze handleiding voltooid.

Shannon Murphy

Lid sinds: 04/05/12

681 Reputatie

3 handleidingen geschreven

Team

Cal Poly, Team 15-16, Forte Spring 2012 Lid van Cal Poly, Team 15-16, Forte Spring 2012

CPSU-FORTE-S12S15G16

5 Leden

3 handleidingen geschreven

0 opmerkingen

Voeg opmerking toe

Weergavestatistieken:

Afgelopen 24 uren: 0

Afgelopen 7 dagen: 0

Afgelopen 30 dagen: 0

Altijd: 6,523