Deze versie kan foutieve bewerkingen bevatten. Schakel over naar de recentste gecontroleerde momentopname.
Wat je nodig hebt
-
Deze stap is niet vertaald. Help het te vertalen
-
To aid in visualization, the two clips boxed in red are located closest to the headphone jack.
-
-
-
Deze stap is niet vertaald. Help het te vertalen
-
Insert the large iPod opening tool into the seam between the front case and rear panel of the iPod, above the dock connector. The tool's edge should point toward the rear panel to prevent any accidental scratching of the anodized aluminum front case.
-
-
Deze stap is niet vertaald. Help het te vertalen
-
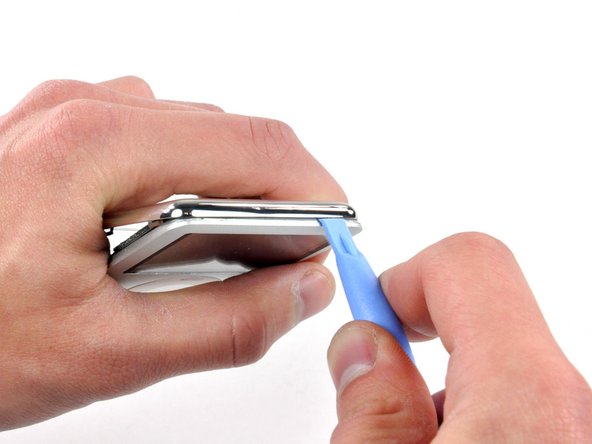
Insert a small iPod opening tool into the seam on the headphone jack side of the Nano, with the edge of the tool pointing toward the rear panel.
-
Gently enlarge the existing gap by pressing/wiggling the small iPod opening tool into the gap near each of the the two tabs attached to the rear case, pushing the clips toward the center of the Nano until both have been freed.
-
-
Deze stap is niet vertaald. Help het te vertalen
-
Repeat the same procedure listed in the previous step to free the three clips along the hold switch side of the Nano.
-
-
Deze stap is niet vertaald. Help het te vertalen
-
Insert an iPod opening tool into the gap near the top left corner of the Nano and work to free the three clips along the top edge of the rear panel.
-
After ensuring all tabs are free, separate the two halves of the iPod.
-
The rear panel is now free from the iPod.
-


Annuleren: ik heb deze handleiding niet afgemaakt.
36 andere personen hebben deze handleiding voltooid.

2 opmerkingen
but what about the model no.
its just a third-gen ipod nano they all have the same design