Deze versie kan foutieve bewerkingen bevatten. Schakel over naar de recentste gecontroleerde momentopname.
Wat je nodig hebt
-
-
Vul een pan met genoeg water om de iOpener volledig in onder te dompelen.
-
Verwarm het water tot het kookt. Zet het vuur uit.
-
Leg je iOpener gedurende 2-3 minuten in het hete water. Zorg dat de iOpener volledig in het water ligt.
-
Gebruik een tang om de iOpener uit de pan te halen.
-
Droog je iOpener grondig met een handdoek.
-
Je iOpener is gereed om te worden gebruikt! als je je iOpener opnieuw op wilt warmen, verwarm je het water weer tot het kookt, zet je het vuur uit en plaats je de iOpener gedurende 2-3 minuten in het water.
-
-
-
Als het glas van je scherm gebarsten is, kun je de scherven bij elkaar houden door het scherm met doorzichtige tape te beplakken. Zo voorkom je ook fysieke schade tijdens de reparatie.
-
Bedek het volledige scherm met overlappende lagen doorzichtige tape.
-
Probeer de rest van de handleiding zo gedetailleerd mogelijk op te volgen. Als het glas echter eenmaal gebroken is, zal het verder breken tijdens de reparatie en zul je misschien een metalen tool nodig hebben om het scherm er alsnog uit te wrikken.
-
-
Deze stap is niet vertaald. Help het te vertalen
-
Elevate the iPad enough for the Anti-Clamp's arms to rest above and below the screen.
-
Pull the blue handle towards the hinge to disengage opening mode.
-
Position the suction cups near the top edge of the iPad—one on the front, and one on the back.
-
Push down on the cups to apply suction to the desired area.
-
-
Deze stap is niet vertaald. Help het te vertalen
-
Push the blue handle away from the hinge to engage opening mode.
-
Turn the handle clockwise until you see the cups start to stretch.
-
Wait one minute to give the adhesive a chance to release and present an opening gap.
-
Insert an opening pick under the screen when the Anti-Clamp creates a large enough gap.
-
Skip the next two steps.
-
-
-
Trek de zuignap met een stevige kracht omhoog om zo een kleine opening te creëren tussen de schermmodule en de achterste behuizing.
-
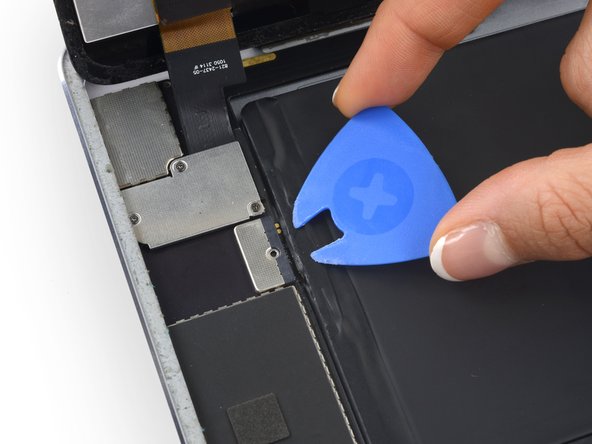
Als je een opening hebt gecreëerd die groot genoeg is, breng je een openingsplectrum aan om te voorkomen dat de lijm zich opnieuw aan het toestel gaat hechten.
-
-
-
Deze stap is niet vertaald. Help het te vertalen
-
Use a plastic opening tool to pry the bracket off the back of the Home Button.
-
-
Deze stap is niet vertaald. Help het te vertalen
-
Remove the Home Button bracket and peel up the tape connected to it.
-
Scrape off as much of the old adhesive residue from the bracket as you can, then clean it with acetone or high-concentration (90% or greater) isopropyl alcohol.
-
Secure the bracket with hot-melt glue, superglue, or high-strength double-sided tape. Make sure the bracket is aligned correctly before allowing your adhesive to cure, or the home button will not click when pressed.
-
-
Deze stap is niet vertaald. Help het te vertalen
-
Peel up the tape covering the Home Button ZIF connector.
-
-
Deze stap is niet vertaald. Help het te vertalen
-
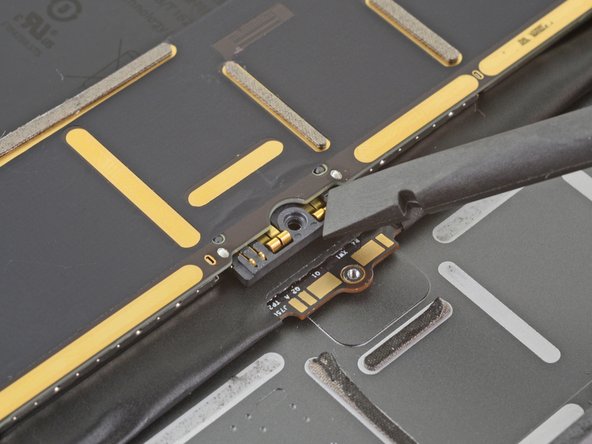
Use the flat end of a spudger to flip up the retaining flap on the Home Button cable socket.
-
-
Deze stap is niet vertaald. Help het te vertalen
-
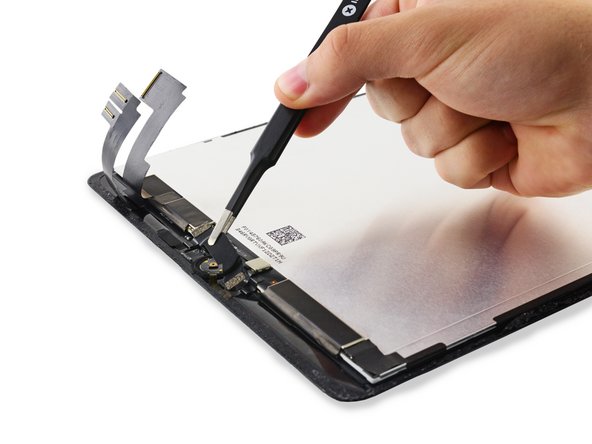
Use the flat end of a spudger to peel up the Home Button ribbon cable and Touch ID control chip.
-
-
Deze stap is niet vertaald. Help het te vertalen
-
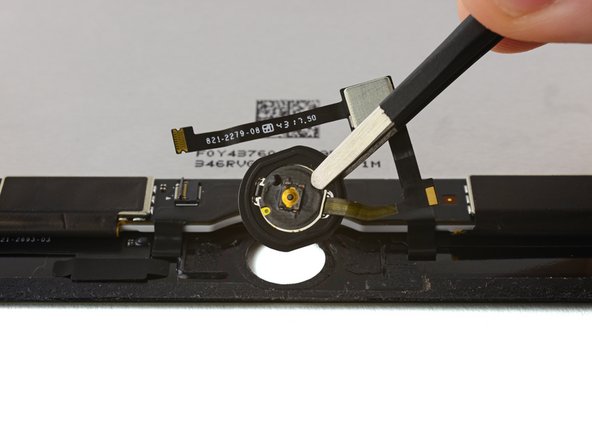
Peel up the remaining corner of the Home Button ribbon cable.
-
-
Deze stap is niet vertaald. Help het te vertalen
-
Reheat your iOpener and lay it over the bottom edge of the display to loosen the adhesive on the Home Button gasket.
-
-
Deze stap is niet vertaald. Help het te vertalen
-
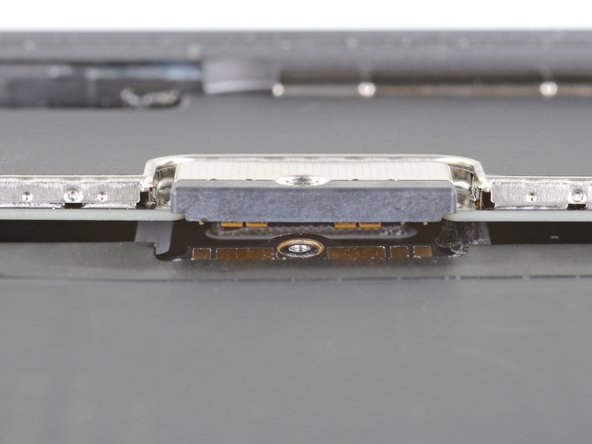
Use the pointed end of a spudger to gently pry the Home Button assembly up from the display.
-
-
Deze stap is niet vertaald. Help het te vertalen
-
Continue working the tip of the spudger around the edge of the gasket until the gasket is fully separated from the front panel.
-


Annuleren: ik heb deze handleiding niet afgemaakt.
40 andere personen hebben deze handleiding voltooid.

11 opmerkingen
There is a small black plastic ring between the back of the glass and the home button gasket that no one seems to be mentioning. Do you see it? It does not appear on any of the photos. What's up with that?
Its the washer, better to transfer to new screen if the screen does not come with the washer. Without the washer the home button will work fine, just feel weird. Good luck
As I understand it, the touch ID chip on the home button ribbon cable is paired to the logic board at the factory. Unless you put the same home button assembly back, you will lose the touch ID when a replacement home button assembly is installed. The home button will work but without touch ID