Deze versie kan foutieve bewerkingen bevatten. Schakel over naar de recentste gecontroleerde momentopname.
Wat je nodig hebt
-
Deze stap is niet vertaald. Help het te vertalen
-
Remove the following screws securing the power & volume button cable to the aluminum frame:
-
Two 5.5mm Phillips #0
-
One 2.6 mm Phillips #0
-
Two 2.6 mm Phillips #0
-
-
Deze stap is niet vertaald. Help het te vertalen
-
Remove the piece of plastic covering the volume buttons.
-
-
Deze stap is niet vertaald. Help het te vertalen
-
Remove the single 2.6 mm Phillips #00 screw holding the volume button frame to the aluminum frame.
-
-
-
Deze stap is niet vertaald. Help het te vertalen
-
Wedge the edge of a plastic opening tool underneath the sleep/wake sensor, being careful to not damage the fragile cable.
-
Move the plastic opening tool around the sensor, releasing the adhesive.
-
-
Deze stap is niet vertaald. Help het te vertalen
-
Continue sliding the plastic opening tool underneath the power & volume cables, releasing the adhesive.
-
-
Deze stap is niet vertaald. Help het te vertalen
-
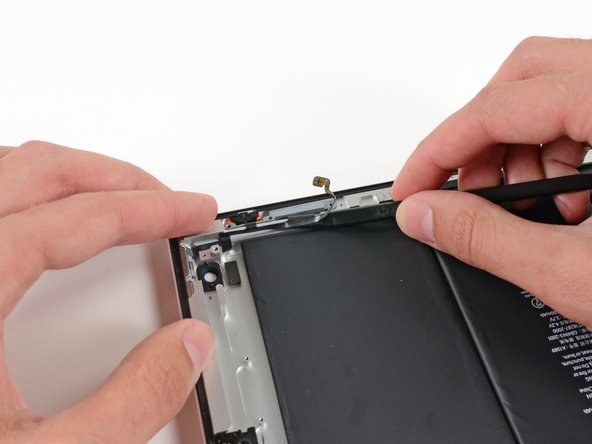
Using the tip of a spudger, release the adhesive underneath the volume button branch of the ribbon cable.
-
-
Deze stap is niet vertaald. Help het te vertalen
-
Continue sliding the tip of the spudger toward the top of the iPad, releasing the adhesive.
-
-
Deze stap is niet vertaald. Help het te vertalen
-
With the tip of the spudger still underneath the ribbon cable, gently lift the power button out of its socket in the aluminum frame.
-
-
Deze stap is niet vertaald. Help het te vertalen
-
Holding the power & volume button cable with with both hands, carefully pull the volume buttons and lock switch from their sockets in the aluminum frame.
-
Lift and remove the power & volume button cable out of the rear aluminum case.
-