Inleiding
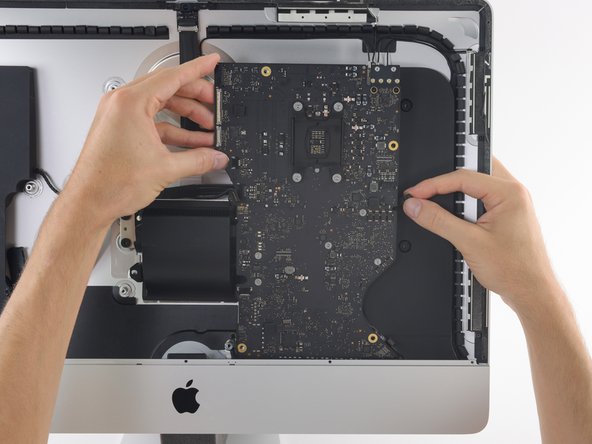
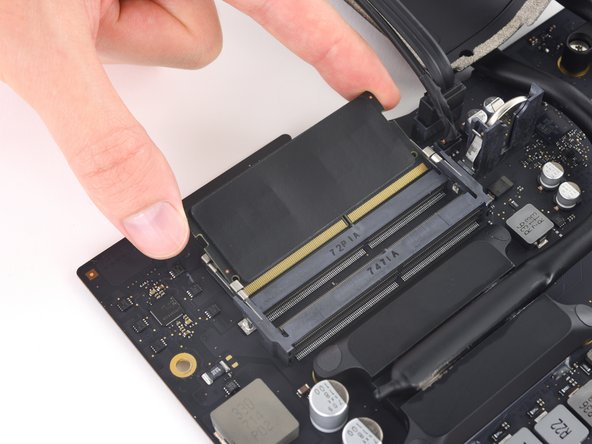
Deze handleiding laat je zien hoe je het moederbord van je iMac 4K uit 2017 verwijdert zodat je de RAM van je iMac kunt verwijderen of vervangen.
Sommige afbeeldingen tonen een iMac uit 2015, waardoor het kan lijken of je iMac er anders uitziet dan op de foto's. Dit heeft echter geen gevolgen voor de reparatieprocedure, die identiek is.
Deze handleiding is bestempeld als 'potentieel gevaarlijk' omdat je de grote condensatoren van de stroomvoorziening moet ontladen. Zorg dat je de iMac uitschakelt en de aan-uitknop gedurende minimaal 10 seconden ingedrukt houdt om de condensatoren te ontladen. Pak de printplaat van de stroomvoorziening vast bij de zijkanten en voorkom te allen tijde dat je de onderdelen op de printplaat aanraakt.
Wat je nodig hebt
-
-
-
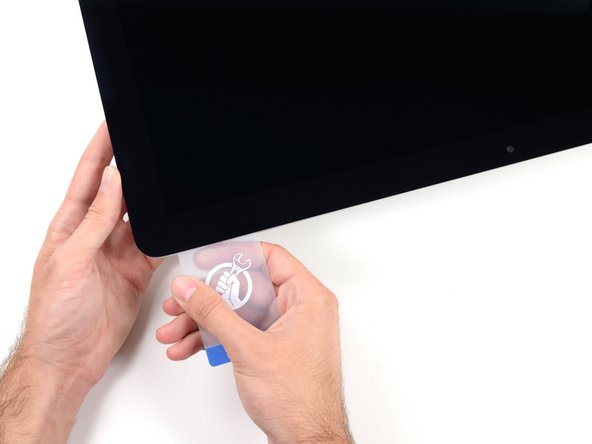
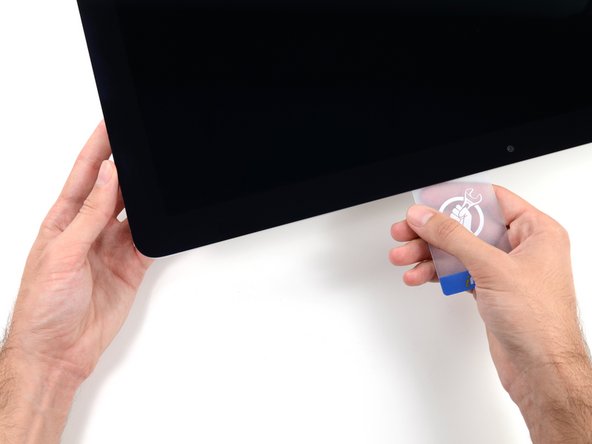
Steek een plastic kaart in de opening tussen het scherm en het frame. Begin in de rechter bovenhoek van het scherm.
-
-
-
-
Verwijder de vijf kruiskopschroeven die de onderste ondersteuningsbeugel op z'n plek houden:
-
Vier 3.2 mm lange schroeven
-
Eén 1.7 mm lange schroef
-
-
-
Verwijder de T10 Torx-schroeven die de beugels van de harde schijf in de iMac bevestigen:
-
Twee 21 mm lange schroeven
-
Eén 9 mm lange schroef
-
Eén 27 mm lange schroef
-
-
-
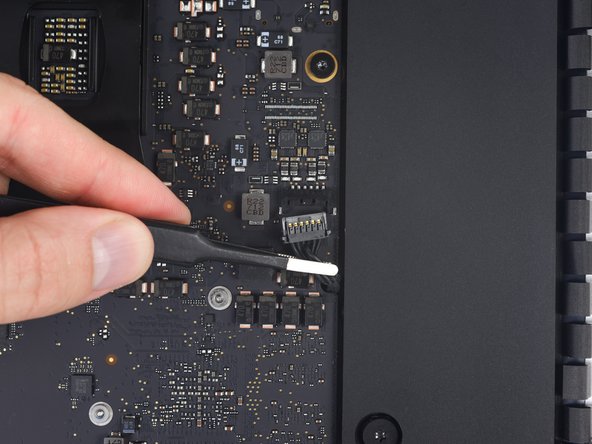
Gebruik de punt van je spudger om beide zijden van de aansluiting van de aan-uitknop om en om uit het contact te duwen.
-
-
-
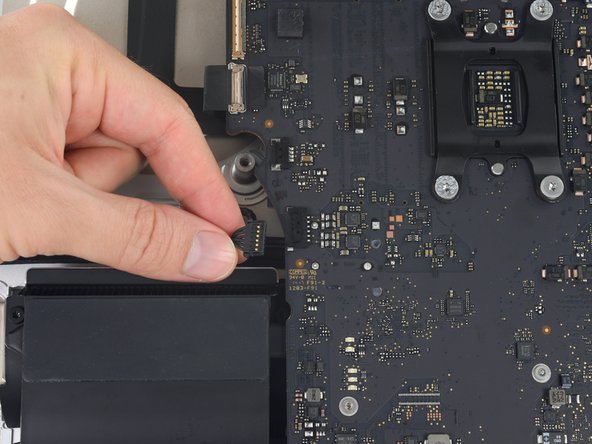
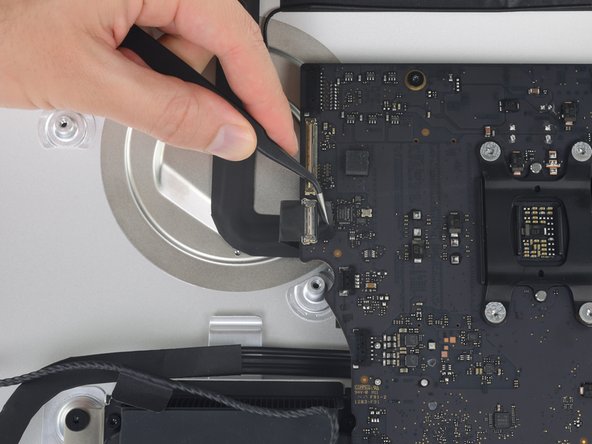
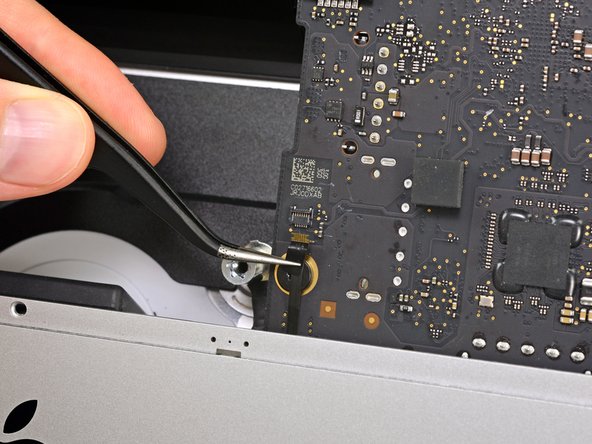
Trek de aansluiting van de ventilator in een rechte beweging uit het contact op het moederbord.
-
-
-
Til de harde schijf van de kant die het dichtst bij het moederbord ligt omhoog en trek het een beetje uit de uitsparing in de behuizing.
-
-
-
Verwijder de 7.3 mm lange T8 Torx-schroef die de harde schijfhouder in de achterste behuizing bevestigt.
-
-
-
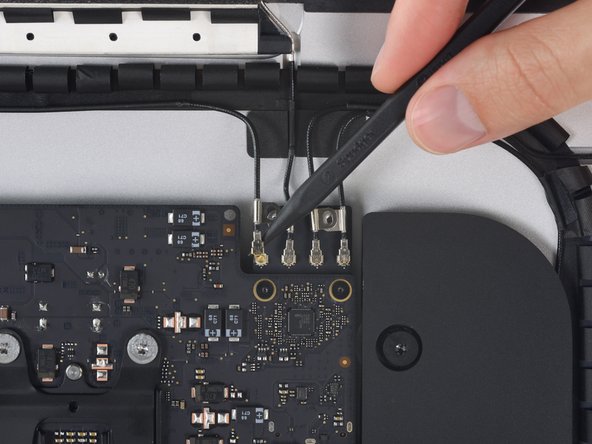
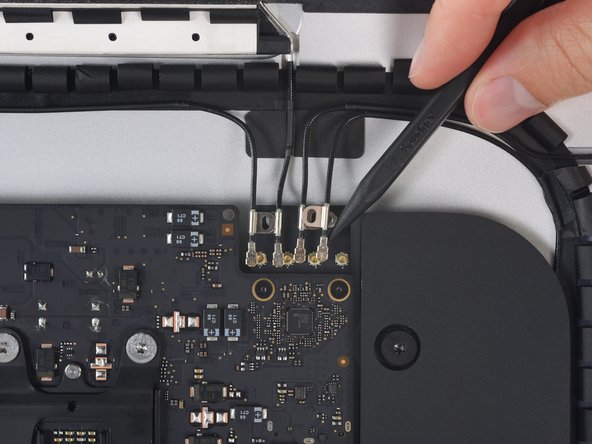
Trek de aansluiting van de rechterspeaker in een rechte beweging naar beneden en uit het contact op het moederbord.
-
-
-
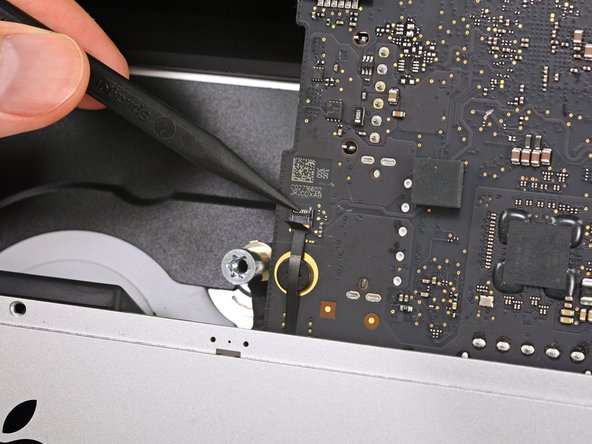
Klap de vergrendeling op de ZIF-aansluiting van de microfoon omhoog en trek de kabel uit het contact op het moederbord.
-


Volg bovenstaande instructies in omgekeerde volgorde om je iMac weer in elkaar te zetten.
Volg bovenstaande instructies in omgekeerde volgorde om je iMac weer in elkaar te zetten.
Annuleren: ik heb deze handleiding niet afgemaakt.
146 andere personen hebben deze handleiding voltooid.
Met dank aan deze vertalers:
100%

Thomas Keulemans helpt ons de wereld te herstellen! Wil je bijdragen?
Begin met vertalen ›

77 opmerkingen
An excellent guide - many thanks. The logic board was tricksy to get out - the card reader was jamming on the casing, but it came out with care. It's easy to trap the microphone cable and the power button cables when re-assembling, so they're worth looking out for. Successfully replaced the RAM and installed an SSD at the same time - many thanks.
Can a SSD or fusion drive be put in the place where the normal hard drive was?
An ssd can yes - that's what I did at the same time as upgrading the ram. As long as it's a 2.5" ssd it should be fine. The Samsung ssd I used was a but thinner than the hard drive that came out but that doesn't affect anything really. You'll need to either have a bootable clone of your drive, or install Sierra from a USB stick you've already prepared (which is what I did).
A Fusion drive is the terminology used by Apple when the use a board soldered 120ish Gb storage and a standard 1Tb 2.5 inch drive, and bind them together, if you throw in a 1Tb SSD in place of the existing standard hard drive you end up with 2 drives when you begin installation, you can find the instructions to merge the onboard and the new SSD back together again, and boy does it transform these machines, absolute pig with a factory fusion setup.
I also upgraded my hard-drive to a 512 GB Samsung SSD successfully along with installing the 32 GB of RAM. The guide was great, but I have a two comments.
1) The screws that hold the antenna connectors (Step 52) are were very tightly screwed into the board, and it is easy to strip the head of the screw. I stripped one of the screws… Luckily, it was easy to just pull up on the bluetooth/AirPort card and slide it out from its slot on the main board. Thus, an option to removing all the antenna wires, is to just pull the bluetooth/Airport card out. It was quite easy to slip back into the correct spot when reassembling as well.
2) It was only after I completed the repair that I realized that the top of the nice screwdriver provided in the repair kit contained more hidden bits!