Inleiding
Om het scherm te kunnen verwijderen, moet je de kleefstrips rondom het scherm doorsnijden. Als je de kleefstrips eenmaal door hebt gesneden, kun je ze niet meer hergebruiken om het scherm terug te plaatsen en dus moet je ze vervangen.
Wat je nodig hebt
-
-
Als het scharnier los wordt gemaakt, is de iMac uit balans en niet makkelijk te hanteren voor een reparatie. Plaats daarom een iMac-ondersteuningswig in de houder om de iMac te stabiliseren.
-
-
-
Als je je oude scherm nog hergebruikt, zul je ook de lijmresten aan de achterkant van je scherm moeten verwijderen.
-
Trek de oude kleefstrips uit het toestel met behulp van een pincet of je vingers. Begin aan de onderkant en peuter alles weg naar boven, richting de bovenkant van het toestel.
-
Maak de voorheen gelijmde gebieden, nadat je alle oude lijmresten hebt verwijderd, schoon met wat hooggeconcentreerde isopropyl alcohol (>90%) en een stuk stofvrij doek. Veeg alles weg in dezelfde richting en niet heen en weer.
The aluminum frame have a plastic zone. Could the isopropyl alcohol damage the plastic surface?
Hello! Isopropyl alcohol should not damage the plastic surface.
It’s not clear if you’re supposed to remove the black strips under the adhesives from the screen. Sometimes they come off when removing the main adhesives, but they seem to be two separate layers.
Only the adhesive should be removed—the black strips underneath them should stay in place.
“Only the adhesive should be removed—the black strips underneath them should stay in place.”
By fault I’ve removed the black strips, now there is a gap between the glass and the aluminum frame in the bottom.
the display is perfectly pasted, it’s only a matter of appearance…
If I open the computer again, what kind of adhesive tape (caption tape?) could I use to eliminate the gap between the glass and the frame?
Or it’s better to let it go…
Thanks for your support
Hi Massimiliano ,
You should be fine. The bottom edge doesn’t have black strips. It should be bare metal. However, there shouldn’t be any gaps between the glass and the frame. Make sure that the adhesive is fully adhered on the bottom edge.
Hi Arthur,
my English is not perfect…
I would mean that I removed all the black strips under the adhesives on the screen; so I believe that the glass has become too thin compared to the bottom aluminium frame.
I thought to open the Mac again and put some black strips to increase the thickness of the glass screen but I don’t know what kind of tape I should use (Kapton or other?).
And then I will put a new set of ifixit adhesives strips.
Maybe it’s a waste of time… it’ s only an aesthetic matter
Thanks again
Thanks for the clarification. Since there is always a chance to crack the screen glass when cutting the adhesive, I’d suggest not to open up the iMac again. However, if you do open it, I suggest using Tesa tape.
Thanks Arthur,
I will follow your suggestion… I will not open again my computer…
Now it works very well and fast.
So, the bit about the adhesive strips really needs to be clarified. Nowhere in the instructions is there talk about multiple layers of adhesive, one that should be removed and one that should remain. And looking at the pictures further on, clearly the wider sections where the adhesive go are completely clean of any black strips. However, on the screen side, I’ve noted that indeed there are two layers, at least on the top. And removing both layers leads to the adhesive *not* really taking hold and the screens falling out. Really wish this had been clearer. I’ve helped dozens of people upgrade their iMac but after the first time that I had to replace a screen due to it falling and breaking, I’ve been using clear strong adhesive tape externally on the corners to ensure that the screen stays in place. Ugly, but better than the risk.
I too started removing the second layer of adhesive strips before reading these comments. PLEASE update the article to reflect that the other black strips should stay!
-
-
-
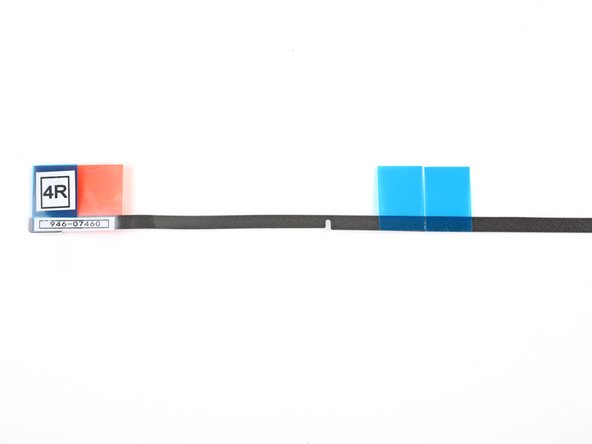
Als je 4R-strip deze uitsnede niet bevat, kun je beter deze handleiding volgen.
-
-
-
Leg al je kleefstrips op hun eigen plek voor je, zodat je overzicht voor jezelf creëert en ervoor zorgt dat je geen kleefstrips op de verkeerde plek plaatst:
-
Strip 01 aan de linker bovenkant
-
Strip 02 aan de rechter bovenkant
-
Strip 03 aan de rechter zijkant
-
Strip 4R aan de rechter onderkant met de donkere kant naar boven toe gericht
-
Strip 4L aan de linker onderkant met de donkere kant naar boven toe gericht
-
Strip 05 aan de linker zijkant
-
-
-
Begin met strip 03, welke aan de rechter zijkant van de achterste behuizing wordt geplaatst.
-
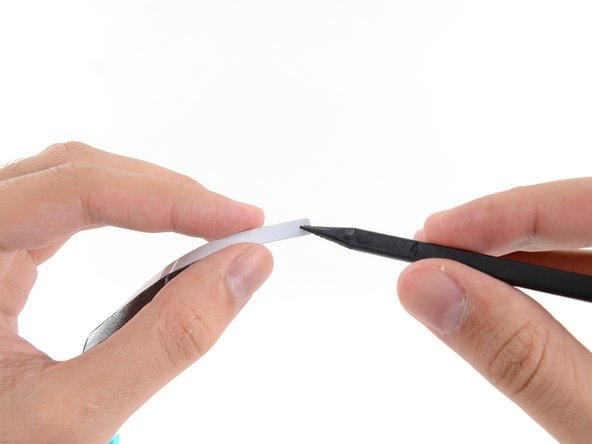
Pak het blauwe lipje vast en trek het korte stukje folie van de achterkant van je kleefstrip af om de kleefkant van de kleefstrip bloot te leggen, zodat je deze in de behuizing kunt plakken.
-
-
-
Steek de punt van een spudger in het gat aan het einde van de strip, waar je zojuist de folie hebt verwijderd. Steek de spudger in het gat vanaf de kant met de witte laag op de kleefstrip.
-
-
-
Met je spudger door het gat in de kleefstrip heen stekend, duw je je spudger in het bijbehorende gat in het frame van de iMac.
-
Breng de kleefstrip, met behulp van het gat en je spudger, aan op de juiste positie aan de rechterkant. Trek je spudger weg van de kleefstrip, zodat deze op spanning komt te staan en druk deze vervolgens stevig vast in het frame.
-
-
-
-
Werk tegen de klok in langs de buitekant van de iMac en breng hierbij drie kleefstrip op eenzelfde wijze aan:
-
Strip 02 aan de rechter bovenkant
-
Strip 01 aan de linker bovenkant
-
Strip 05 aan de linker zijkant.
-
-
-
Pak de rode treklip op strip 4R vast en trek hieraan om ongeveer 5 cm (2 inches) aan witte folie van de strip af te trekken.
These steps instruct you to install the lower strips to the iMac frame first, as that is what Apple instructs their techs to do. If you have an iMac without a microphone hole, you can choose to install the lower strips onto the display first. Peel the blue tab instead of the red to expose the adhesive. Carefully place the adhesive along the bottom edge of the display. The L-bend on the adhesive should match the display contours.
i have no microphone hole - which is good . . . because the 4R and 4L stips must be labelled incorrectly as the L’s are on the wrong side. Also the strips don’t completely cover the bottom. And there are no holes in these strips making placement less secure. Someone certainly goofed. (Reckon I’ll use snipped off L’s to cover the open space.
Ah, the L strips don’t overlap - so they’re long enuf, but they are still reversed.
Die Löcher in den Klebestreifen passen nicht (mehr) zu den Löchern im Rahmen. Ich habe mich an den breiten Stellen orientiert und die Klebestreifen daran ausgerichtet. Das ging besser.
The holes in the adhesive strips no longer match the holes in the frame. I oriented myself towards the wide areas and aligned the adhesive strips with them. That worked better.
-
-
-
Breng de kleefstrip aan op een lijn met de onderkant door de inkeping voor de microfoon over het microfoongat heen te leggen.
-
Als je iMac geen microfoongat bevat, breng je de rechterkant van de kleefstrip zo aan dat de L-vormige hoek precies naar de kleefstrip aan de rechter zijkant komt te zitten. De L-vormige hoek behoort niet te overlappen met de kleefstrip aan de rechter zijkant.
-
Als je de strip eenmaal op z'n plek hebt gebracht, druk je ook de inmiddels blootgelegde linkerkant van de strip op de iMac.
The strips that I received from OWC do not have a notch cut out for the microphone. The instructions advise you, for 2017 and later 21.5” iMacs, to cut about 2 inches off from the left side of the strip so you do not cover the microphone hole.
As far as the remaining 2 inches I cut off, I snipped off a little more on the right side to leave a small gap for the microphone and placed that small remaining part in the center where it should have been if there was no microphone, just to complete the adhesive.
I have done quite a few of these now. It is easier to apply the bottom strips to the Display, rather than the housing. With the Red tabs folded at 90 degrees to the adhesive. You can then remove these tabs with the display kind in place, secured by painters tape on the out side before closing it up.
Don't make the mistake i just did - if you want to cut a notch, cut the BOTTOM 2/3rds section of the strip, not the top! :P
Also, here's a some pics of the mic location in the 2017 retina version from iFIXit: Muffled Microphone - iMac 21.5" (mid 2017) - Following Adhesive Strips.
-
-
-
Breng het scherm voorzichtig op z'n plek en zorg dat deze op de juiste positie komt te zitten.
In my experience, it is easier to lay the Mac flat on its back, especially if you do not have a wedge, because the display will tilt up and down and you do not want that happening. With the Mac on its back, I removed all the front adhesive strips and then angled the display (not a big angle) against the chin making sure it was even on both sides. Then reconnect the video cables and gently bring the display down into the proper position. Step 23 below seems too much of a hassle to try and get the bottom adhesive strips out while the display is resting on them, and taping the bottom of the display in Step 19 also seems to be a hassle.
-
-
-
Gebruik schilderstape om de onderkant van het scherm tijdelijk aan de behuizing van de iMac te bevestigen.
Noooo!! I followed this step and promptly cracked my screen!!!! You need to be extremely careful NOT to wrap the tape around the back of the computer. These images make it look like it's wrapped around, but if you do that, you won't be able to lift the screen at all to attach the display cables. Why?!!!!!
Oh no! I'm so sorry to hear this! Thank you for sharing your experience—I'm going to add a warning into the step.
-
-
-
Steek de stroomkabel van het scherm in het contact op het logic board.
I am powering the unit back up to test all is working. Screen is black but fan is running loud. I’ve decoupled the power and confirmed both the display cables are connected. Note - I replaced both the HDD with a SSD as well as upgraded the RAM from 8GB to 16GB.
-
-
-
Gebruik een pincet of je andere hand om de schermdatakabel aan te sluiten op het contact op het logic board.
-
Bevestig de metalen bevestigingsbeugel op de schermdatakabel door deze naar beneden, in de richting van het logic board, te drukken.
While the previous step refers to “cables,” plural, this step suggests that only the display cable needs to be reinstalled in order to test working order. In my experience (iMac 21-1/2" Retina 4K Display, late 2015), I found that I had to also reconnect the camera/microphone cable in order for the screen to work. [6/7/21]
-
-
-
Zet het scherm terug op de achterste behuizing van de iMac.
-
Steek de stekker van je iMac nu in het stopcontact, schakel je iMac in en test je reparatie voordat je verder gaat met het sluiten van je computer. Zorg dat je alle functies checkt van alle onderdelen die je mogelijk hebt verwijderd of losgekoppeld hebt.
At this point I tested everything to make sure it worked, including the microphone. It was a bit muffled so I poked it with a pin to try and clear it. This was incredibly stupid because (a) the muffling was due to the backing which I was about to remove from the strip (b) poking with a pin broke the microphone.
I’m not going to buy a new microphone (£72 apparently) and a new set of strips, so I’ll get an external USB microphone instead.
But to anyone else, if the microphone sound is muffled, don’t worry!
-
-
-
Nadat je hebt bevestigd dat je iMac prima functioneert, koppel je de schermkabels weer los en laat je het scherm voorzichtig naar voren leunen.
-
Verwijder de folie van de twee onderste kleefstrips door de blauwe folie vanaf boven met een pincet vast te pakken en deze in een rechte beweging van de onderkant van het scherm naar boven te trekken.
-
-
-
Sluit de stroom- en datakabels van het scherm voor de laatste keer aan.
-
-
-
Houd het scherm stevig vast en in balans met een hand terwijl je in de volgende stappen de folie van de kleefstrips af zult halen met je andere hand. Je kunt er ook voor kiezen om het scherm tegen de iMac-behuizing aan te laten leunen.
-
-
-
Om ervoor te zorgen dat de kleefstrips zich goed aan het scherm hechten, leg je de iMac voorzichtig op z'n rug (zodat het scherm naar boven wijst) en druk je alle kanten van het scherm stevig aan.
-
Verwijder de tape waarmee je het scherm tijdelijk aan de achterste behuizing hebt bevestigd.
Yo lo pongo sobre una manta con la pantalla apoyada sobre la manta.Pongo trapos o papel de cocina doblado alrededor de la pantalla y lo sujeto con pinzas de tender ropa.Lo dejo así 24 horas y queda perfecto. Saludos y gracias por el tutorial.
-


Annuleren: ik heb deze handleiding niet afgemaakt.
38 andere personen hebben deze handleiding voltooid.
Met dank aan deze vertalers:
100%

Thomas Keulemans helpt ons de wereld te herstellen! Wil je bijdragen?
Begin met vertalen ›


Één opmerking
Very helpful guide! Did a fine job for me, when changing HDDs on the 21,5" as well as the 27". Thanks for that! Hi from Krautland