Ga door naar hoofdinhoud

iHome iH8BR Buttons Replacement

Wat je nodig hebt

  1. iHome iH8BR Buttons Replacement, Lower Case: stap 1, afbeelding 1 van 3 iHome iH8BR Buttons Replacement, Lower Case: stap 1, afbeelding 2 van 3 iHome iH8BR Buttons Replacement, Lower Case: stap 1, afbeelding 3 van 3
    • Unplug the device from the wall outlet, and turn it over so that the buttons are on a flat surface.

    • Use your fingers to pinch the tab in the direction of the "Open" arrow until tab is loose. Pull the tab vertically to remove it.

    • Remove the battery cover and the batteries.

  2. iHome iH8BR Buttons Replacement: stap 2, afbeelding 1 van 2 iHome iH8BR Buttons Replacement: stap 2, afbeelding 2 van 2
    • Slide a spudger under the two front rubber pads to expose two hidden screws.

  3. iHome iH8BR Buttons Replacement: stap 3, afbeelding 1 van 1
    • Remove the following eight screws:

    • Four 15.1 mm Phillips #2 screws near the front of the device.

    • Four 12.7 mm Phillips #2 screws near the back of the device.

    • The slots for the four 12.7 mm screws are very narrow, so you will need a slender, Phillips #2 screwdriver that does not feature replaceable heads in order to reach them.

  4. iHome iH8BR Buttons Replacement: stap 4, afbeelding 1 van 2 iHome iH8BR Buttons Replacement: stap 4, afbeelding 2 van 2
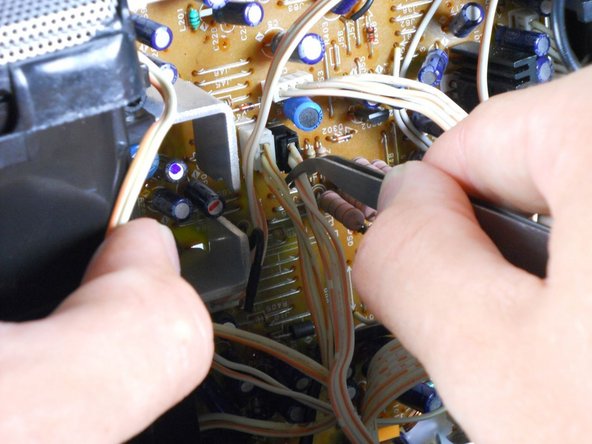
    • Turn the iHome 180 degrees so the speaker grille is facing you. Carefully lift the bottom case away from the rest of the body and tilt it as shown.

    • Be careful and do not yank the bottom case. A white ribbon wire is the only thing that connects the bottom case to the rest of the device.

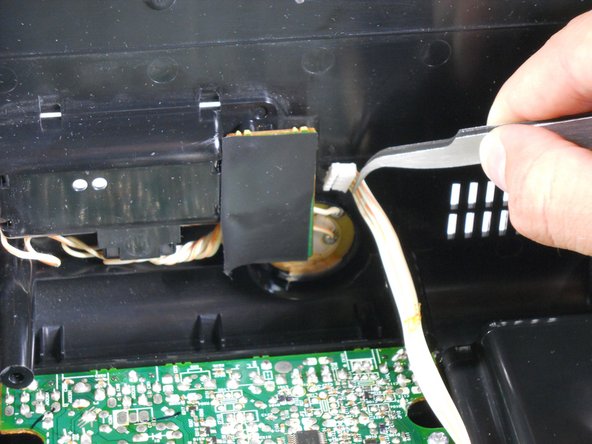
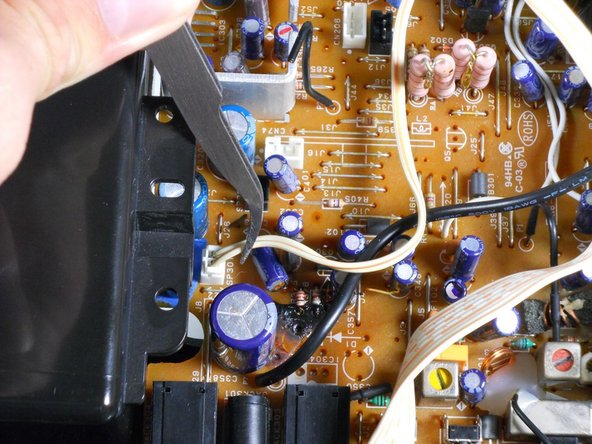
    • Using a pair of tweezers, detach the white ribbon cable. Make sure to pull on the ribbon, not on the head.

    • The lower case can now be completely removed from the device!

  5. iHome iH8BR Buttons Replacement, Motherboard Assembly: stap 5, afbeelding 1 van 2 iHome iH8BR Buttons Replacement, Motherboard Assembly: stap 5, afbeelding 2 van 2
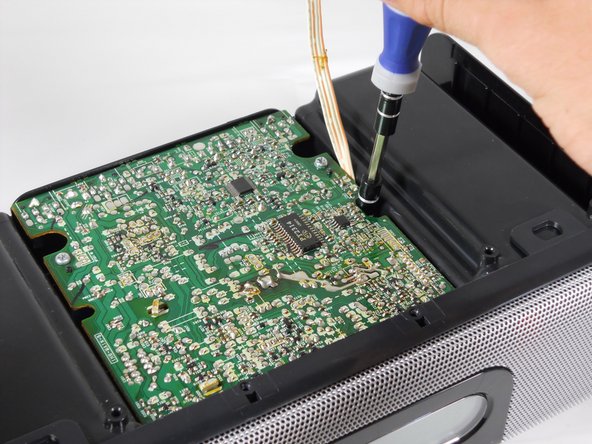
    • Remove the four screws attaching the top of the case to the motherboard:

    • Two 9.5 mm Phillips #2 screws near the speaker grille.

    • Two 14.3 mm Phillips #2 screws that sit in recesses under the motherboard.

    • It is useful to use a screwdriver with a magnetic tip so that the screws don't get lost inside the device.

  6. iHome iH8BR Buttons Replacement: stap 6, afbeelding 1 van 2 iHome iH8BR Buttons Replacement: stap 6, afbeelding 2 van 2
    • Turn the iHome 180 degrees and carefully pull up on speaker cases to pry them loose from the bottom case.

    • Prying the Motherboard Assembly from the Upper Case will require a good amount of force. Be very careful not to break the case, or yank on any of the ribbon wires attached to the underside.

    • Pulling outwards on the sides of the Upper Casing can help loosen the assembly.

    • If it seems too difficult to remove, chances are that a screw is still attached. Make sure you've removed every screw listed before proceeding to this step.

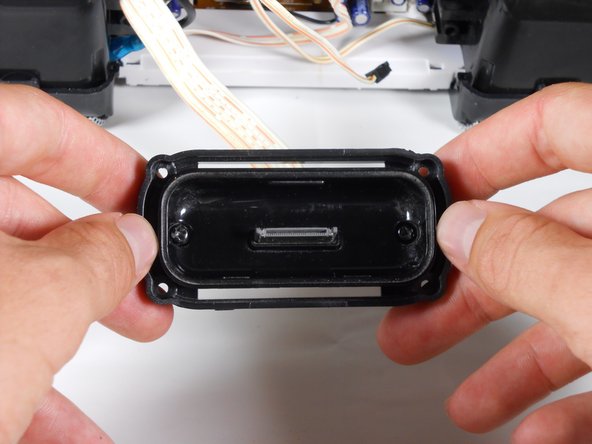
    • Pull the back adapter cover off.

  7. iHome iH8BR Buttons Replacement: stap 7, afbeelding 1 van 2 iHome iH8BR Buttons Replacement: stap 7, afbeelding 2 van 2
    • Remove the four 6.4 mm Phillips #1 screws holding the adapter to the outer case.

    • Only remove the following screws if you are planning on taking apart the iPod Adapter later on:

    • Two 6.4 mm Phillips #1 screws near the center of the adapter. These screws have built in washers.

    • One 4.0 mm Phillips #1 screw near the center of the adapter.

    • The iPod adapter should now be separate from the upper casing.

  8. iHome iH8BR Buttons Replacement: stap 8, afbeelding 1 van 3 iHome iH8BR Buttons Replacement: stap 8, afbeelding 2 van 3 iHome iH8BR Buttons Replacement: stap 8, afbeelding 3 van 3
    • With the back of the iHome is facing you, tilt the Motherboard Assembly upwards as shown.

    • Do not yank or jerk these ribbon cables. Make sure not to pull on the heads, but on the ribbons themselves.

    • Use tweezers to remove the 6 ribbon cables.

  9. iHome iH8BR Buttons Replacement: stap 9, afbeelding 1 van 1
    • Pull the speakers, motherboard, and iPod adapter up and away from the lower casing.

    • You have now separated your iHome's inner workings from its protective case!

  10. iHome iH8BR Buttons Replacement, Buttons: stap 10, afbeelding 1 van 3 iHome iH8BR Buttons Replacement, Buttons: stap 10, afbeelding 2 van 3 iHome iH8BR Buttons Replacement, Buttons: stap 10, afbeelding 3 van 3
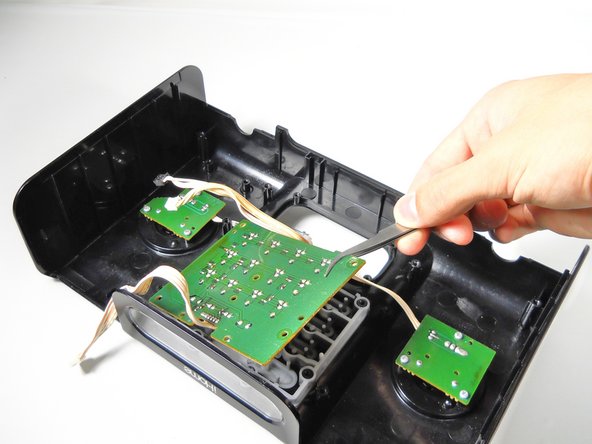
    • Remove the eight 7.9 mm Phillips #1 screws from the center board.

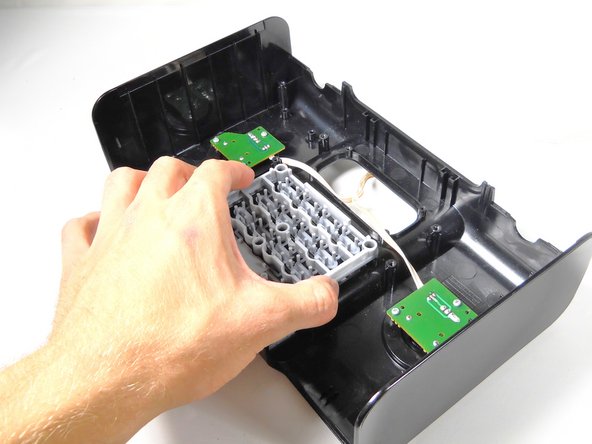
    • Use tweezers to carefully remove the largest circuit board.

    • You should be able to easily lift the buttons away.

Conclusie

To reassemble your device, follow these instructions in reverse order.

Één andere persoon heeft deze handleiding voltooid.

cfredric

Lid sinds: 04/17/13

19 Reputatie

6 handleidingen geschreven

Team

Cal Poly, Team 12-33, Amido Spring 2013 Lid van Cal Poly, Team 12-33, Amido Spring 2013

CPSU-AMIDO-S13S12G33

4 Leden

7 handleidingen geschreven

Één opmerking

Suggestion here is that no parts required but if buttons broken where do I get replacements from? iHome site doesn't recognise iH8

Am in UK

thank you h

Heidi Yeo - Antwoord

Voeg opmerking toe

Weergavestatistieken:

Afgelopen 24 uren: 0

Afgelopen 7 dagen: 4

Afgelopen 30 dagen: 15

Altijd: 2,202