Deze versie kan foutieve bewerkingen bevatten. Schakel over naar de recentste gecontroleerde momentopname.
Wat je nodig hebt
-
Deze stap is niet vertaald. Help het te vertalen
-
Remove any iPod or apple music device connected to the iHome and unplug from any power source.
-
Flip the iHome so the speakers are laying on a flat surface, and you have the concealed battery areas facing you.
-
-
Deze stap is niet vertaald. Help het te vertalen
-
Using your fingers, press down firmly on the plastic slide and push in the direction of the arrows shown above the word "Open" on the plastic.
-
Remove the plastic slide from its location and set it aside.
-
Remove all 4 AA batteries by placing your fingernail at one end of the battery and applying force upwards until the battery is freed from its holder.
-
Insert your fingernail or a prying tool under the notch of the plastic slide that is protecting the watch battery.
-
Set the plastic covering and the watch battery aside.
-
-
Deze stap is niet vertaald. Help het te vertalen
-
Remove the following screws:
-
Eight 10 mm using the Phillips #0 on the bottom of your device.
-
-
Deze stap is niet vertaald. Help het te vertalen
-
Use your fingers or a plastic opening tool to carefully pry apart the plastic connections still connecting the base to the top.
-
-
-
Deze stap is niet vertaald. Help het te vertalen
-
Slowly lift the plastic base towards you and lay it on the flat surface. The base should still be connected to the rest of the iHome by a few wires.
-
You should have visible access to most of the components inside the iHome now.
-
-
Deze stap is niet vertaald. Help het te vertalen
-
Pull out the AV circuit board and lift it up and out of the way to allow access to other components.
-
-
Deze stap is niet vertaald. Help het te vertalen
-
Remove the following screws:
-
Two 10 mm Phillips #0
-
Pull the speakers away and set them aside for now. They should still be connected to the rest of the iHome by two wires.
-
-
Deze stap is niet vertaald. Help het te vertalen
-
Remove the following 6 screws:
-
Two 7 mm Phillips #0
-
Three 10 mm Phillips #2
-
One 9 mm Phillips #2
-
-
Deze stap is niet vertaald. Help het te vertalen
-
Carefully lift the iHome about an inch from your surface to verify you are going to the correct spot, because the iHome looks symmetrical at this point.
-
Carefully lift the main motherboard out of the way of the button control circuit board.
-
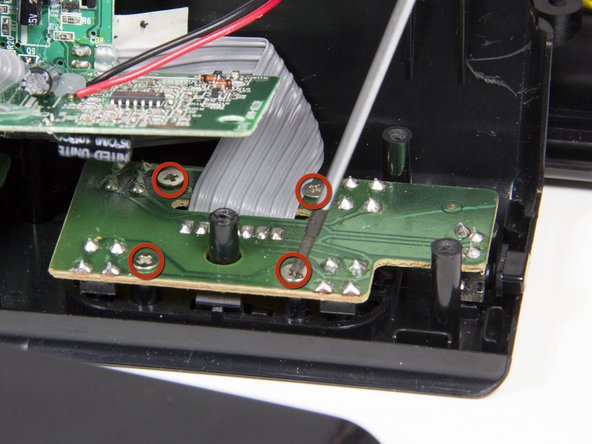
Remove the following screws:
-
Four 6 mm Phillips #2
-
-
Deze stap is niet vertaald. Help het te vertalen
-
Carefully lift the button control motherboard out of the way.
-
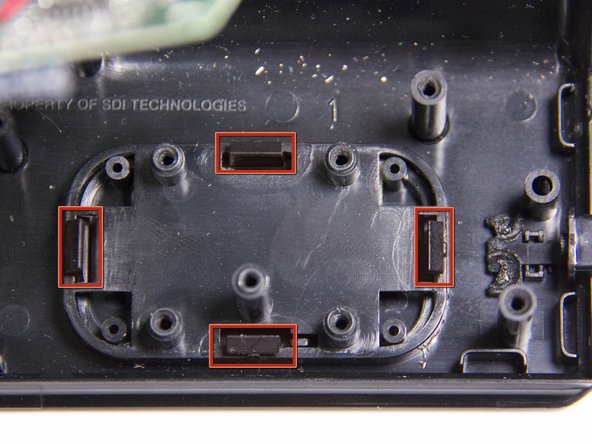
Place your fingers on each of the four notches. Apply pressure towards the center, and push downwards until the plastic piece is dislodged from its casing.
-
If your fingers aren't working, use a flathead screwdriver or plastic prying tool to give you extra leverage.
-
-
Deze stap is niet vertaald. Help het te vertalen
-
Replace your cracked or otherwise broken button with the new button.
-


Team

Cal Poly, Team 3-21, Amido Fall 2012 Lid van Cal Poly, Team 3-21, Amido Fall 2012
CPSU-AMIDO-F12S3G21
4 Leden
9 handleidingen geschreven