Ga door naar hoofdinhoud

eufy Security SpaceView Monitor Charging Port Replacement

Wat je nodig hebt

  1. eufy Security SpaceView Monitor Charging Port Replacement, Display Assembly: stap 1, afbeelding 1 van 2 eufy Security SpaceView Monitor Charging Port Replacement, Display Assembly: stap 1, afbeelding 2 van 2
    • Using either the Jimmy or the IFixit Opening tool, press into the opening notches built into the lower portion of the display.

    • The sides of the display each have two notches, while the top has 3 notches, and the bottom has 4 respectively.

    • Using the given tools, ensure that the tool enters the space of the opening notches, and apply force downwards, prying that specific part up and away from the housing.

    • Repeat for all sides and notches, until the display is completely detached from the rest of the monitor.

  2. eufy Security SpaceView Monitor Charging Port Replacement: stap 2, afbeelding 1 van 1
    • Lift the display up and away from the housing.

    • Take care to not twist or pull on the ribbon connector.

  3. eufy Security SpaceView Monitor Charging Port Replacement, Screen: stap 3, afbeelding 1 van 1
    • Lay the display face down on a table, to expose the back of the screen.

    • Use Phillips #00 screwdriver to unscrew each of the six screws that hold the display in place.

    • There are two on each end of the display, and one on each of its longer sides.

  4. eufy Security SpaceView Monitor Charging Port Replacement: stap 4, afbeelding 1 van 2 eufy Security SpaceView Monitor Charging Port Replacement: stap 4, afbeelding 2 van 2
    • Gently lift the display housing, and set it aside.

    • The housing is ready to have the new display installed.

  5. eufy Security SpaceView Monitor Charging Port Replacement: stap 5, afbeelding 1 van 1
    • Gently disconnect the ribbon connector from the motherboard, taking care not to damage it.

  6. eufy Security SpaceView Monitor Charging Port Replacement, Motherboard: stap 6, afbeelding 1 van 2 eufy Security SpaceView Monitor Charging Port Replacement, Motherboard: stap 6, afbeelding 2 van 2
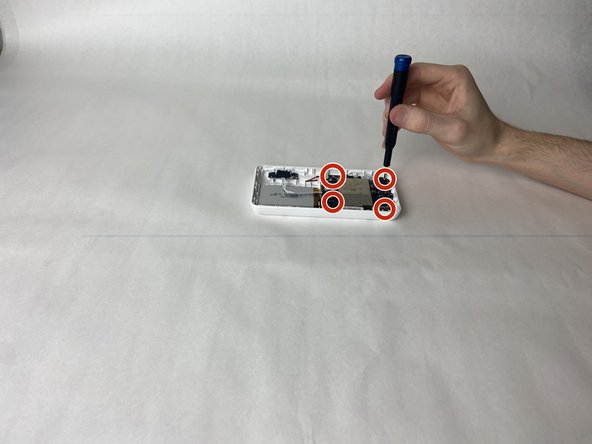
    • Using a Phillips #00 screwdriver, unscrew the 4 retaining screws in each corner of the motherboard.

  7. eufy Security SpaceView Monitor Charging Port Replacement: stap 7, afbeelding 1 van 3 eufy Security SpaceView Monitor Charging Port Replacement: stap 7, afbeelding 2 van 3 eufy Security SpaceView Monitor Charging Port Replacement: stap 7, afbeelding 3 van 3
    • Starting with either red/black wired connector on, gently pull it from its receptor and set it aside.

    • Pull the white ribbon connector from the motherboard, on the side closest to the battery.

    • Lift the motherboard and disconnect the antenna connector from its port.

    • The motherboard is free from the housing and can be replaced.

  8. eufy Security SpaceView Monitor Charging Port Replacement, Charging Port: stap 8, afbeelding 1 van 1
    • Desolder the charging port from the motherboard.

Conclusie

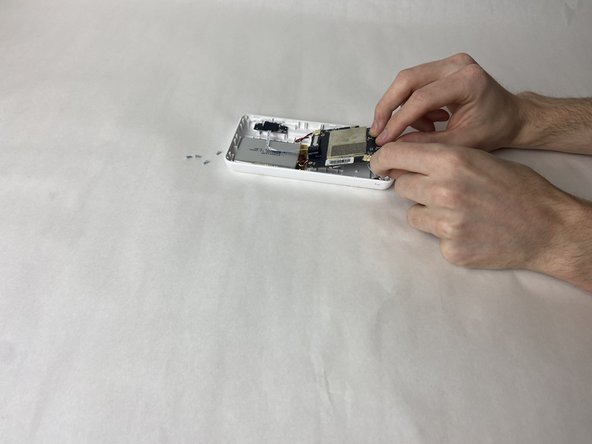
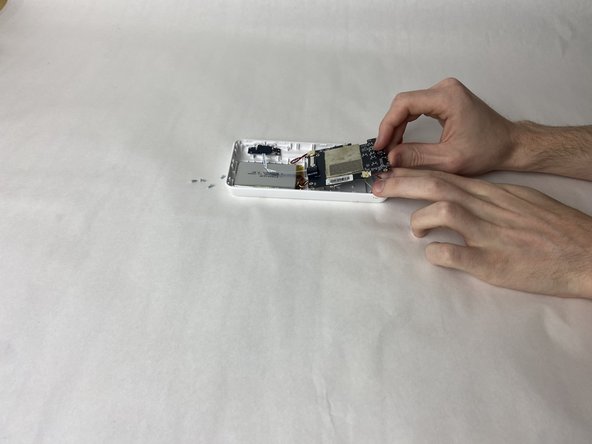
To reassemble your device, follow these instructions in reverse order.

Één andere persoon heeft deze handleiding voltooid.

Marcelo Monteiro

Lid sinds: 11/01/23

73 Reputatie

1 Handleiding geschreven

Team

UMass Dartmouth, Team 2-5, Gulbrandsen Fall 2023 Lid van UMass Dartmouth, Team 2-5, Gulbrandsen Fall 2023

UMASSD-GULBRANDSEN-F23S2G5

3 Leden

6 handleidingen geschreven

0 opmerkingen

Voeg opmerking toe

Weergavestatistieken:

Afgelopen 24 uren: 1

Afgelopen 7 dagen: 3

Afgelopen 30 dagen: 26

Altijd: 179