Waarschuwing: Je bewerkt een vooraf vereiste handleiding. Alle wijzigingen die je hierin maakt, beïnvloeden alle 2 handleidingen die deze stap bevatten.
Stap 2 vertalen
Stap 2


-
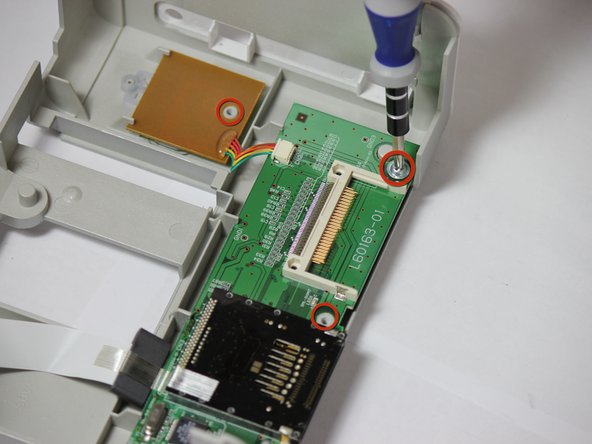
Locate the four 7.85 mm screws attaching the control panel motherboard to the top face casing.
-
Use a Phillips Head #1 screw driver to remove the four highlighted screws.
-
NOTE: Make sure removal of front face plate is completed.
Je bijdragen zijn gelicentieerd onder de open source Creative Commons-licentie.