Ga door naar hoofdinhoud

Zotac GTX 1080 Ti Mini Fans Replacement

Wat je nodig hebt

  1. Zotac GTX 1080 Ti Mini Fans Replacement, Zotac GTX 1080 Ti Mini Fans: stap 1, afbeelding 1 van 2 Zotac GTX 1080 Ti Mini Fans Replacement, Zotac GTX 1080 Ti Mini Fans: stap 1, afbeelding 2 van 2
    • Be sure to properly ground yourself with an anti-static wristband before working on the graphics card.

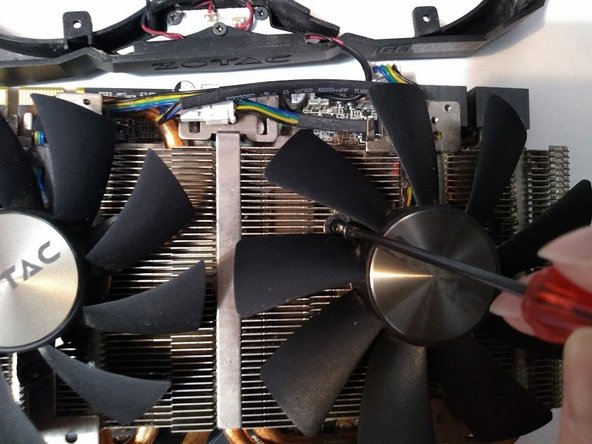
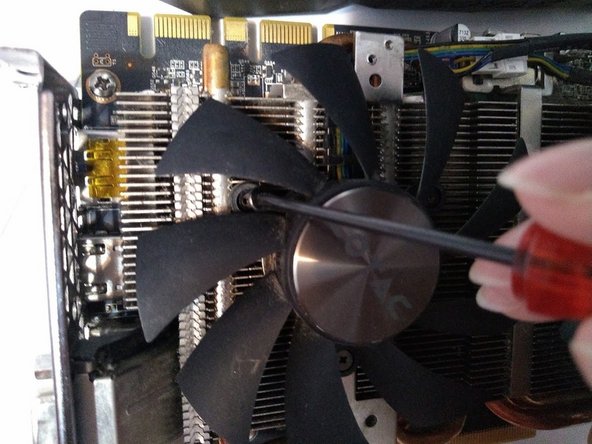
    • Use a Phillips #0 screwdriver to remove the two 4mm screws from the right side of the shroud.

  2. Zotac GTX 1080 Ti Mini Fans Replacement: stap 2, afbeelding 1 van 2 Zotac GTX 1080 Ti Mini Fans Replacement: stap 2, afbeelding 2 van 2
    • Use a Phillips #0 screwdriver to remove the two 4mm screws from the left side of the shroud.

  3. Zotac GTX 1080 Ti Mini Fans Replacement: stap 3, afbeelding 1 van 2 Zotac GTX 1080 Ti Mini Fans Replacement: stap 3, afbeelding 2 van 2
    • Look for the fan header located beside the 16-pin power connector.

    • Gently pry the fan connector apart from the header with a flathead screwdriver.

  4. Zotac GTX 1080 Ti Mini Fans Replacement: stap 4, afbeelding 1 van 2 Zotac GTX 1080 Ti Mini Fans Replacement: stap 4, afbeelding 2 van 2
    • Slowly and carefully lift the shroud off the heatsink.

    • During this step, make sure not to damage the LED connector that is still connecting the shroud to the PCB.

    • Flip the shroud along the top of the graphics card.

  5. Zotac GTX 1080 Ti Mini Fans Replacement: stap 5, afbeelding 1 van 3 Zotac GTX 1080 Ti Mini Fans Replacement: stap 5, afbeelding 2 van 3 Zotac GTX 1080 Ti Mini Fans Replacement: stap 5, afbeelding 3 van 3
    • Remove the three 3 mm Phillips screws holding the fans to the heatsink with a Phillips #0 screwdriver.

    • Remove the broken fans.

  6. Zotac GTX 1080 Ti Mini Fans Replacement: stap 6, afbeelding 1 van 3 Zotac GTX 1080 Ti Mini Fans Replacement: stap 6, afbeelding 2 van 3 Zotac GTX 1080 Ti Mini Fans Replacement: stap 6, afbeelding 3 van 3
    • Place the replacement fan on top of the heatsink with the screw holes aligned.

    • Screw the fans into place using a Phillips #0 screwdriver.

  7. Zotac GTX 1080 Ti Mini Fans Replacement: stap 7, afbeelding 1 van 1
    • Reconnect the fan connector to its header.

  8. Zotac GTX 1080 Ti Mini Fans Replacement: stap 8, afbeelding 1 van 3 Zotac GTX 1080 Ti Mini Fans Replacement: stap 8, afbeelding 2 van 3 Zotac GTX 1080 Ti Mini Fans Replacement: stap 8, afbeelding 3 van 3
    • Place the shroud back over the heatsink and screw it back into place using a Phillips #0 screwdriver.

Conclusie

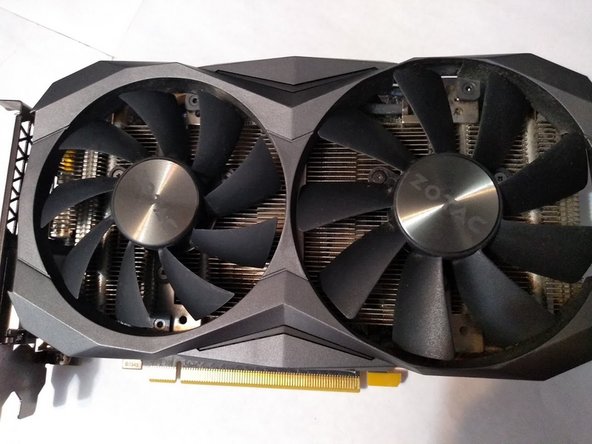
Hopefully, your graphics card is fully replaced and completely working now.

Één andere persoon heeft deze handleiding voltooid.

Victor Pan

Lid sinds: 01/27/21

175 Reputatie

1 Handleiding geschreven

Team

Één opmerking

Do you know what size (diameter and thread) the 4mm and 3mm screws are?

cchagadorn - Antwoord

Voeg opmerking toe

Weergavestatistieken:

Afgelopen 24 uren: 0

Afgelopen 7 dagen: 14

Afgelopen 30 dagen: 63

Altijd: 4,659