Deze versie kan foutieve bewerkingen bevatten. Schakel over naar de recentste gecontroleerde momentopname.
Wat je nodig hebt
-
Deze stap is niet vertaald. Help het te vertalen
-
Remove the two screws on the bottom using a Phillips #00 screwdriver.
-
-
Deze stap is niet vertaald. Help het te vertalen
-
Using a spudger, start prying the case apart by working around the edge slowly.
-
-
Deze stap is niet vertaald. Help het te vertalen
-
Peel back the touch interface chip (which is on the top right of the motherboard, covered in yellow tape.)
-
-
Deze stap is niet vertaald. Help het te vertalen
-
Flip up the small gate and unplug the ribbon cable shown.
-
-
-
Deze stap is niet vertaald. Help het te vertalen
-
Using a Phillips #00 screwdriver, remove the screws highlighted with the orange rings as shown in the picture.
-
-
Deze stap is niet vertaald. Help het te vertalen
-
Slide back the plastic latch for the main display cable.
-
Carefully unplug the cable with tweezers.
-
-
Deze stap is niet vertaald. Help het te vertalen
-
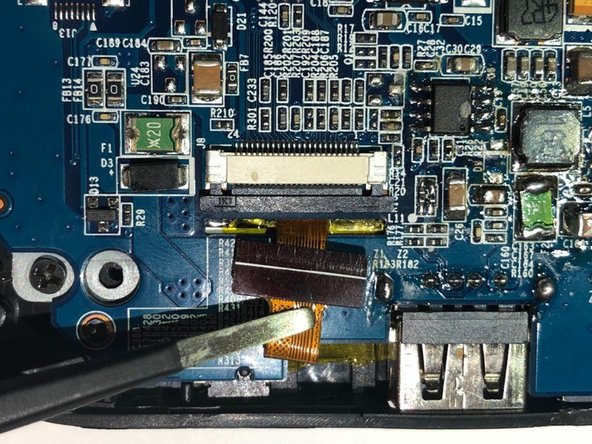
Slide back the plastic latch for the camera cable.
-
Carefully unplug the cable with tweezers.
-
-
Deze stap is niet vertaald. Help het te vertalen
-
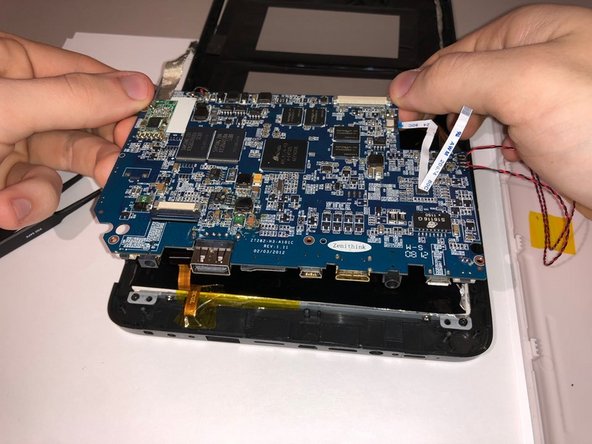
Lift up the motherboard assembly, starting by lifting up the top.
-
-
Deze stap is niet vertaald. Help het te vertalen
-
Peel back the adhesive tape holding the camera in place.
-
Remove the camera from the device.
-


Annuleren: ik heb deze handleiding niet afgemaakt.
Één andere persoon heeft deze handleiding voltooid.
Team

University of North Texas, Team S6-G1, Thompson Fall 2018 Lid van University of North Texas, Team S6-G1, Thompson Fall 2018
UNT-THOMPSON-F18S6G1
3 Leden
5 handleidingen geschreven