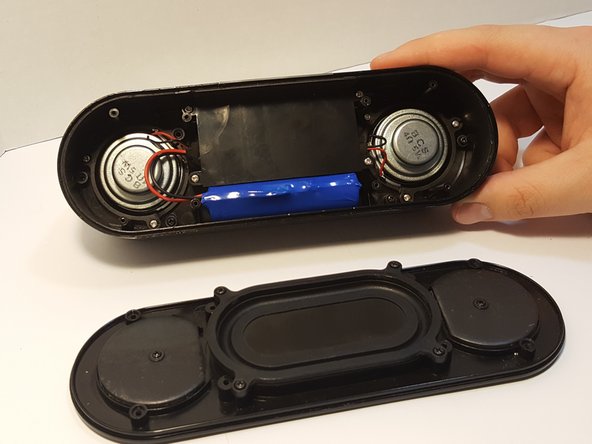
Ga door naar hoofdinhoud

Zenbre SoundBank Z3 Speaker Grill Replacement

Wat je nodig hebt

  1. Zenbre SoundBank Z3 Speaker Grill Replacement, Bottom Cover: stap 1, afbeelding 1 van 2 Zenbre SoundBank Z3 Speaker Grill Replacement, Bottom Cover: stap 1, afbeelding 2 van 2
    • Power off the SoundBank Z3.

    • Turn over the device.

    • Peel the silicone feet up to remove.

    • No extra adhesive is needed to reapply the feet as long as the sticky side is not touched.

  2. Zenbre SoundBank Z3 Speaker Grill Replacement: stap 2, afbeelding 1 van 1
    • Remove all eight of the 11 mm Phillips screws from the bottom of the device.

  3. Zenbre SoundBank Z3 Speaker Grill Replacement: stap 3, afbeelding 1 van 2 Zenbre SoundBank Z3 Speaker Grill Replacement: stap 3, afbeelding 2 van 2
    • Remove the bottom panel speaker using an iFixit opening tool.

  4. Zenbre SoundBank Z3 Speaker Grill Replacement, Motherboard Cover: stap 4, afbeelding 1 van 3 Zenbre SoundBank Z3 Speaker Grill Replacement, Motherboard Cover: stap 4, afbeelding 2 van 3 Zenbre SoundBank Z3 Speaker Grill Replacement, Motherboard Cover: stap 4, afbeelding 3 van 3
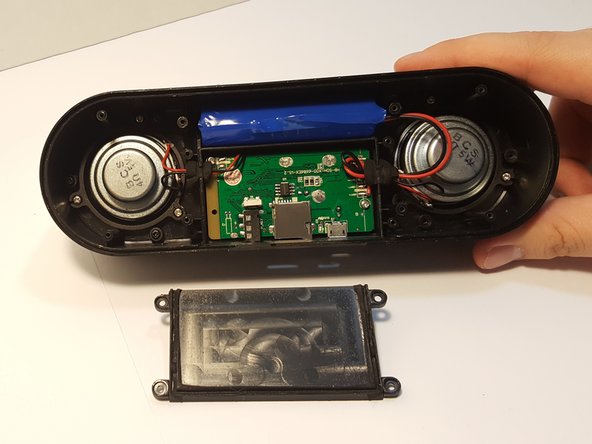
    • Remove the four 4.5 mm silver Phillips screws that secure the plastic panel covering the motherboard.

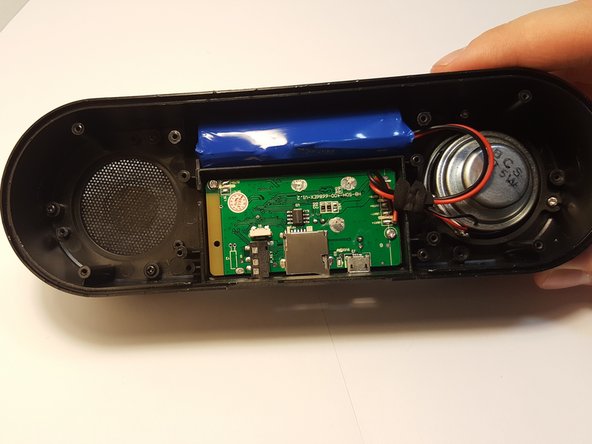
    • Remove the plastic panel.

  5. Zenbre SoundBank Z3 Speaker Grill Replacement, Speaker Grill: stap 5, afbeelding 1 van 3 Zenbre SoundBank Z3 Speaker Grill Replacement, Speaker Grill: stap 5, afbeelding 2 van 3 Zenbre SoundBank Z3 Speaker Grill Replacement, Speaker Grill: stap 5, afbeelding 3 van 3
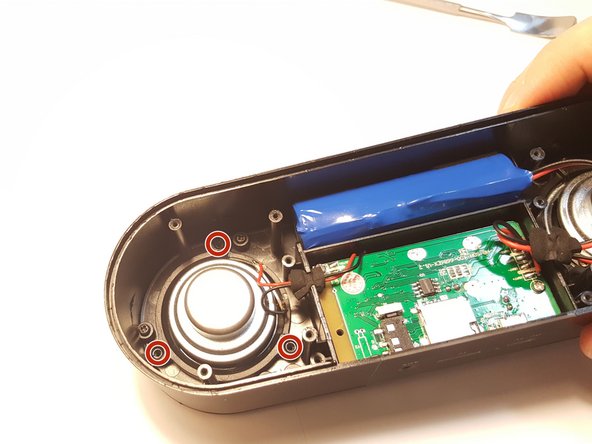
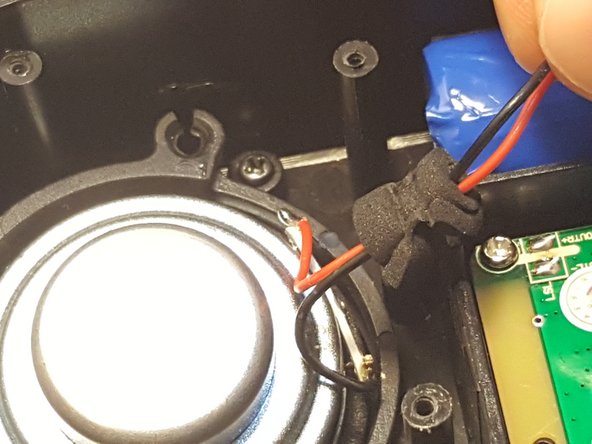
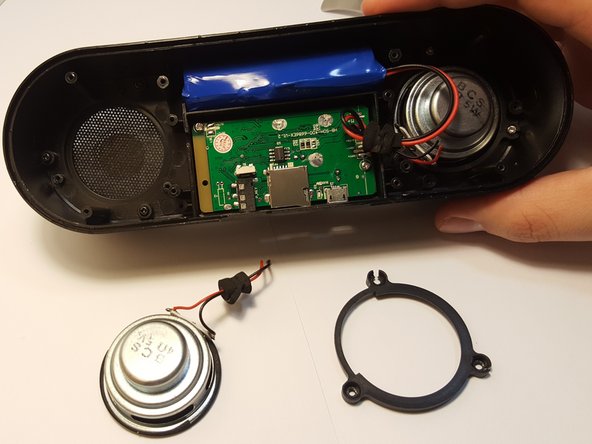
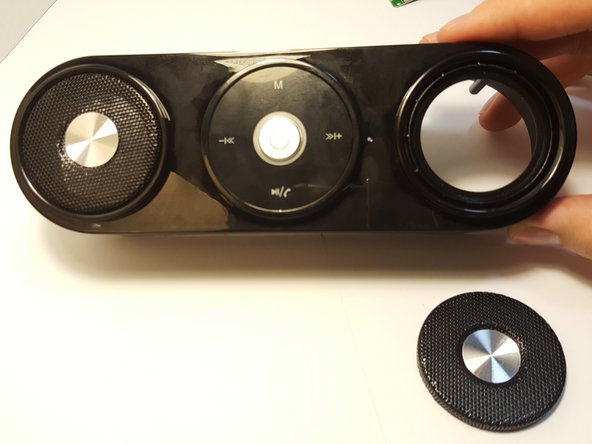
    • Remove the three silver Phillips screws from the plastic ring that holds the speaker in place.

    • Be careful not to rip out the speaker while taking out the screws

    • The same steps can be done on the other side of the speaker

  6. Zenbre SoundBank Z3 Speaker Grill Replacement: stap 6, afbeelding 1 van 3 Zenbre SoundBank Z3 Speaker Grill Replacement: stap 6, afbeelding 2 van 3 Zenbre SoundBank Z3 Speaker Grill Replacement: stap 6, afbeelding 3 van 3
    • First, remove the speaker from the motherboard, then remove the ring that held the speaker in place.

    • These are the joints that need to be soldered. Follow this guide link to help you remove the wires from the motherboard.

    • How To Solder and Desolder Connections

  7. Zenbre SoundBank Z3 Speaker Grill Replacement: stap 7, afbeelding 1 van 2 Zenbre SoundBank Z3 Speaker Grill Replacement: stap 7, afbeelding 2 van 2
    • With the plastic ring removed, the speaker should slide out easily.

    • Be careful not remove other components in the speaker

    • This will expose the speaker grill

  8. Zenbre SoundBank Z3 Speaker Grill Replacement: stap 8, afbeelding 1 van 3 Zenbre SoundBank Z3 Speaker Grill Replacement: stap 8, afbeelding 2 van 3 Zenbre SoundBank Z3 Speaker Grill Replacement: stap 8, afbeelding 3 van 3
    • Now that the speaker has been removed, the plastic grill should be visible.

    • With a little bit of force they can be pushed out.

Conclusie

To reassemble your device, follow these instructions in reverse order.

2 andere personen hebben deze handleiding voltooid.

Luc Josue Pierre Louis

Lid sinds: 03/09/16

183 Reputatie

1 Handleiding geschreven

Team

UMass Dartmouth, Team 3-2, Bhusal Spring 2016 Lid van UMass Dartmouth, Team 3-2, Bhusal Spring 2016

UMASSD-BHUSAL-S16S3G2

5 Leden

8 handleidingen geschreven

0 opmerkingen

Voeg opmerking toe

Weergavestatistieken:

Afgelopen 24 uren: 0

Afgelopen 7 dagen: 1

Afgelopen 30 dagen: 1

Altijd: 514