Ga door naar hoofdinhoud

Zenbre SoundBank Z3 Battery Replacement

Wat je nodig hebt

  1. Zenbre SoundBank Z3 Battery Replacement, Bottom Cover: stap 1, afbeelding 1 van 2 Zenbre SoundBank Z3 Battery Replacement, Bottom Cover: stap 1, afbeelding 2 van 2
    • Power off the SoundBank Z3.

    • Turn over the device.

    • Peel the silicone feet up to remove.

    • No extra adhesive is needed to reapply the feet as long as the sticky side is not touched.

  2. Zenbre SoundBank Z3 Battery Replacement: stap 2, afbeelding 1 van 1
    • Remove all eight of the 11 mm Phillips screws from the bottom of the device.

  3. Zenbre SoundBank Z3 Battery Replacement: stap 3, afbeelding 1 van 2 Zenbre SoundBank Z3 Battery Replacement: stap 3, afbeelding 2 van 2
    • Remove the bottom panel speaker using an iFixit opening tool.

  4. Zenbre SoundBank Z3 Battery Replacement, Motherboard Cover: stap 4, afbeelding 1 van 3 Zenbre SoundBank Z3 Battery Replacement, Motherboard Cover: stap 4, afbeelding 2 van 3 Zenbre SoundBank Z3 Battery Replacement, Motherboard Cover: stap 4, afbeelding 3 van 3
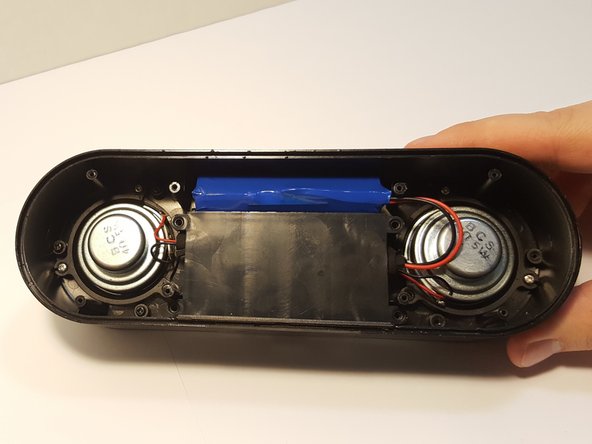
    • Remove the four 4.5 mm silver Phillips screws that secure the plastic panel covering the motherboard.

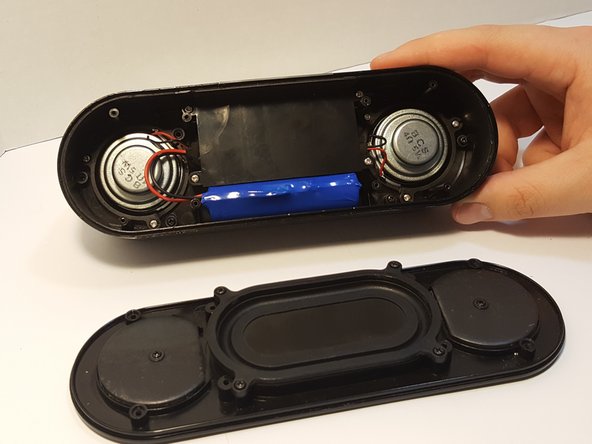
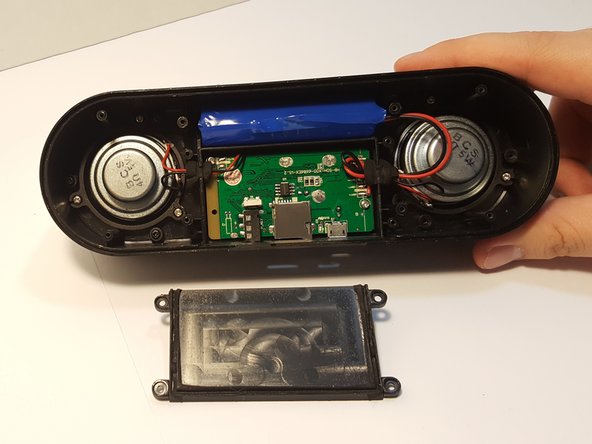
    • Remove the plastic panel.

  5. Zenbre SoundBank Z3 Battery Replacement, Battery: stap 5, afbeelding 1 van 2 Zenbre SoundBank Z3 Battery Replacement, Battery: stap 5, afbeelding 2 van 2
    • Remove the battery from the holder. It may be difficult the first time.

    • Use a spudger between the battery and speaker wall to loosen it from its surroundings.

    • If the battery is punctured, leaking, or bloated/puffy, it may be hazardous and should be properly disposed of.

  6. Zenbre SoundBank Z3 Battery Replacement: stap 6, afbeelding 1 van 2 Zenbre SoundBank Z3 Battery Replacement: stap 6, afbeelding 2 van 2
    • Remove the pressure-fitted foam from the slot by hand.

    • Unravel and remove foam from the wires.

    • When reassembling, the foam can be re-wrapped if care is taken when handling it.

  7. Zenbre SoundBank Z3 Battery Replacement: stap 7, afbeelding 1 van 1
    • Using a soldering iron, remove the leads, separating the battery from motherboard.

    • Follow this guide to help you remove the wires from the motherboard if you are unfamiliar with soldering.

Conclusie

To reassemble your device, follow these instructions in reverse order.

3 andere personen hebben deze handleiding voltooid.

Cherian Thomas

Lid sinds: 03/25/16

334 Reputatie

5 handleidingen geschreven

Team

UMass Dartmouth, Team 3-2, Bhusal Spring 2016 Lid van UMass Dartmouth, Team 3-2, Bhusal Spring 2016

UMASSD-BHUSAL-S16S3G2

5 Leden

8 handleidingen geschreven

3 opmerkingen

Thank you for providing battery replacement instructions for the ZENGRE BlueTooth speaker system. They are very helpful.

Michael Coleman - Antwoord

Bendiciones. con que batería la reemplazaste? podrías enviarme un link para comprarlo, desde ya muchas gracias

Alier Obed Jaenz Rivas -

MUCHAS GRACIAS!!!!

Sin embargo hubiese sido exelente pudiese mostrarse los tipos de batería con los cuales se puede reemplazar.

Alier Obed Jaenz Rivas - Antwoord

Voeg opmerking toe

Weergavestatistieken:

Afgelopen 24 uren: 0

Afgelopen 7 dagen: 0

Afgelopen 30 dagen: 2

Altijd: 4,565