Ga door naar hoofdinhoud

ZTE Grand X Max Plus Camera Replacement

Wat je nodig hebt

  1. ZTE Grand X Max Plus Camera Replacement, Back Cover: stap 1, afbeelding 1 van 1
    • Make sure you turn off your phone before starting.

    • Heat the phone using a heating pad, heat gun, or hair dryer to loosen the glue. You just need to heat the back of the phone.

    • You can also use a hair dryer or a heating gun for this step.

  2. ZTE Grand X Max Plus Camera Replacement: stap 2, afbeelding 1 van 2 ZTE Grand X Max Plus Camera Replacement: stap 2, afbeelding 2 van 2
    • After the phone is heated, use the blue plastic opening tool on both sides of the phone.

    • Don't apply too much pressure because the cover can crack easily.

    • To avoid that your cover cracks, you can add tape to back cover.

    • You can use a suction cup to help remove the battery.

  3. ZTE Grand X Max Plus Camera Replacement: stap 3, afbeelding 1 van 2 ZTE Grand X Max Plus Camera Replacement: stap 3, afbeelding 2 van 2
    • Carefully remove the cover from the phone.

  4. ZTE Grand X Max Plus Camera Replacement, Rear Camera: stap 4, afbeelding 1 van 2 ZTE Grand X Max Plus Camera Replacement, Rear Camera: stap 4, afbeelding 2 van 2
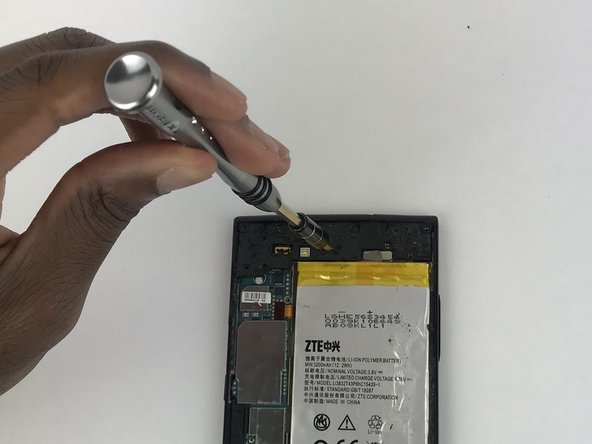
    • Remove the screws from the upper part of the phone using a screwdriver with a JIS #000 head. There are (6) six screws that should be removed.

  5. ZTE Grand X Max Plus Camera Replacement: stap 5, afbeelding 1 van 3 ZTE Grand X Max Plus Camera Replacement: stap 5, afbeelding 2 van 3 ZTE Grand X Max Plus Camera Replacement: stap 5, afbeelding 3 van 3
    • Use a plastic opening tool to remove the plastic piece that is protecting the motherboard.

  6. ZTE Grand X Max Plus Camera Replacement: stap 6, afbeelding 1 van 1
    • With a plastic opening tool, unclip the camera from the motherboard.

  7. ZTE Grand X Max Plus Camera Replacement: stap 7, afbeelding 1 van 3 ZTE Grand X Max Plus Camera Replacement: stap 7, afbeelding 2 van 3 ZTE Grand X Max Plus Camera Replacement: stap 7, afbeelding 3 van 3
    • After the camera is unclipped, remove it from the device.

Conclusie

To reassemble your device, follow these instructions in reverse order.

Jordano Baer

Lid sinds: 10/02/17

689 Reputatie

5 handleidingen geschreven

Team

USF Tampa, Team S9-G4, Remmell Fall 2017 Lid van USF Tampa, Team S9-G4, Remmell Fall 2017

USFT-REMMELL-F17S9G4

4 Leden

10 handleidingen geschreven

0 opmerkingen

Voeg opmerking toe

Weergavestatistieken:

Afgelopen 24 uren: 0

Afgelopen 7 dagen: 0

Afgelopen 30 dagen: 0

Altijd: 159