Ga door naar hoofdinhoud

ZTE Awe Motherboard Replacement

Wat je nodig hebt

  1. ZTE Awe Motherboard Replacement, Remove the back cover: stap 1, afbeelding 1 van 1
    • Remove the back cover of the phone to expose the phone's mid-frame.

  2. ZTE Awe Motherboard Replacement, Remove battery: stap 2, afbeelding 1 van 1
    • Pry the battery up and out of the phone.

  3. ZTE Awe Motherboard Replacement, Detach the mid frame: stap 3, afbeelding 1 van 1
    • Use the Phillips Head 00 screw driver to unscrew the seven 0.1mm screws from the phone's mid frame.

  4. ZTE Awe Motherboard Replacement, Separate the mid frame and the digitizer: stap 4, afbeelding 1 van 3 ZTE Awe Motherboard Replacement, Separate the mid frame and the digitizer: stap 4, afbeelding 2 van 3 ZTE Awe Motherboard Replacement, Separate the mid frame and the digitizer: stap 4, afbeelding 3 van 3
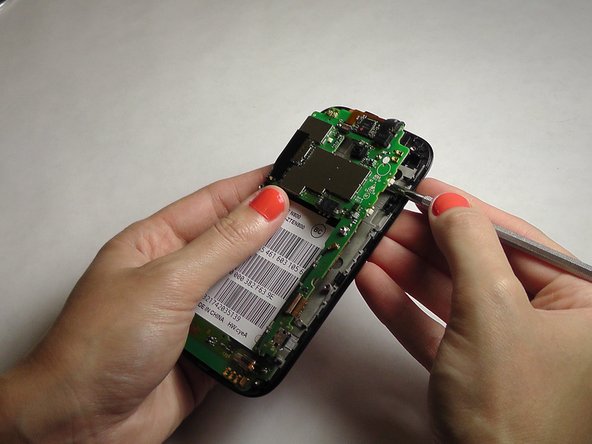
    • Wedge the flat end of the spudger between the mid frame and the digitizer.

  5. ZTE Awe Motherboard Replacement, Expose the motherboard: stap 5, afbeelding 1 van 2 ZTE Awe Motherboard Replacement, Expose the motherboard: stap 5, afbeelding 2 van 2
    • Gently pry the mid frame away from the rest of the phone to expose the motherboard.

  6. ZTE Awe Motherboard Replacement, Remove the ribbon wires: stap 6, afbeelding 1 van 3 ZTE Awe Motherboard Replacement, Remove the ribbon wires: stap 6, afbeelding 2 van 3 ZTE Awe Motherboard Replacement, Remove the ribbon wires: stap 6, afbeelding 3 van 3
    Gereedschap gebruikt in deze stap:
    Tweezers
    $4.99
    Koop
    • Use the tweezers to remove the four ribbon wires on the sides of the device.

  7. ZTE Awe Motherboard Replacement, Orient the motherboard: stap 7, afbeelding 1 van 1
    • Orient the motherboard to expose the mid frame.

  8. ZTE Awe Motherboard Replacement, Remove the connector: stap 8, afbeelding 1 van 3 ZTE Awe Motherboard Replacement, Remove the connector: stap 8, afbeelding 2 van 3 ZTE Awe Motherboard Replacement, Remove the connector: stap 8, afbeelding 3 van 3
    • Remove the connector to free the motherboard from the screen.

Conclusie

To reassemble your device, follow these instructions in reverse order.

5 andere personen hebben deze handleiding voltooid.

Jennifer DeMeo

Lid sinds: 10/07/14

1.035 Reputatie

5 handleidingen geschreven

Team

USF Tampa, Team 1-2, Leahy Fall 2014 Lid van USF Tampa, Team 1-2, Leahy Fall 2014

USFT-LEAHY-F14S1G2

4 Leden

10 handleidingen geschreven

0 opmerkingen

Voeg opmerking toe

Weergavestatistieken:

Afgelopen 24 uren: 0

Afgelopen 7 dagen: 1

Afgelopen 30 dagen: 11

Altijd: 1,897