Deze handleiding heeft recentere wijzigingen. Schakel over naar de nieuwste niet-geverifieerde versie.
Wat je nodig hebt
Video overzicht
-
-
Grasp the hard drive assembly and press the release button while lifting its front edge.
-
Remove the hard drive assembly from the top vent.
-
-
-
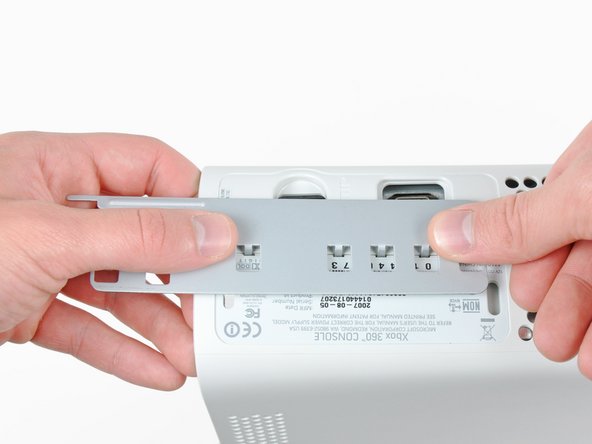
Insert the flat end of a spudger or the edge of an Xbox 360 opening tool into the small gap at the front edge of the bottom vent.
-
Pry the front edge of the bottom vent away from the faceplate.
-
-
-
Insert the flat edge of a spudger between the faceplate and the outer casing near the power button.
-
Run your spudger along the edge of the faceplate to release the clips securing it to the front of the console.
-
-
-
The top vent is secured to the console via clips. The first two clips are located underneath the top vent closest to the faceplate, as shown in the pictures.
-
-
-
Stand the console vertically with the top edge facing down.
-
Carefully peel the warranty sticker off the console.
-
-
-
-
While pushing the upper and lower cases apart, use the tip of a spudger or the finger of an Xbox 360 opening tool to push the long clip highlighted in red toward the center of the 360.
-
The clip should release, leaving the clips near the power connector as the only thing holding the upper and lower cases together.
-
-
-
Use the tip of a spudger to release the clip securing the eject button to the metal casing.
-
Insert the flat end of a spudger between the eject button and the optical drive.
-
Pry the eject button off its retaining posts and remove it from the 360.
-
-
-
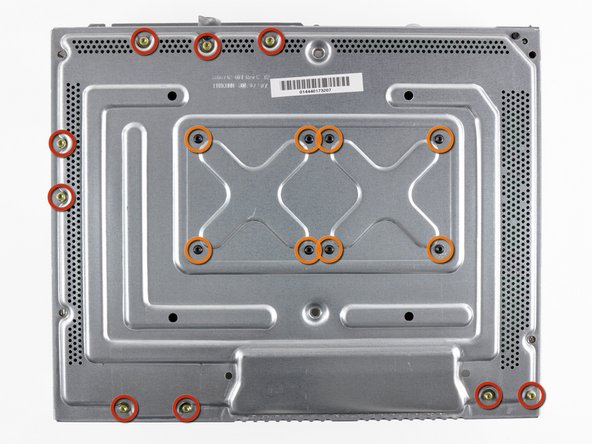
Remove the six silver 64 mm T10 Torx screws securing the upper case to the metal casing.
-
-
-
Insert the flat end of a spudger into the small rectangular opening on the top of the cooling fan duct.
-
Carefully release the fan duct retaining clip and remove the fan duct from the Xbox.
-
The clip can alternatively be released using the metal finger of an Xbox 360 opening tool.
-
-
-
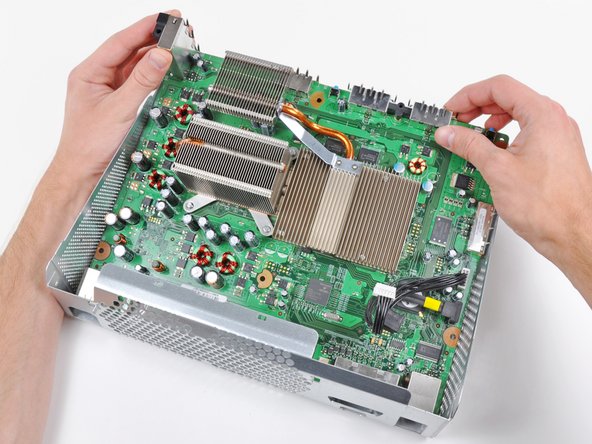
While lifting the metal chassis strip above the dual fans, pull the fans toward the center of the motherboard.
-
-
-
Use the flat end of a spudger to release the clips securing the RF module shield along the top and the left edge of the RF module.
-
Remove the RF module shield from the console.
-
-
-
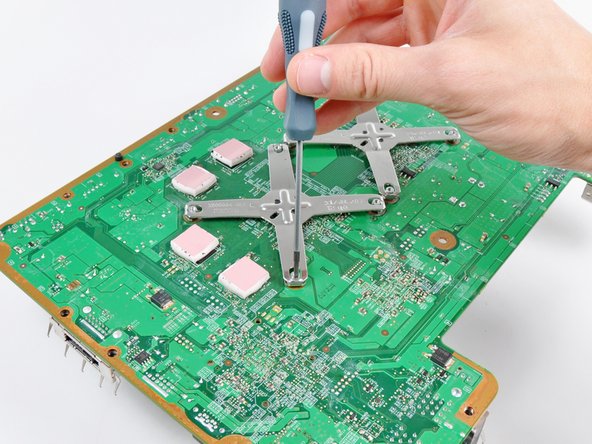
Insert the tip of a small flathead screwdriver between the X clamp and its retaining post on the heat sink.
-
Pry the X clamp away from its retaining post until it is lifted above the small groove cut into the retaining post.
-
-
-
Insert the tip of a small flathead screwdriver between the X clamp and its retaining post on the heat sink.
-
Pry the X clamp away from its retaining post until it is lifted above the small groove cut into the retaining post.
-
Remove the CPU heat sink from the motherboard.
-
-
-
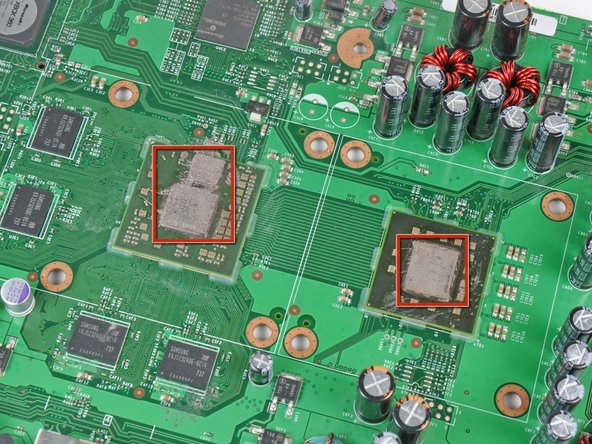
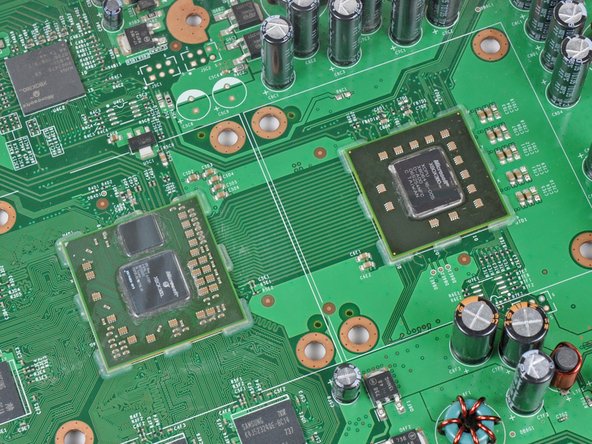
Now that the heat sinks are off both processors, use a plastic spudger to remove all of the old thermal paste residue from the faces of both processors and the inner faces of the heat sinks.
-
-
-
Insert a machine screw through each of the four holes around the CPU heat sink, with their heads on the back side of the board.
-
While holding the head of the screw, place a nylon washer then a metal washer over the threads.
-
Using the large flathead screwdriver bit, tighten the screws into the CPU heat sink. First lightly tighten the four screws in an X-shaped pattern as seen in the second picture, then follow the same X-shaped sequence to really torque the screws down.
-


To reassemble your device, follow these instructions from Step 42 in reverse order.
To reassemble your device, follow these instructions from Step 42 in reverse order.
Annuleren: ik heb deze handleiding niet afgemaakt.
626 andere personen hebben deze handleiding voltooid.

68 opmerkingen
I didn't have a heat gun so I disabled the fan and left the 360 on for 1/2 hour to heat up the weak solder points and then let it cool down for 1/2 hour before re-assembling the 360. This gave me all green lights.
Unfortunately this repair only lasted a few months on my xbox, going to try it again and hope for better results.
When you take it apart, I recommend following our reflow guide before installing the RROD fix kit. I recently did this to an X360 that the RROD kit fixed only momentarily and afterwards it worked good as new.
I did the relowing of the motherboard this weekend, hopefully it lasts longer than the previous repair.
zima539 -
I followed this guide and even performed the reflowing procedure. It worked perfectly. I noticed that when I took my Xbox 360 apart there were no existing thermal pads on the RAM chips on the underside of the mobo. Perhaps this caused the problem...? Either way this guide was thorough and easy to follow. Be sure to read ahead a step or two because some things are described generally in one step, then in better detail in the step after.