Deze versie kan foutieve bewerkingen bevatten. Schakel over naar de recentste gecontroleerde momentopname.
Wat je nodig hebt
Video overzicht
-
Deze stap is niet vertaald. Help het te vertalen
-
Place Gamepad face down and remove the two 4.7 mm screws with a Phillips size #00 screwdriver.
-
-
Deze stap is niet vertaald. Help het te vertalen
-
With your finger, press down and pull back on the battery connector plug.
-
Remove the battery from the battery case.
-
-
Deze stap is niet vertaald. Help het te vertalen
-
Remove 10 9mm screws with Tri-Wing size Y1 screwdriver around the outer case.
-
Lift up on the back of case.
-
-
Deze stap is niet vertaald. Help het te vertalen
-
Unplug outer case rumble motor connector from the motherboard with your fingers.
-
-
Deze stap is niet vertaald. Help het te vertalen
-
With your fingers, unplug the left speaker cable from the motherboard.
-
-
Deze stap is niet vertaald. Help het te vertalen
-
Remove the right speaker cable that's connected to the motherboard with the tweezers.
-
-
-
Deze stap is niet vertaald. Help het te vertalen
-
Open the top and bottom clasp that connects the white flex cable to the motherboard with the tweezer.
-
Remove the white flex cable with the tweezers.
-
-
Deze stap is niet vertaald. Help het te vertalen
-
Disconnect the black and white wires off of the back of the WiFi module.
-
-
Deze stap is niet vertaald. Help het te vertalen
-
Carefully lift the black clasp. It is prone to breaking if only lifted from one point. Remove the brown ribbon by using the tweezers.
-
-
Deze stap is niet vertaald. Help het te vertalen
-
Remove these two connectors to the motherboard with your fingers.
-
-
Deze stap is niet vertaald. Help het te vertalen
-
Remove the NFC communicator.
-
Remove the small connector plug-in on the back.
-
-
Deze stap is niet vertaald. Help het te vertalen
-
Remove the remaining three 5.1 mm screws using the Phillips size #0 screwdriver.
-
Lift and remove the mother board.
-
-
Deze stap is niet vertaald. Help het te vertalen
-
Remove the four 5.1mm screws using Phillips size #0 screwdriver.
-
Pull the white and black cables away from the display case.
-
-
Deze stap is niet vertaald. Help het te vertalen
-
Lift and remove the grey display case with your fingers.
-
-
Deze stap is niet vertaald. Help het te vertalen
-
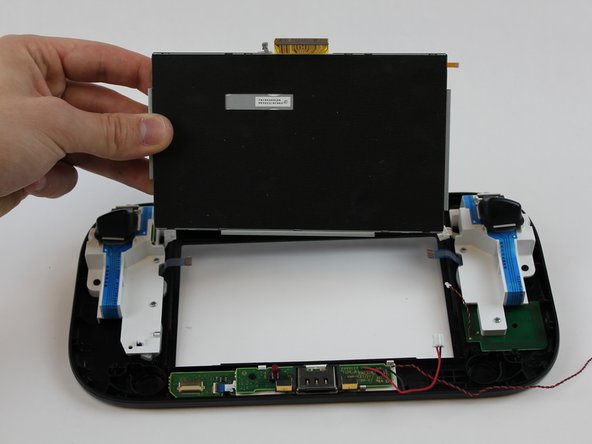
Gently with your fingers, press on the front of the display and it will lift up.
-
Remove the display with your fingers.
-


Annuleren: ik heb deze handleiding niet afgemaakt.
79 andere personen hebben deze handleiding voltooid.
Team

USF Tampa, Team 1-6, Sullivan Spring 2016 Lid van USF Tampa, Team 1-6, Sullivan Spring 2016
USFT-SULLIVAN-S16S1G6
4 Leden
40 handleidingen geschreven
18 opmerkingen
was really perfect to repair my device. Thank you very much for this help
In step 14 - what does the small gray ribbon do? The replacement LCD display that I got in the mail did not have it.
Its the touch screen cable. The screen I ordered did not come with one. I had to carefully remove it from my broken display and put it on the new one. Thankfully the touchscreen still works for me.
Mine did not come with the touch screen either.