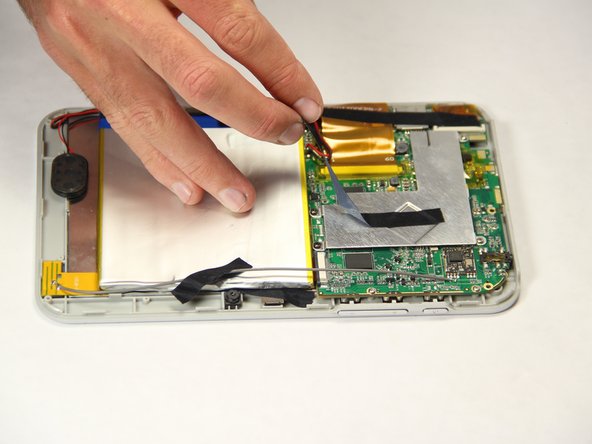
Ga door naar hoofdinhoud

Vivitar XO 7 Battery Replacement

Wat je nodig hebt

  1. Vivitar XO 7 Battery Replacement, Back Cover: stap 1, afbeelding 1 van 1
    • Remove the two 3mm Phillips #00 screws on the bottom of the tablet.

  2. Vivitar XO 7 Battery Replacement: stap 2, afbeelding 1 van 1
    • With the plastic opening tools, pry open the back cover.

  3. Vivitar XO 7 Battery Replacement: stap 3, afbeelding 1 van 1
    • Remove the back cover from the tablet.

  4. Vivitar XO 7 Battery Replacement, Battery: stap 4, afbeelding 1 van 2 Vivitar XO 7 Battery Replacement, Battery: stap 4, afbeelding 2 van 2
    • Peel off the black pieces of tape from the internal components.

  5. Vivitar XO 7 Battery Replacement: stap 5, afbeelding 1 van 2 Vivitar XO 7 Battery Replacement: stap 5, afbeelding 2 van 2
    • Carefully remove the battery from the tablet.

  6. Vivitar XO 7 Battery Replacement: stap 6, afbeelding 1 van 2 Vivitar XO 7 Battery Replacement: stap 6, afbeelding 2 van 2
    • With the tweezers, firmly grab the wire at the base and pull to disconnect the battery from the motherboard.

Conclusie

To reassemble your device, follow these instructions in reverse order.

Één andere persoon heeft deze handleiding voltooid.

Barron Dillman

Lid sinds: 01/20/15

227 Reputatie

2 handleidingen geschreven

Team

USF Tampa, Team 11-1, Blackwell Winter 2015 Lid van USF Tampa, Team 11-1, Blackwell Winter 2015

USFT-BLACKWELL-W15S11G1

4 Leden

10 handleidingen geschreven

Één opmerking

Great directions for replacing battery. However where do you get battery?

jay hamil - Antwoord

Voeg opmerking toe

Weergavestatistieken:

Afgelopen 24 uren: 0

Afgelopen 7 dagen: 2

Afgelopen 30 dagen: 6

Altijd: 1,569