Inleiding
This guide is for the DIY'er who wants to do a basic repair on the Rancilio Silvia espresso machine. We take you step-by-step with a visual guide through the process of replacing the grouphead gasket and screen. Learn how to conduct a deep cleaning of your machine.
Make sure you do not rush the process. The parts are not readily available at the local hardware store. If you damage the parts it may take several days to get new parts.
If you have doubts about your ability to do the repairs yourself give your machine to a professional to do the repairs. These machines are not inexpensive to replace if damaged.
On the other hand, this may be your last effort to fix your old machine before you buy a new one. If so, give it a try. Your efforts may save you the cost of a new machine.
Wat je nodig hebt
-
-
This is the version 3. It is identified by the ergonomic handle, the larger steam handle with a silver cap on it, and a steam wand that is mounted on a ball joint.
-
This is the version 2. It is identified by the smooth handle, the steam knob with ridges, and the plastic Rancilio logo.
-
This is version 1. The handle has ridges on it. The logo is silk screened on the machine.
-
-
-
Lift the water tank cover and put it aside.
-
Lift hoses from the tank and pull to the side.
-
Pull tank straight out of machine.
-
-
-
Remove Drip Tray
-
Flip machine upside down.
-
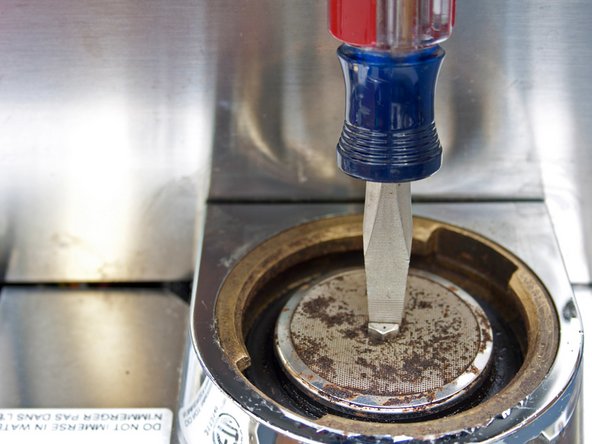
Remove screw with flathead screwdriver.
-
-
-
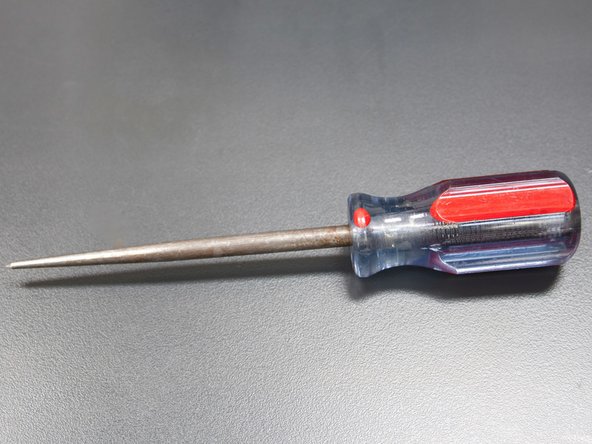
Our favorite screwdriver for extracting difficult to remove screws. It has a big handle for a good grip. The screwdriver cannot be too long or it will hit the drip tray and won't fit. This is a Craftsman 5/16" x 1 3/4" slotted screwdriver.
-
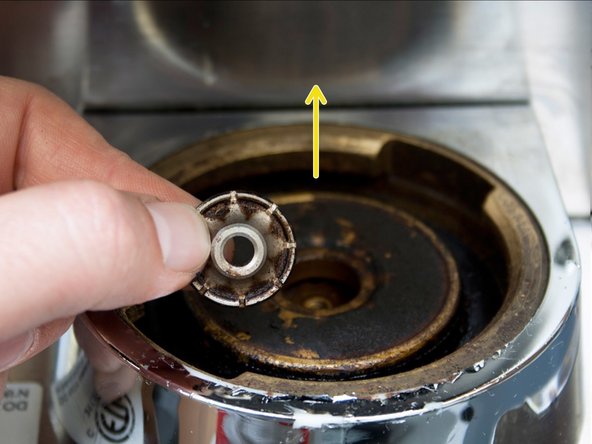
Remove the screen. It may take some prying. If it is really stuck you can use a channel lock pliers.
-
Remove the small stainless steel diffuser.
-
-
-
-
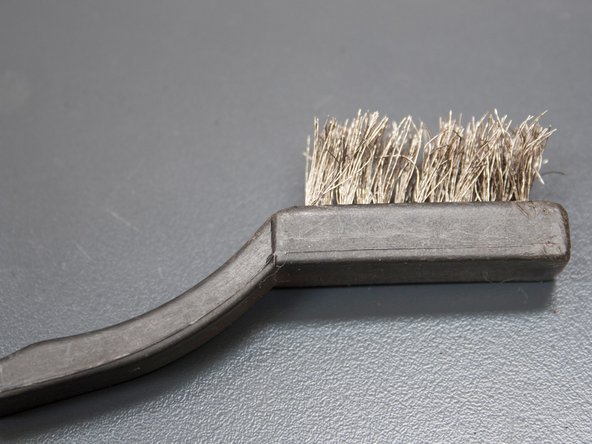
Soak this dirty little guy in coffee detergent with hot water. Then clean it again with a wire brush if needed.
-
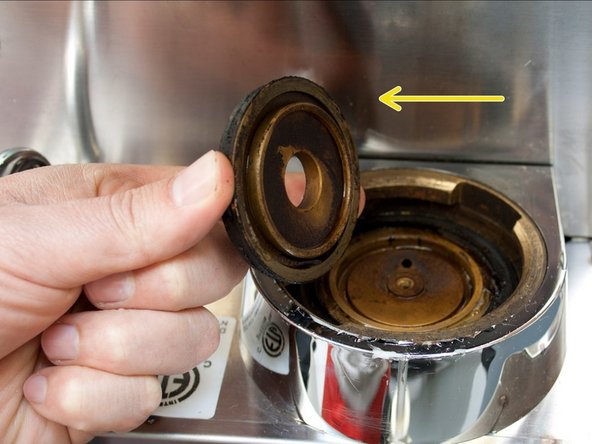
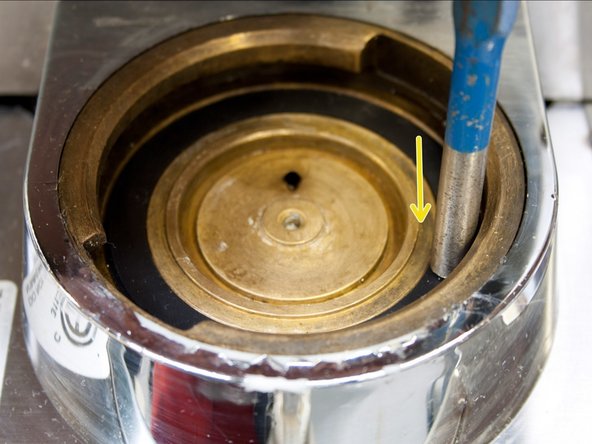
On Version 3 you will need to remove the brass disc. Just lift it out. If it is stuck you can use a channel lock pliers to get it loose. Be gentle! Careful not to damage the brass. You cannot remove the brass disk on Version 1 & 2
-
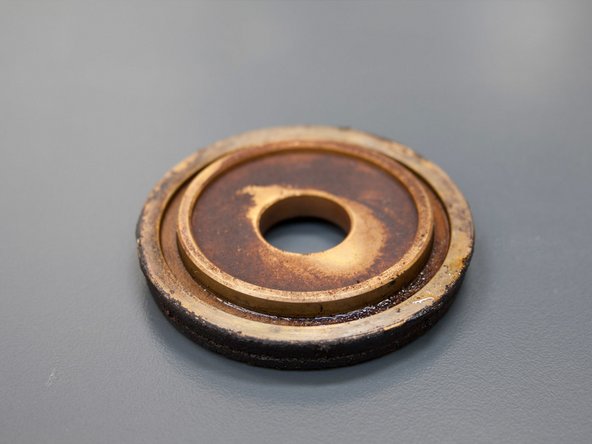
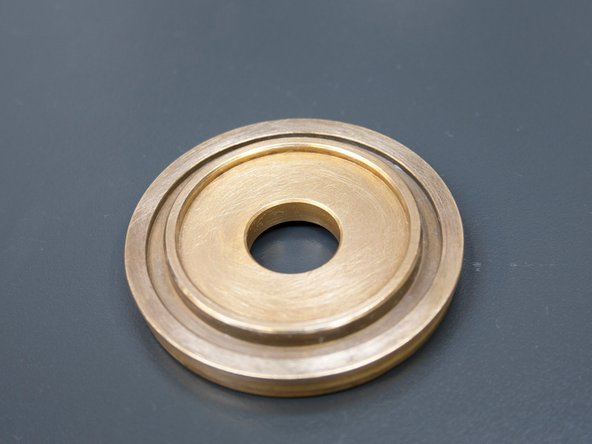
This is the brass disc after it is been removed. Soak it in coffee cleaner with hot water for about 10 minutes. Then, scrub both sides with a steel brush. Get leftover coffee residue off disc.
-
-
-
Picture of grouphead with brass disc removed on Version 3.
-
An awl works great for removing grouphead gaskets from espresso machines.
-
Pry the gasket up with the sharp tip of the awl.
-
-
-
If you are lucky the gasket will still be intact after you remove it. However the gasket may be hard as a rock and difficult to remove.
-
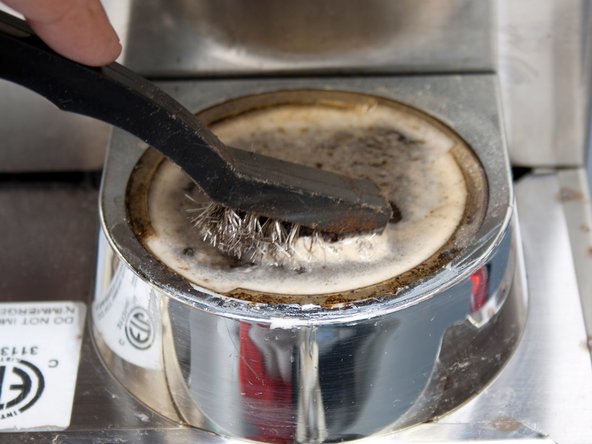
It's time to clean the bottom of the grouphead.
-
We like to pour about a 1/2 tsp of coffee cleaner on the bottom of the grouphead.
-
-
-
Pour boiling hot water on the grouphead and let it soak for about 10 minutes.
-
Take a wire brush like the one in the picture. Scrub the top of the grouphead clean.
-
-
-
Get a pick like the one in the image. Clean the inside edges of the grouphead.
-
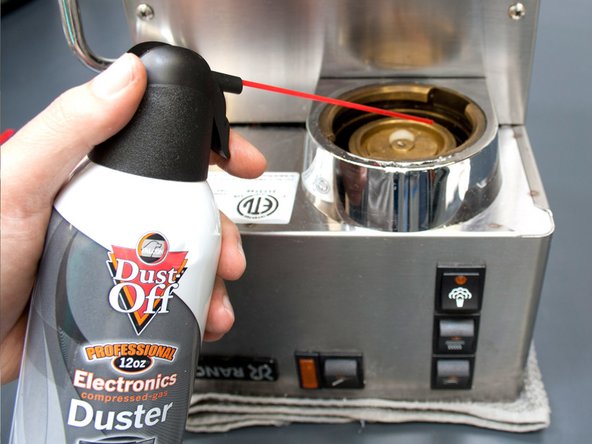
Use compressed air to remove all excess debris from the grouphead.
-
-
-
Get the New grouphead gasket.
-
Next with the lettering down insert the gasket into the grouphead. We use a 3/16" punch to gently push the gasket into place. Make sure the gasket is level on the entire surface.
-
if you have version 3 insert the brass disk you scrubbed earlier.
-
-
-
Then insert the stainless steel diffuser that you cleaned earlier.
-
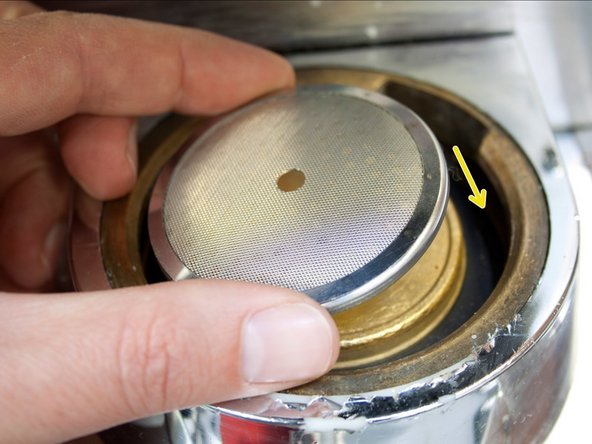
Install the new screen.
-
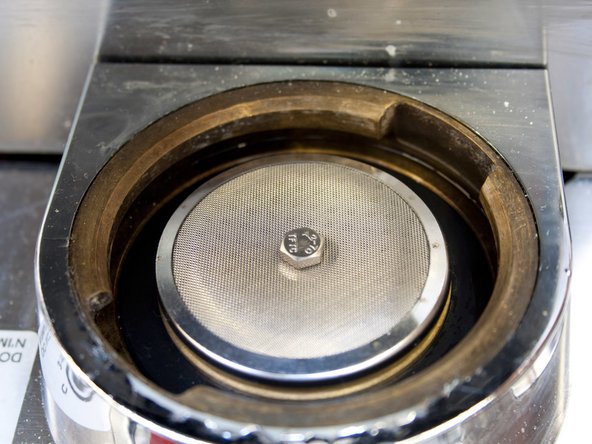
Now put the screw in nice and tight. Use a 8mm socket wrench to do so. The screen should flex downward toward the grouphead when tightening the screw.
-


You are almost done. Turn your machine over. Pull the hoses out. Install the water tank with the slot on the left side for the hoses. Put the hoses in the tank. Add water, put the lid on. Install the drip tray and grate.
Now, pour a shot of espresso and see how your machine works.
You are almost done. Turn your machine over. Pull the hoses out. Install the water tank with the slot on the left side for the hoses. Put the hoses in the tank. Add water, put the lid on. Install the drip tray and grate.
Now, pour a shot of espresso and see how your machine works.
Annuleren: ik heb deze handleiding niet afgemaakt.
20 andere personen hebben deze handleiding voltooid.

Team

Kanen Coffee: Espresso Machines Lid van Kanen Coffee: Espresso Machines
Business
1 Lid
2 handleidingen geschreven
19 opmerkingen
Thanks Sam for your very thorough instructions. My machine has been spraying coffee all over creation for a couple years now and I just recently figured out the reason why. I ordered the parts from Amazon and Seattle Coffeegear and could not wait to install. I've got to let it sit overnight so the new rubber feet I put on it take hold but, first thing tomorrow, I'll be firing it up and praying for "no spray."
You have really done a great public service by posting this blog and I thank you for that.
I don't know what the 30 points are all about but I give you all that and more.
thanks
Ranny
Hello Ranny, thank you for your comments. I am happy to give other people the tools to repair their machines and enjoy great cups of espresso again :) -Sam
This was so helpful! I had a hard time removing the old screen from the brass disc but I persevered. The old gasket came out easily- I screwed a small wood screw into it and used the screw as a handle to pull it out which worked great.
I did a thorough cleaning and made sure the writing side of the gasket was pointing downward, and replaced the screen, but now there's a bit of leaking. I took it all apart again and double checked everything, used the portafilter to help wedge in the gasket (again), tightened the screw on the screen, but it's still leaking a little bit.
Help?!
Often the issues related to wear on the ears of the portafilter. If the chrome is worn away and you can see brass. Then the portafilter has developed a wear pattern. Can you send pictures showing the bottom ears on the portafilter?