Deze versie kan foutieve bewerkingen bevatten. Schakel over naar de recentste gecontroleerde momentopname.
Wat je nodig hebt
-
Deze stap is niet vertaald. Help het te vertalen
-
Situate the laptop so that it is open and the display is facing you.
-
Use the plastic opening tool to pry the black plastic insert upward. The insert can be found at the top of the keyboard.
-
Once the insert is loose, carefully remove it from the device.
-
-
Deze stap is niet vertaald. Help het te vertalen
-
Using #1 Phillips Screwdriver, remove both of the 5 mm screws that are located beneath the insert.
-
-
Deze stap is niet vertaald. Help het te vertalen
-
Use the plastic opening tool to begin removing the keys off of the device.
-
-
-
Deze stap is niet vertaald. Help het te vertalen
-
Lift up the gate on the ZIF socket to release the ribbon.
-
Ease the ribbon connecting the keyboard to the motherboard out of the ZIF socket.
-
-
Deze stap is niet vertaald. Help het te vertalen
-
With the keyboard removed, locate the marked screws.
-
Remove the marked 5mm screws using the #1 Phillips Screwdriver.
-
-
Deze stap is niet vertaald. Help het te vertalen
-
In the rectangular opening directly above the mouse pad, use the plastic opening tool to push up the tiny black gate of the ZIF socket (fancy name for the white connector).
-
Remove the ribbon from the ZIF socket.
-
-
Deze stap is niet vertaald. Help het te vertalen
-
Locate the wide opening at the top in the direction toward the screen.
-
Use the plastic opening tool to open the black ZIF gate.
-
Remove the blue ribbon.
-
-
Deze stap is niet vertaald. Help het te vertalen
-
Use the plastic opening tool to separate the top faceplate.
-
Carefully pry the faceplate away from the laptop's base by sliding the plastic opening tool around the perimeter of the entire device. You'll hear the sound of several clicks as you do this.
-
-
Deze stap is niet vertaald. Help het te vertalen
-
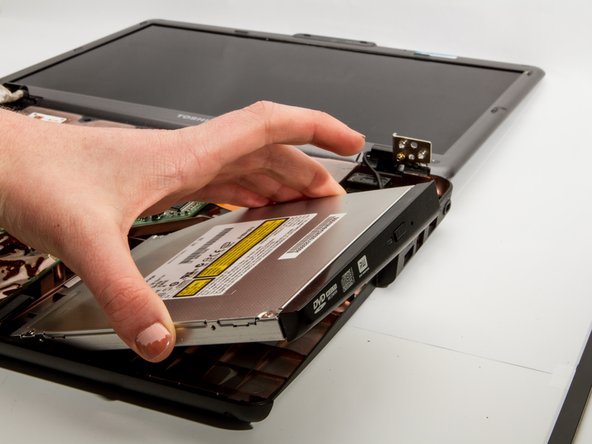
Gently lift the disk drive by its outward facing edge (the one with writing on it).
-
Pull the disk drive up and away from the laptop.
-


Annuleren: ik heb deze handleiding niet afgemaakt.
2 andere personen hebben deze handleiding voltooid.
Team

Cal Poly, Team 7-8, Maness Winter 2013 Lid van Cal Poly, Team 7-8, Maness Winter 2013
CPSU-MANESS-W13S7G8
4 Leden
8 handleidingen geschreven