Ga door naar hoofdinhoud

Toshiba Satellite P205-S8811 Monitor Replacement

Wat je nodig hebt

  1. Toshiba Satellite P205-S8811 Monitor Replacement, Battery: stap 1, afbeelding 1 van 2 Toshiba Satellite P205-S8811 Monitor Replacement, Battery: stap 1, afbeelding 2 van 2
    • Flip the laptop over so the bottom is facing upward and the battery is on top.

    • Slide the tab below the battery to the left.

  2. Toshiba Satellite P205-S8811 Monitor Replacement: stap 2, afbeelding 1 van 2 Toshiba Satellite P205-S8811 Monitor Replacement: stap 2, afbeelding 2 van 2
    • Slide and hold the tab on the right side of the battery to the right.

    • While holding the right tab, slide the battery upward and out its socket.

  3. Toshiba Satellite P205-S8811 Monitor Replacement, Keyboard: stap 3, afbeelding 1 van 2 Toshiba Satellite P205-S8811 Monitor Replacement, Keyboard: stap 3, afbeelding 2 van 2
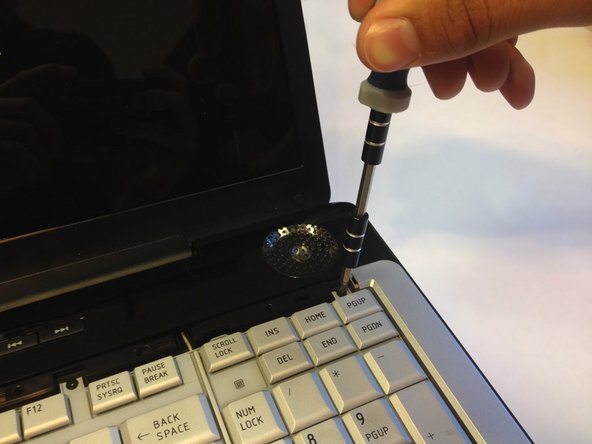
    • Place the head of a plastic opening tool underneath the plastic strip lining the top of the keyboard, right above the "PGUP" button.

    • Next, pull the strip up using a plastic opening tool with a light force, until it pops off.

  4. Toshiba Satellite P205-S8811 Monitor Replacement: stap 4, afbeelding 1 van 1
    • Lightly lift from the side that was popped up earlier in order to pop the rest of the strip off of the laptop.

  5. Toshiba Satellite P205-S8811 Monitor Replacement: stap 5, afbeelding 1 van 2 Toshiba Satellite P205-S8811 Monitor Replacement: stap 5, afbeelding 2 van 2
    • Use a #1 Phillips screwdriver to take out the four 4mm Phillips #1 screws that were underneath the plastic strip.

  6. Toshiba Satellite P205-S8811 Monitor Replacement: stap 6, afbeelding 1 van 3 Toshiba Satellite P205-S8811 Monitor Replacement: stap 6, afbeelding 2 van 3 Toshiba Satellite P205-S8811 Monitor Replacement: stap 6, afbeelding 3 van 3
    • Be careful to not lift up on the keyboard too quickly or harshly; there is a ribbon cable connecting the keyboard and the base which may be breakable.

    • Lightly lift up on the keyboard from one of its top corners and pull it towards the screen so you can safely remove the ribbon cable.

    • At the base of the ribbon cable, there is a tiny tab that runs across the width of the connector. Flip it up. You can now pull the ribbon cable free with no resistance towards the monitor.

    • With the cable unplugged, the keyboard can be lifted away from the laptop.

  7. Toshiba Satellite P205-S8811 Monitor Replacement, Monitor: stap 7, afbeelding 1 van 2 Toshiba Satellite P205-S8811 Monitor Replacement, Monitor: stap 7, afbeelding 2 van 2
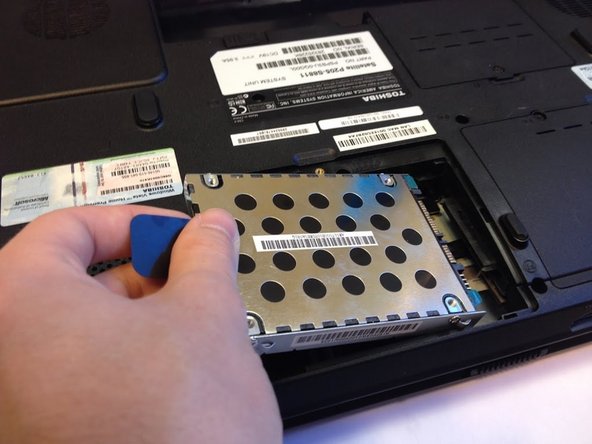
    • Unscrew the 4mm Phillips #1 screw holding the hard drive cover on.

    • Place one finger underneath the tab of the hard drive cover and lift it up with medium force to take it off.

  8. Toshiba Satellite P205-S8811 Monitor Replacement: stap 8, afbeelding 1 van 2 Toshiba Satellite P205-S8811 Monitor Replacement: stap 8, afbeelding 2 van 2
    • Grab the black tab attached to the hard drive and pull it to the left with a medium force until it pops out of its socket.

  9. Toshiba Satellite P205-S8811 Monitor Replacement: stap 9, afbeelding 1 van 1
    • Remove the two 8mm Phillips #1 screws from the back side of the laptop.

  10. Toshiba Satellite P205-S8811 Monitor Replacement: stap 10, afbeelding 1 van 1
    • Remove the four 8mm Phillips #1 screws located on the corners below the monitor.

  11. Toshiba Satellite P205-S8811 Monitor Replacement: stap 11, afbeelding 1 van 1
    • Remove the two 4mm Phillips #1 screws located between the screws removed in the last step.

  12. Toshiba Satellite P205-S8811 Monitor Replacement: stap 12, afbeelding 1 van 2 Toshiba Satellite P205-S8811 Monitor Replacement: stap 12, afbeelding 2 van 2
    • Unplug the black wire connecting the monitor to the motherboard by pulling it lightly towards you.

    • Unplug the black/red wire that also connects the monitor to the motherboard by pulling lightly away from you.

  13. Toshiba Satellite P205-S8811 Monitor Replacement: stap 13, afbeelding 1 van 3 Toshiba Satellite P205-S8811 Monitor Replacement: stap 13, afbeelding 2 van 3 Toshiba Satellite P205-S8811 Monitor Replacement: stap 13, afbeelding 3 van 3
    • Remove the three colored wires (white, grey, and black) that are all connected beside each other by pulling them up lightly.

  14. Toshiba Satellite P205-S8811 Monitor Replacement: stap 14, afbeelding 1 van 1
    • Gently pull out the wide, white wire coming from the monitor.

  15. Toshiba Satellite P205-S8811 Monitor Replacement: stap 15, afbeelding 1 van 2 Toshiba Satellite P205-S8811 Monitor Replacement: stap 15, afbeelding 2 van 2
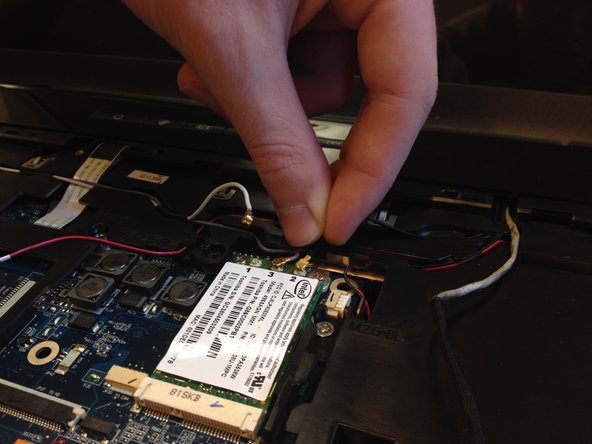
    • Use a plastic opening tool to loosen the top panel by placing the tool underneath the panel at several points and then lifting upwards with a medium force. You will know it is loose if it makes a loud clicking noise.

    • Place your fingers on the side of the panel closest to the monitor. Lift up on that side of the panel with a large amount of force in order to pry it off.

  16. Toshiba Satellite P205-S8811 Monitor Replacement: stap 16, afbeelding 1 van 3 Toshiba Satellite P205-S8811 Monitor Replacement: stap 16, afbeelding 2 van 3 Toshiba Satellite P205-S8811 Monitor Replacement: stap 16, afbeelding 3 van 3
    • Remove the 8mm Phillips #1 screw located just below the large gray wire.

    • Remove the 8mm Phillips #1 screw located to the right of the left-hand speaker.

    • Remove the 4mm Phillips #1 screw located above the fan and next to the large gray wire.

  17. Toshiba Satellite P205-S8811 Monitor Replacement: stap 17, afbeelding 1 van 2 Toshiba Satellite P205-S8811 Monitor Replacement: stap 17, afbeelding 2 van 2
    • Remove the large gray wire that is connected to the motherboard to the right of the fan.

    • Remove the small white/grey wire that is connected at the top of the fan.

  18. Toshiba Satellite P205-S8811 Monitor Replacement: stap 18, afbeelding 1 van 1
    • Grabbing both sides of the monitor, gently lift the it out of place and set it aside.

Conclusie

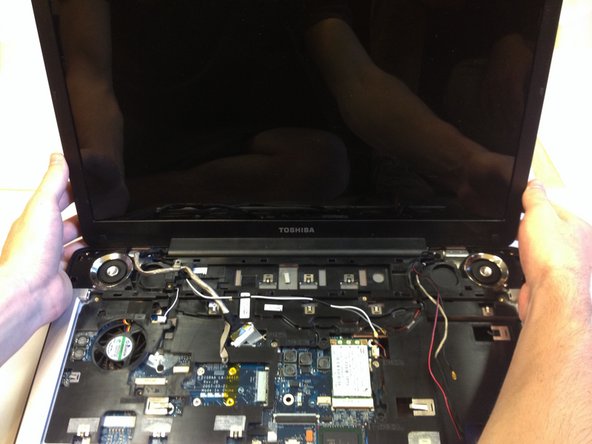
To reassemble your device, follow these instructions in reverse order.

Bradley Johnson

Lid sinds: 02/02/14

214 Reputatie

2 handleidingen geschreven

Team

Cal Poly, Team 2-8, Amido Winter 2014 Lid van Cal Poly, Team 2-8, Amido Winter 2014

CPSU-AMIDO-W14S2G8

4 Leden

7 handleidingen geschreven

0 opmerkingen

Voeg opmerking toe

Weergavestatistieken:

Afgelopen 24 uren: 0

Afgelopen 7 dagen: 0

Afgelopen 30 dagen: 2

Altijd: 884