Ga door naar hoofdinhoud

Toshiba Satellite L655D-S5095 Touchpad Button Replacement

Wat je nodig hebt

  1. Toshiba Satellite L655D-S5095 Touchpad Button Replacement, Battery: stap 1, afbeelding 1 van 3 Toshiba Satellite L655D-S5095 Touchpad Button Replacement, Battery: stap 1, afbeelding 2 van 3 Toshiba Satellite L655D-S5095 Touchpad Button Replacement, Battery: stap 1, afbeelding 3 van 3
    • Locate the battery locks on the bottom of the laptop.

    • Slide the right lock outwards, until it locks into place.

    • Slide and hold the left lock outwards and hold it in place.

  2. Toshiba Satellite L655D-S5095 Touchpad Button Replacement: stap 2, afbeelding 1 van 1
    • While holding the lock in place, slide the battery out towards you.

  3. Toshiba Satellite L655D-S5095 Touchpad Button Replacement, Touchpad Button: stap 3, afbeelding 1 van 2 Toshiba Satellite L655D-S5095 Touchpad Button Replacement, Touchpad Button: stap 3, afbeelding 2 van 2
    • Place device down so the bottom of it is facing you.

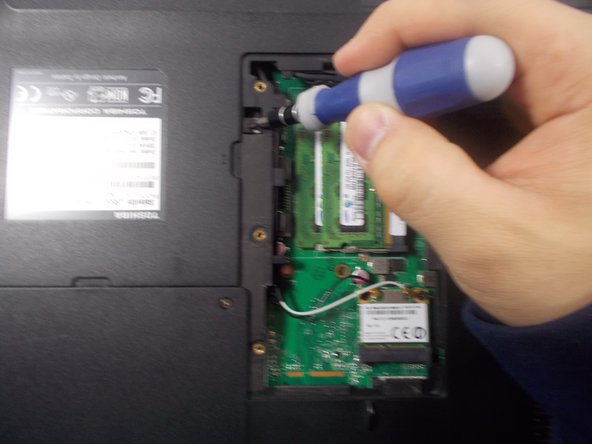
    • Unscrew each screw located in the deep holes found around the bottom of the device as shown.

  4. Toshiba Satellite L655D-S5095 Touchpad Button Replacement: stap 4, afbeelding 1 van 2 Toshiba Satellite L655D-S5095 Touchpad Button Replacement: stap 4, afbeelding 2 van 2
    • Unscrew the panel located over the RAM as shown

    • Rotate the computer so the battery is now located on the top of the device. Now unscrew the single screw located at the top left of the RAM's housing as shown

  5. Toshiba Satellite L655D-S5095 Touchpad Button Replacement: stap 5, afbeelding 1 van 3 Toshiba Satellite L655D-S5095 Touchpad Button Replacement: stap 5, afbeelding 2 van 3 Toshiba Satellite L655D-S5095 Touchpad Button Replacement: stap 5, afbeelding 3 van 3
    • Remove the battery.

    • Unscrew the single screw closest to the center of the device, as shown in picture two.

    • Remove the four screws that were previously hidden by the battery.

  6. Toshiba Satellite L655D-S5095 Touchpad Button Replacement: stap 6, afbeelding 1 van 2 Toshiba Satellite L655D-S5095 Touchpad Button Replacement: stap 6, afbeelding 2 van 2
    • Remove the disk drive located at the left of the device.

    • Remove two screws that were hidden by the disk drive, as shown in picture two.

  7. Toshiba Satellite L655D-S5095 Touchpad Button Replacement: stap 7, afbeelding 1 van 2 Toshiba Satellite L655D-S5095 Touchpad Button Replacement: stap 7, afbeelding 2 van 2
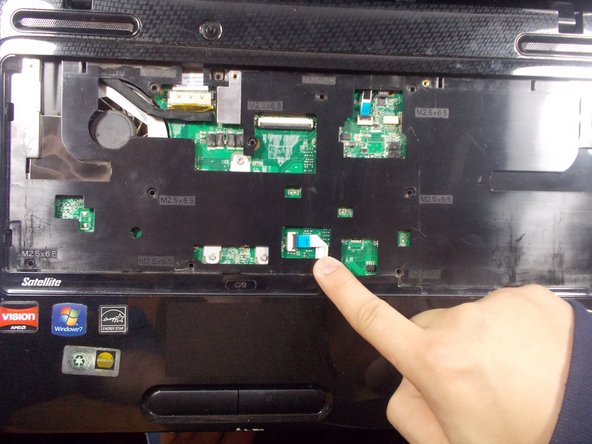
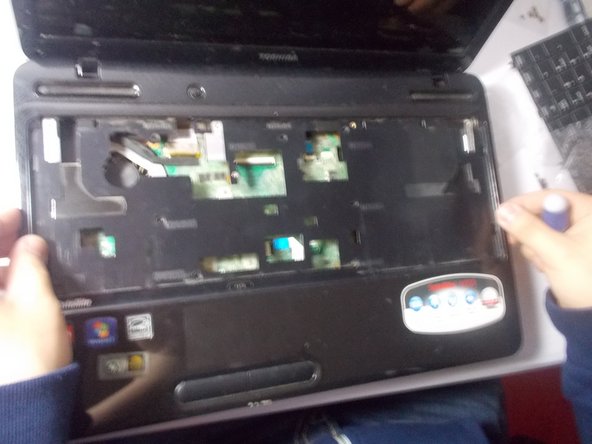
    • Now turn the device over so you can see the keyboard. Find the plastic bar located at the top of the keyboard.

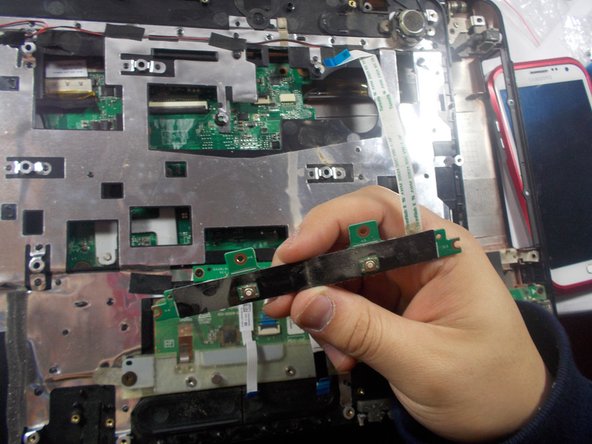
    • Pry this plastic cover off with the use of the plastic opening tools.

    • Now unscrew the screws that are located under the plastic cover previously removed. After these are gone, remove the keyboard.

  8. Toshiba Satellite L655D-S5095 Touchpad Button Replacement: stap 8, afbeelding 1 van 3 Toshiba Satellite L655D-S5095 Touchpad Button Replacement: stap 8, afbeelding 2 van 3 Toshiba Satellite L655D-S5095 Touchpad Button Replacement: stap 8, afbeelding 3 van 3
    • Remove the screws located around the area the keyboard had previously covered, as shown in the red circles.

    • Before removing this cover, locate the connection indicated in the photo and disconnect it.

    • Remove the cover.

    • remove all screws on bottom marked F65

  9. Toshiba Satellite L655D-S5095 Touchpad Button Replacement: stap 10, afbeelding 1 van 1
    • Turn the cover over and remove the back panel.

    • Locate the button found at the lower end of the cover. Once found, remove the four screws keeping it in place.

  10. Toshiba Satellite L655D-S5095 Touchpad Button Replacement: stap 11, afbeelding 1 van 3 Toshiba Satellite L655D-S5095 Touchpad Button Replacement: stap 11, afbeelding 2 van 3 Toshiba Satellite L655D-S5095 Touchpad Button Replacement: stap 11, afbeelding 3 van 3
    • Remove the two buses from the button by the blue tab as shown in the pictures.

    • Remove the last bus from the motherboard by pulling the blue tab.

    • Remove the disfunctional button from the device.

Conclusie

To reassemble your device, follow these instructions in reverse order.

Één andere persoon heeft deze handleiding voltooid.

Alejandro

Lid sinds: 03/11/14

121 Reputatie

1 Handleiding geschreven

Team

UMass Dartmouth, Team 4-4, Calaway Spring 2014 Lid van UMass Dartmouth, Team 4-4, Calaway Spring 2014

UMASSD-CALAWAY-S14S4G4

4 Leden

2 handleidingen geschreven

0 opmerkingen

Voeg opmerking toe

Weergavestatistieken:

Afgelopen 24 uren: 3

Afgelopen 7 dagen: 5

Afgelopen 30 dagen: 8

Altijd: 2,968