Inleiding
The Toshiba Satellite A105-S4074 relies on its internal fan located over the main processor to keep cool; if there are issues with your system's fan, the laptop may overheat and shut down. Should replacement be required, these easy to follow instructions will guide you through the process.
Wat je nodig hebt
-
-
Turn the laptop back over so it is right-side up, with the cover facing up.
-
Open the laptop all the way so that the screen is horizontal with the body.
-
-
-
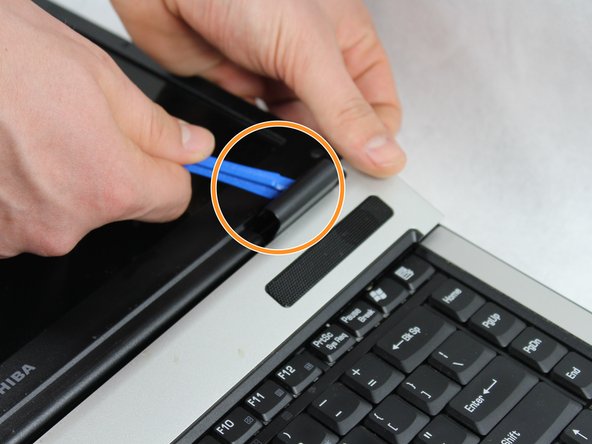
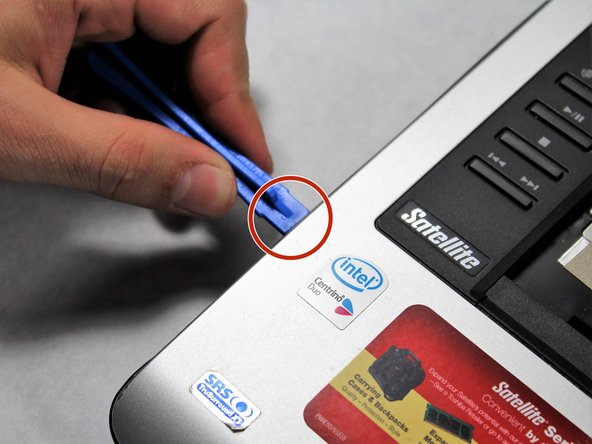
Using the iFixit plastic opening tool, pop up the left tab along the top of the panel that is connected to the hinge for the widescreen display.
-
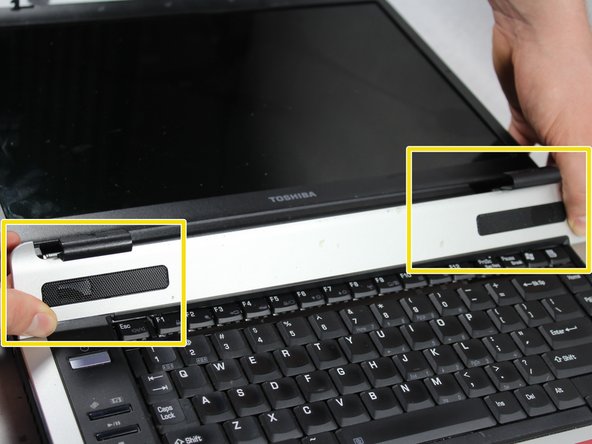
Using the plastic opening tool, pop up the right tab along the top of the panel that is connected to the hinge for the widescreen display.
-
Pry up and remove the cover panel that is located above the keyboard.
-
-
-
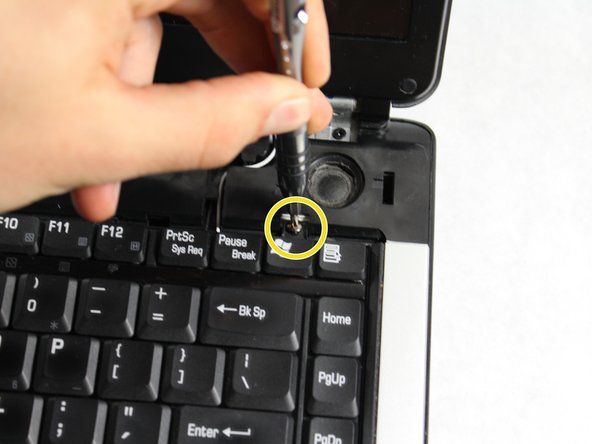
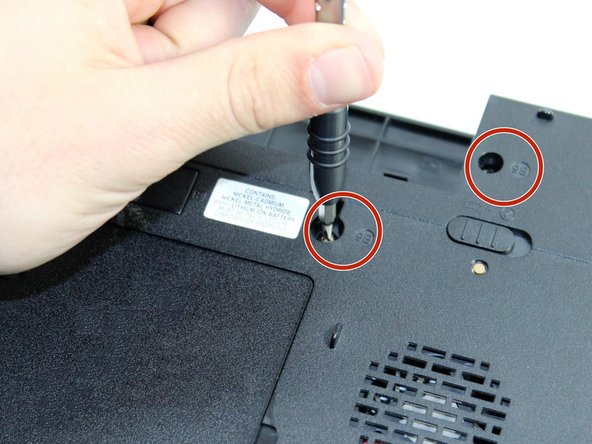
Position laptop so that both screws connecting the keyboard to the laptop are visible.
-
Unscrew the left 3.0 mm screw that is holding the keyboard onto the laptop using the Phillips #0 screwdriver.
-
Unscrew the right 3.0 mm screw that is holding the keyboard onto the laptop using the Phillips #0 screwdriver.
-
-
-
-
Carefully detach the black and white antenna cables connecting the widescreen display to the Intel® Pro/Wireless 3945ABG card on the motherboard by lifting the brass connectors with your fingers.
-
Remove the black and white antenna cables from the channel guides in the bottom half of the laptop.
-
-
-
Unscrew the two 4.0 mm screws from the left hinge located at the base of the widescreen display using the Phillips #1 screwdriver.
-
Unscrew the two 4.0 mm screws from the right hinge located at the base of the widescreen display using the Phillips #1 screwdriver.
-
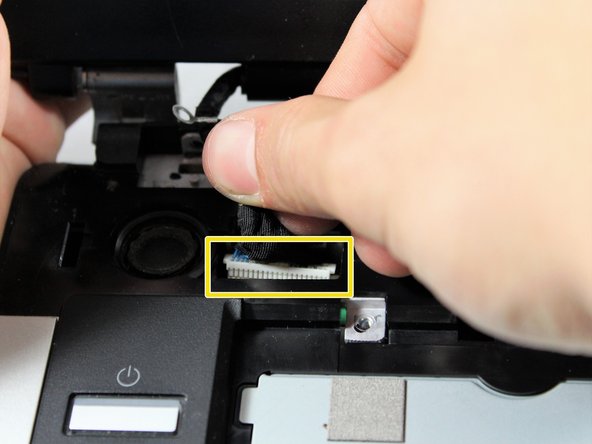
Gently disconnect the black video cable that connects the screen to the motherboard.
-
-
-
Turn the computer around so the screen faces away from you, and unscrew the 5.0 mm screws on the left back hinge using the Phillips #1 screwdriver.
-
Turn the computer around so the screen faces away from you, and unscrew the 5.0 mm screws on the right back hinge using the Phillips #1 screwdriver.
-
Remove the display and set it aside.
-
-
-
Using the plastic opening tool, gently pry up on the upper casing of the laptop separating it from the lower casing.
-
Slowly work the tool around the sides of the case until the two pieces are completely separated from each other.
-
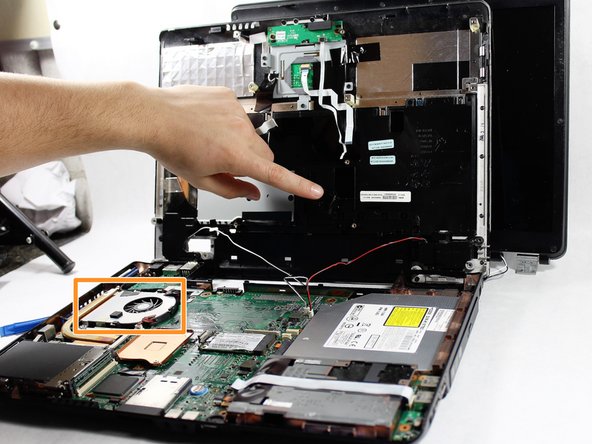
Remove the upper casing from the bottom casing using your hands.
-
With the laptop separated, you should be able to see the CPU fan.
-


To reassemble your device after replacing the fan, follow these instructions in reverse order.
To reassemble your device after replacing the fan, follow these instructions in reverse order.
Annuleren: ik heb deze handleiding niet afgemaakt.
3 andere personen hebben deze handleiding voltooid.
Team

UMass Dartmouth, Team S2-G1, Isaacson Spring 2017 Lid van UMass Dartmouth, Team S2-G1, Isaacson Spring 2017
UMASSD-ISAACSON-S17S2G1
4 Leden
15 handleidingen geschreven