Deze versie kan foutieve bewerkingen bevatten. Schakel over naar de recentste gecontroleerde momentopname.
Wat je nodig hebt
-
Deze stap is niet vertaald. Help het te vertalen
-
Turn the laptop over and locate the lock and battery release switches. Unlock the battery by changing the switch on the right from locked to unlocked by sliding the switch outward.
-
-
Deze stap is niet vertaald. Help het te vertalen
-
Hold the release switch and pull out the battery towards you.
-
-
Deze stap is niet vertaald. Help het te vertalen
-
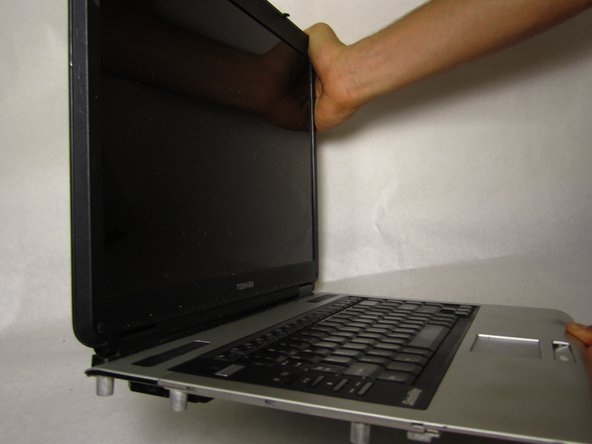
Open the laptop so the display screen is bent fully back with the display facing upward, parallel to the surface you are working on.
-
Wedge the Phillips 00 screwdriver above the F1 key, and separate the top piece of plastic from the body of the laptop. Don't worry about breaking it! You will need to forcefully wedge the screwdriver under the plastic, simultaneously pushing upward and forward.
-
Once that section has popped up, work on pulling the rest of the plastic piece up and out, alternating from left to right.
-
-
Deze stap is niet vertaald. Help het te vertalen
-
Completely remove the plastic piece from the body of the laptop.
-
Using the Phillips 1 screwdriver, unscrew the two 3mm screws located at the top corners of the keyboard. (See the second picture for additional clarification.)
-
-
-
Deze stap is niet vertaald. Help het te vertalen
-
Without yanking, lift the keyboard up carefully.
-
Now that the board is free, cautiously undo and pull free the ribbon that connects the keyboard to the body of the laptop.
-
-
Stap 6
Voorzichtig: stappen 6-7 komen van een handleiding die in bewerking is.
Deze stap is niet vertaald. Help het te vertalen
-
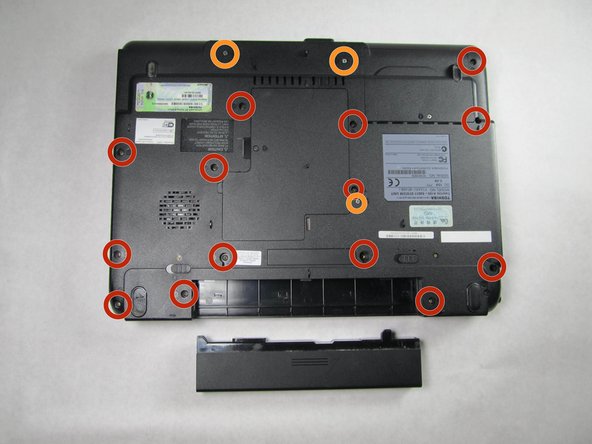
Turn the laptop over, so that you are now looking at the bottom of the laptop.
-
Using the Phillips #1 screwdriver remove the fourteen 6mm screws.
-
Using the Phillips #1 screwdriver remove the three 4mm screws.
-
-
Deze stap is niet vertaald. Help het te vertalen
-
Completely remove the display piece by pulling between the silver display-component and the black bottom-component. The display- component is an all-in-one component pictured here.
-
-
Deze stap is niet vertaald. Help het te vertalen
-
Using the #00 Phillips Screwdriver, remove the single screw that holds the optical drive in place.
-
-
Deze stap is niet vertaald. Help het te vertalen
-
Simply push the disk drive to the left, as demonstrated in the picture, until the disk drive is completely outside of the casing.
-


Team

Cal Poly, Team 4-14, Maness Spring 2013 Lid van Cal Poly, Team 4-14, Maness Spring 2013
CPSU-MANESS-S13S4G14
4 Leden
14 handleidingen geschreven