Ga door naar hoofdinhoud

Toshiba Portege M300 Wireless Card Replacement

Wat je nodig hebt

  1. Toshiba Portege M300 Wireless Card Replacement, Battery: stap 1, afbeelding 1 van 1
    • Turn the computer over onto its back.

  2. Toshiba Portege M300 Wireless Card Replacement: stap 2, afbeelding 1 van 2 Toshiba Portege M300 Wireless Card Replacement: stap 2, afbeelding 2 van 2
    • Slide the lock on the left side to the unlock position.

    • Slide the lock on the right side to the unlock position until there is a clicking sound.

  3. Toshiba Portege M300 Wireless Card Replacement: stap 3, afbeelding 1 van 2 Toshiba Portege M300 Wireless Card Replacement: stap 3, afbeelding 2 van 2
    • Remove the battery by sliding it away from the laptop.

    • Make sure the two locks from the previous step are in the unlocked position while sliding the battery away.

  4. Toshiba Portege M300 Wireless Card Replacement, Wireless Card: stap 4, afbeelding 1 van 3 Toshiba Portege M300 Wireless Card Replacement, Wireless Card: stap 4, afbeelding 2 van 3 Toshiba Portege M300 Wireless Card Replacement, Wireless Card: stap 4, afbeelding 3 van 3
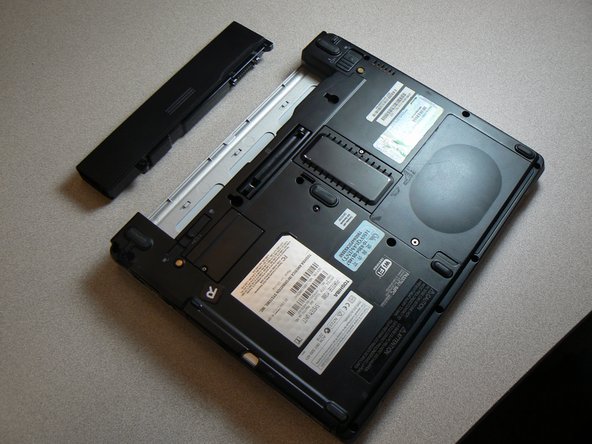
    • Turn the computer onto the back.

    • Remove the Phillips #0 screw that secures the cover to the rest of the device.

    • One 5.1 mm coarse thread screw.

    • Pull the cover forward to release it.

  5. Toshiba Portege M300 Wireless Card Replacement: stap 5, afbeelding 1 van 3 Toshiba Portege M300 Wireless Card Replacement: stap 5, afbeelding 2 van 3 Toshiba Portege M300 Wireless Card Replacement: stap 5, afbeelding 3 van 3
    • Use a Phillips #1 screwdriver to remove the two screws on opposite corners of the wireless card.

    • Two 4.0 mm coarse thread screws.

    • Use a plastic opening tool to gently lift the wireless card out while leaving the wire connected.

  6. Toshiba Portege M300 Wireless Card Replacement: stap 6, afbeelding 1 van 2 Toshiba Portege M300 Wireless Card Replacement: stap 6, afbeelding 2 van 2
    • Hold the edges of the wireless card and carefully disconnect the black 3 pin connector.

Conclusie

To reassemble your device, follow these instructions in reverse order.

Alison Wendt

Lid sinds: 04/18/13

135 Reputatie

6 handleidingen geschreven

Team

Cal Poly, Team 21-51, Johann Spring 2013 Lid van Cal Poly, Team 21-51, Johann Spring 2013

CPSU-JOHANN-S13S21G51

3 Leden

18 handleidingen geschreven

0 opmerkingen

Voeg opmerking toe

Weergavestatistieken:

Afgelopen 24 uren: 0

Afgelopen 7 dagen: 0

Afgelopen 30 dagen: 2

Altijd: 819