Ga door naar hoofdinhoud

Toshiba HD-A2 Optical Drive Replacement

Wat je nodig hebt

  1. Toshiba HD-A2 Optical Drive Replacement, Top Panel: stap 1, afbeelding 1 van 1
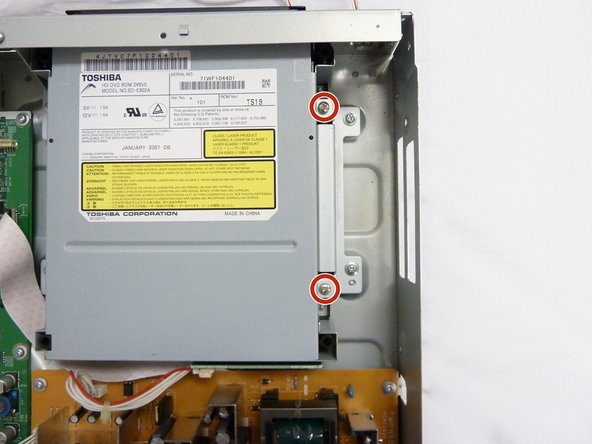
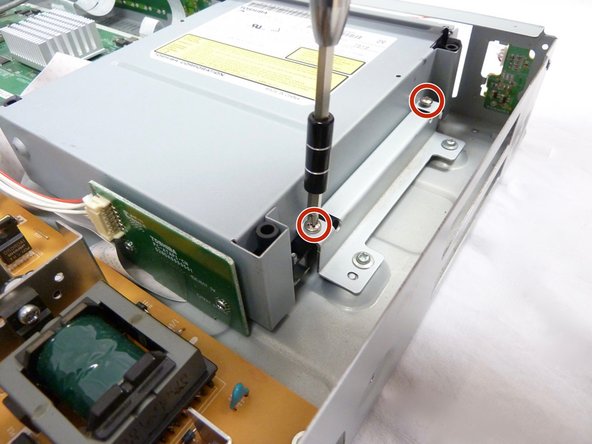
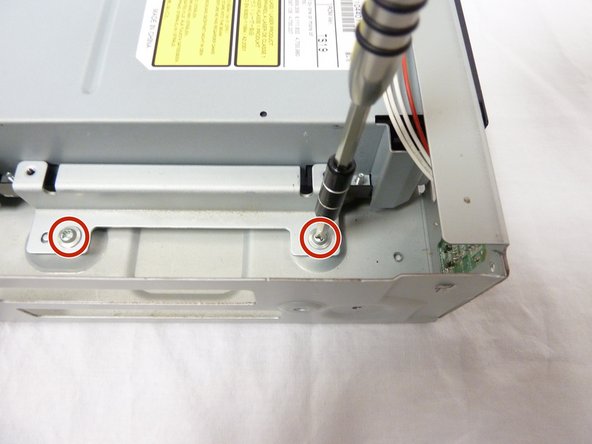
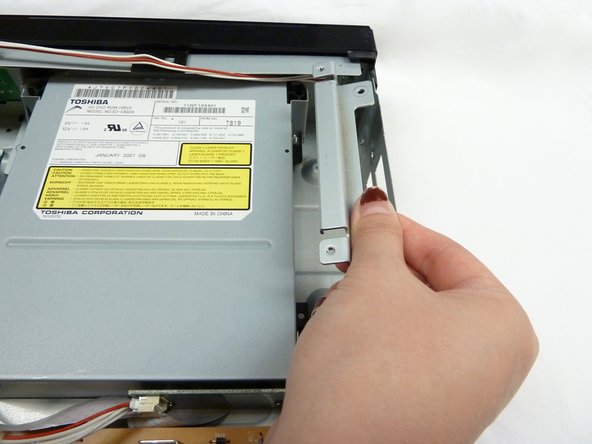
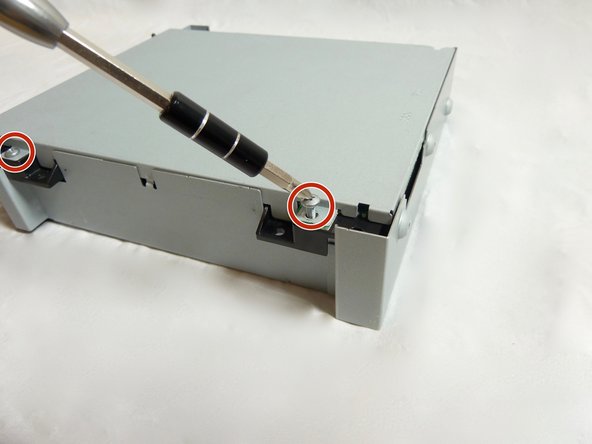
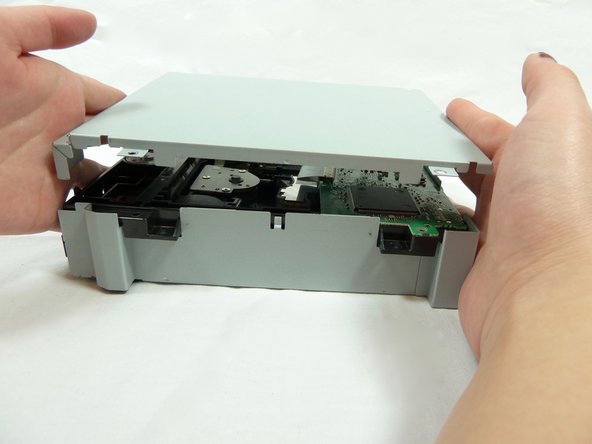
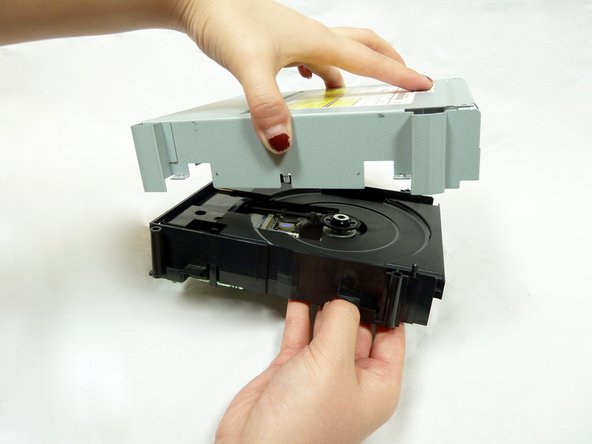
    • Remove the three 6mm Phillips head screws on the back of the DVD player with a Phillips #1 screwdriver.

  2. Toshiba HD-A2 Optical Drive Replacement: stap 2, afbeelding 1 van 2 Toshiba HD-A2 Optical Drive Replacement: stap 2, afbeelding 2 van 2
    • Remove the two 3mm Phillips screws on each side of the DVD player using the Phillips #1 screwdriver.

  3. Toshiba HD-A2 Optical Drive Replacement: stap 3, afbeelding 1 van 1
    • Using your hand, gently lift the black top panel and safely place it off to the side.

  4. Toshiba HD-A2 Optical Drive Replacement, Optical Drive: stap 4, afbeelding 1 van 3 Toshiba HD-A2 Optical Drive Replacement, Optical Drive: stap 4, afbeelding 2 van 3 Toshiba HD-A2 Optical Drive Replacement, Optical Drive: stap 4, afbeelding 3 van 3
    • Remove five 6mm Phillips screws with a Phillips #2 screwdriver.

    • The 2 screws on the right of the cartridge are better shown in the second and third photos.

  5. Toshiba HD-A2 Optical Drive Replacement: stap 5, afbeelding 1 van 2 Toshiba HD-A2 Optical Drive Replacement: stap 5, afbeelding 2 van 2
    • Remove the remaining four 6mm Phillips screws.

  6. Toshiba HD-A2 Optical Drive Replacement: stap 6, afbeelding 1 van 3 Toshiba HD-A2 Optical Drive Replacement: stap 6, afbeelding 2 van 3 Toshiba HD-A2 Optical Drive Replacement: stap 6, afbeelding 3 van 3
    • Using your fingers, gently remove the metal pieces on each side of the cartridge and carefully place them aside.

  7. Toshiba HD-A2 Optical Drive Replacement: stap 7, afbeelding 1 van 2 Toshiba HD-A2 Optical Drive Replacement: stap 7, afbeelding 2 van 2
    • Gently lift the cartridge. Remove two 4mm Phillips screws from the green circuit board.

  8. Toshiba HD-A2 Optical Drive Replacement: stap 8, afbeelding 1 van 1
    • Using your fingers, gently pull off the wires.

  9. Toshiba HD-A2 Optical Drive Replacement: stap 9, afbeelding 1 van 2 Toshiba HD-A2 Optical Drive Replacement: stap 9, afbeelding 2 van 2
    • Using your fingers, pull off the green circuit board from the cartridge and carefully place it down.

    • Be careful not to rip the tape attaching the green circuit boards together.

  10. Toshiba HD-A2 Optical Drive Replacement: stap 10, afbeelding 1 van 2 Toshiba HD-A2 Optical Drive Replacement: stap 10, afbeelding 2 van 2
    • Flip the cartridge over to the bare side with no stickers. Remove four 10mm Phillips screws from each corner.

  11. Toshiba HD-A2 Optical Drive Replacement: stap 11, afbeelding 1 van 2 Toshiba HD-A2 Optical Drive Replacement: stap 11, afbeelding 2 van 2
    • Using your hands, gently lift the lid and carefully place it aside.

  12. Toshiba HD-A2 Optical Drive Replacement: stap 12, afbeelding 1 van 3 Toshiba HD-A2 Optical Drive Replacement: stap 12, afbeelding 2 van 3 Toshiba HD-A2 Optical Drive Replacement: stap 12, afbeelding 3 van 3
    • Flip over the cartridge. Using your hands, gently lift the rest of the silver case.

Eindstreep

Één andere persoon heeft deze handleiding voltooid.

Nouriyah Saleh

Lid sinds: 10/22/18

800 Reputatie

6 handleidingen geschreven

Team

UC Davis, Team S11-G1, Lore Fall 2018 Lid van UC Davis, Team S11-G1, Lore Fall 2018

UCD-LORE-F18S11G1

3 Leden

6 handleidingen geschreven

0 opmerkingen

Voeg opmerking toe

Weergavestatistieken:

Afgelopen 24 uren: 0

Afgelopen 7 dagen: 0

Afgelopen 30 dagen: 8

Altijd: 392