Deze versie kan foutieve bewerkingen bevatten. Schakel over naar de recentste gecontroleerde momentopname.
Wat je nodig hebt
-
Deze stap is niet vertaald. Help het te vertalen
-
Remove the back cover.
-
Work your fingernail or flat object under the cover’s seal. Start at the top right corner just above the front facing camera this is the device “Weak Spot”.
-
After you pry open the first clip slide the flat object along the perimeter of the cover until the cover is removable. You should hear the clips pop open.
-
-
Deze stap is niet vertaald. Help het te vertalen
-
Remove any black tape from the device.
-
Keep the tape, you will need to put it back on when you are done.
-
-
-
Deze stap is niet vertaald. Help het te vertalen
-
Unscrew the battery from the device.
-
The device has 5 screws to remove, keep the screws.
-
-
Deze stap is niet vertaald. Help het te vertalen
-
Remove the the remaining 3 screws to unfasten circuit board. Keep the screws.
-
-
Deze stap is niet vertaald. Help het te vertalen
-
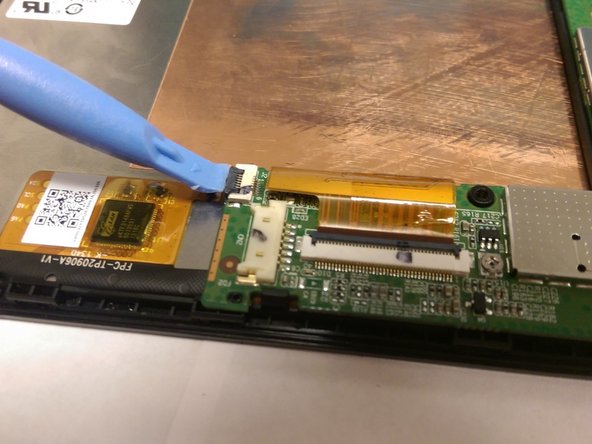
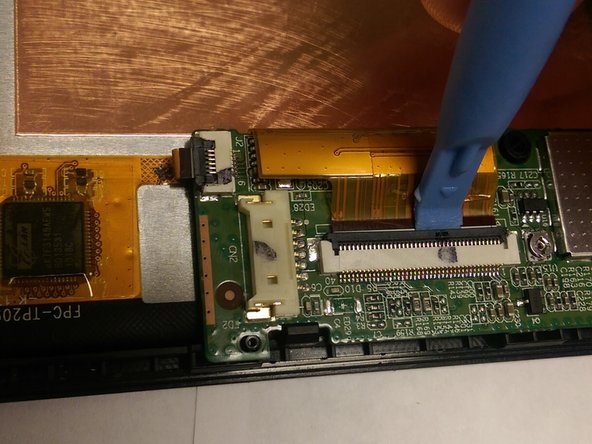
The screen is connected to the circuit board by 2 “Data Cables” (orange ribbons). Data cables include 3 working components, data cables, the white harness plug, and the black lever.
-
Gently flip the black lock up with an opening tool and unplug data cables.
-
-
Deze stap is niet vertaald. Help het te vertalen
-
Use an opening tool to remove the circuit board by gently coaxing it from the clips located just to the right of the circuit board.
-
-
Deze stap is niet vertaald. Help het te vertalen
-
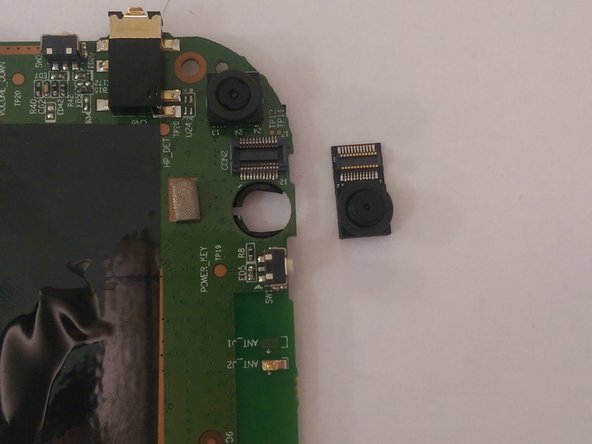
Flip the circuit board over, the rear facing camera is the black rectangle in the upper right corner of the circuit board.
-
Gently unplug the camera from the circuit board and plug the new camera in.
-


Team

USF Tampa, Team 1-3, Tanski Winter 2015 Lid van USF Tampa, Team 1-3, Tanski Winter 2015
USFT-TANSKI-W15S1G3
4 Leden
12 handleidingen geschreven