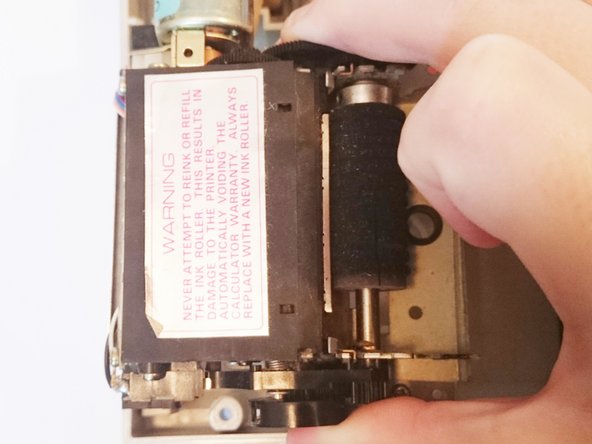
Ga door naar hoofdinhoud

Texas Instruments TI-5130 Printer Unit Replacement

Wat je nodig hebt

  1. Texas Instruments TI-5130 Printer Unit  Replacement, Printer Unit: stap 1, afbeelding 1 van 2 Texas Instruments TI-5130 Printer Unit  Replacement, Printer Unit: stap 1, afbeelding 2 van 2
    • Flip the calculator over and remove the 4 main 10mm screws with a PH1 screwdriver.

  2. Texas Instruments TI-5130 Printer Unit  Replacement: stap 2, afbeelding 1 van 1
    • Flip the calculator back over and remove the top cover.

  3. Texas Instruments TI-5130 Printer Unit  Replacement: stap 3, afbeelding 1 van 1
    • Disconnect the printing unit from the motherboard by pulling up on the connector – located in the bottom left of the motherboard.

  4. Texas Instruments TI-5130 Printer Unit  Replacement: stap 4, afbeelding 1 van 1
    • Remove the ink cartridge by pushing the tab back then lifting it out to gain access to the screw that holds the printer in place.

  5. Texas Instruments TI-5130 Printer Unit  Replacement: stap 5, afbeelding 1 van 2 Texas Instruments TI-5130 Printer Unit  Replacement: stap 5, afbeelding 2 van 2
    • Using a PH1 screwdriver remove the 10mm screw that holds down the printer unit.

    • Remove the printer unit by lifting it up.

Conclusie

To reassemble your device, follow these instructions in reverse order.

3 andere personen hebben deze handleiding voltooid.

Shannon Perkins

Lid sinds: 09/17/15

652 Reputatie

3 handleidingen geschreven

Team

2 opmerkingen

wehre did you buy the replacement printer

Tino ullrich - Antwoord

what sources are there for TI-5130 printer unit?

Norman Todd - Antwoord

Voeg opmerking toe

Weergavestatistieken:

Afgelopen 24 uren: 1

Afgelopen 7 dagen: 1

Afgelopen 30 dagen: 10

Altijd: 2,273