Inleiding
The UI board is responsible for the knobs and keyboard action and connects to the speaker. If it fails there will be no fun at all.
This guide will show you how to replace the UI board of your OP-1.
Wat je nodig hebt
-
-
The four longer keys from the fingerboard are to be handled from the left side to get them off.
-
The eight smaller keys need to be levered from the bottom up.
-
-
-
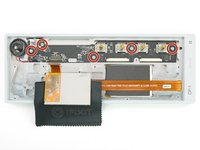
The scissor mechanism of the eight small keys are obstructing the underlying screws.
-
By using again an opening tool or opening pick these can be snapped off easily.
-
-
-
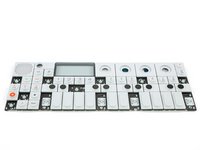
Loosen those 12 screws with a Phillips #00 screwdriver.
-
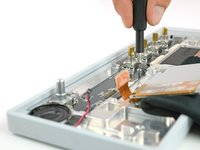
Then just pull off the four rotary knobs and the volume knob.
-
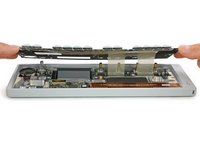
Now it is possible to slightly lift the keyboard and set it back.
Your missing the ribbon decoupling step, unless you skipped it because it’s such a tight squeeze to get back in.
The concept of removing the square panels that the knobs sit on was skipped.
-
-
-
-
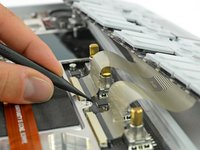
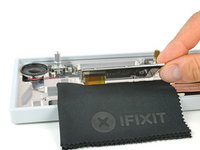
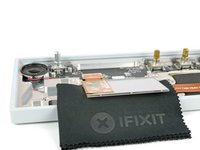
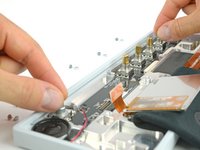
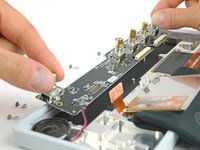
Unlock the flex cables by pushing the two black nibs on both sides of each connector.
-
Now you can pull the flex cables out and remove the keyboard completely.
I found bring the OP-1 higher up off my work surface made installing the ribbons much easier, oh and keep the keyboard assembly parallel to the OP-1 to ensure the ribbons seat evenly.
There ribbons are incredibly frustrating -- I cannot, for the life of me, lock them in place. Even after bending them, the direction of the bend itself creates tension that pulls them out of the zero insertion force connector. The black nibs do not seem to provide enough locking force. Frustratingly enough, this happens slowly over time, so usually 24 hours after I have fully reassembled the keyboard, it starts malfunctioning again. I would really appreciate some help here.
-
-
-
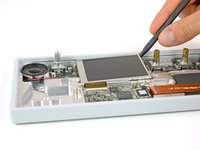
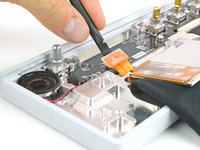
The display is held in place with a mild adhesive. A spudger helps you to get it free.
-
Make sure the display won't be damaged when you flip it over to the front to access the UI board.
-
-
-
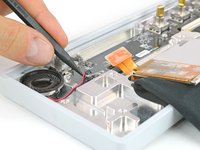
Now the UI board is free to take out. You can grab it by the knobs and start lifting it on the right side half way out.
-
On the left side the speaker and its cable might be in the way to get it out straight. Just move it diagonally to the right to get it out completely.
-


To reassemble your device, follow these instructions in reverse order.
To reassemble your device, follow these instructions in reverse order.
Annuleren: ik heb deze handleiding niet afgemaakt.
10 andere personen hebben deze handleiding voltooid.

Team

Tobias Isakeit - Repairability Engineer Lid van Tobias Isakeit - Repairability Engineer
Business
1 Lid
1.132 handleidingen geschreven
2Gids Commentaar
Can anyone recommend a good adhesive tape to fix the screen in place after doing the repair?
No need to replace the adhesive tape as long as you leave it attached to the op1 or to the back of the display itself. So when you go to put everything back together, slot the display back into place, the adhesive tape that is there should stick very gently and when you go to put the keyboard with the display glass back, everything will be held in place.
Also, this guide skips over detaching the ribbon cables when you are removing the keyboard, the two connectors each have two (2 on each port) very small black colored locking mechanisms on the left and right of the cable's port, using a spudger you can push those locking mechanisms up about 2mm, and the ribbons should detach from the ui board seamlessly allowing you to gently pull them out. When putting it back together, insert the ribbon cable evenly to the new port, and push the locking mechanisms into place (reverse from what you did before).