Ga door naar hoofdinhoud

SwagTron T1 Outer Shell Replacement

Wat je nodig hebt

  1. SwagTron T1 Outer Shell Replacement, Back Panels: stap 1, afbeelding 1 van 1
    • Ensure that the SwagTron is off.

    • Turn the SwagTron upside down to see the underside.

  2. SwagTron T1 Outer Shell Replacement: stap 2, afbeelding 1 van 3 SwagTron T1 Outer Shell Replacement: stap 2, afbeelding 2 van 3 SwagTron T1 Outer Shell Replacement: stap 2, afbeelding 3 van 3
    • Unscrew the eighteen 10mm screws that secure the back panels using a Phillips #2 screwdriver.

    • The screws are tightly in place. It will take effort to screw them out.

    • The panel is still attached to the SwagTron by wires that go to the motherboard.

    • Carefully lift the panels off

  3. SwagTron T1 Outer Shell Replacement: stap 3, afbeelding 1 van 3 SwagTron T1 Outer Shell Replacement: stap 3, afbeelding 2 van 3 SwagTron T1 Outer Shell Replacement: stap 3, afbeelding 3 van 3
    • Follow the wires from the panels to the motherboard.

    • You may need to cut any zip ties that are holding the wires together.

    • There is one connection on the battery side and three on the other side that must be removed.

    • These connections may be difficult to remove. Try to securely press the connection and pull firmly.

    • Your back panels are now completely removed.

  4. SwagTron T1 Outer Shell Replacement, Outer Shell: stap 4, afbeelding 1 van 2 SwagTron T1 Outer Shell Replacement, Outer Shell: stap 4, afbeelding 2 van 2
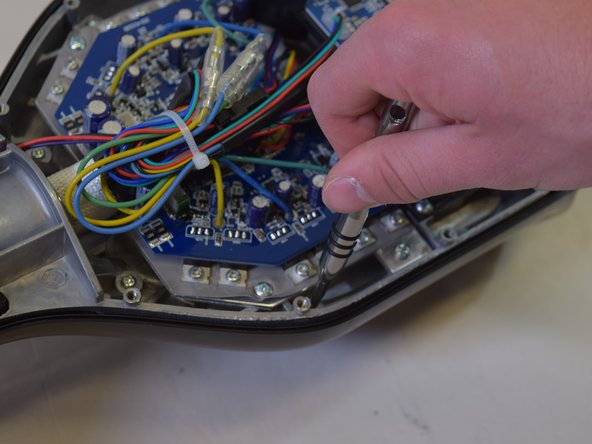
    • Unscrew the twelve 10mm screws that connect the metal chassis to the top plastic panel.

    • These screws will be low into the SwagTron.

  5. SwagTron T1 Outer Shell Replacement: stap 5, afbeelding 1 van 1
    • Turn the SwagTron right side up and slightly lift up the panel.

    • Be careful to not pull too hard because the panel is still attached to the SwagTron by wires.

  6. SwagTron T1 Outer Shell Replacement: stap 6, afbeelding 1 van 3 SwagTron T1 Outer Shell Replacement: stap 6, afbeelding 2 van 3 SwagTron T1 Outer Shell Replacement: stap 6, afbeelding 3 van 3
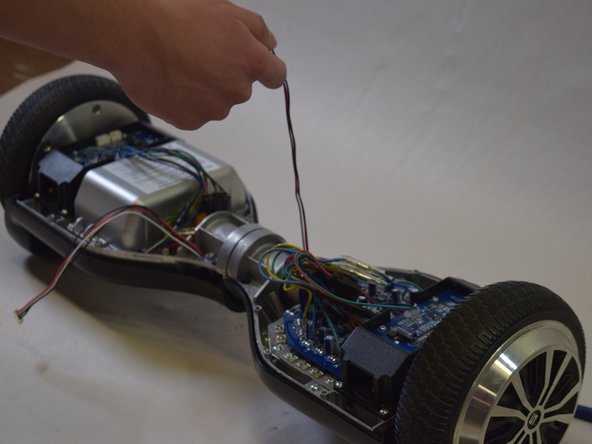
    • Turn the SwagTron over and disconnect the wires from the motherboard.

    • Follow the wires to the underside of the SwagTron.

    • Carefully remove the cord and the panel together.

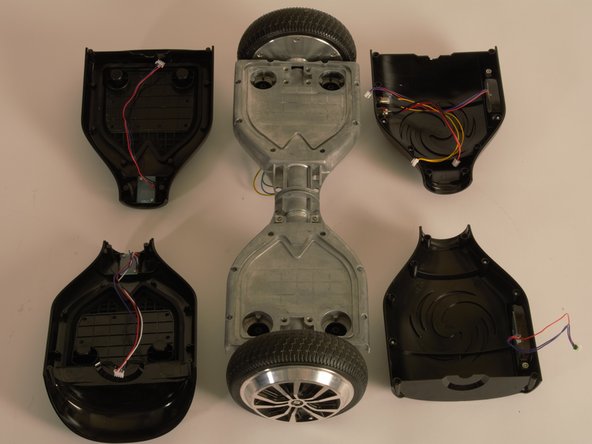
    • All the panels are now free from the SwagTron.

Conclusie

To reassemble your device, follow these instructions in reverse order.

Één andere persoon heeft deze handleiding voltooid.

Gloria Whang

Lid sinds: 04/13/17

179 Reputatie

1 Handleiding geschreven

Team

Cal Poly, Team S17-G5, Banghart Spring 2017 Lid van Cal Poly, Team S17-G5, Banghart Spring 2017

CPSU-BANGHART-S17S17G5

4 Leden

5 handleidingen geschreven

4 opmerkingen

Where did you ind a replacement shell for the Swagtron T1? I need to buy a new one, but can’t seem to find a place to buy it online.

Syd Jensen - Antwoord

Where can I buy a Swagtron T1 replacement shell?

Syd Jensen - Antwoord

Syd any luck finding a replacement shell?  I need to order the same kind and cannot find it online.

Craig -

Amazon.com Keyword: CertiCable

Jesse Griffis -

Voeg opmerking toe

Weergavestatistieken:

Afgelopen 24 uren: 1

Afgelopen 7 dagen: 2

Afgelopen 30 dagen: 7

Altijd: 1,942