Deze versie kan foutieve bewerkingen bevatten. Schakel over naar de recentste gecontroleerde momentopname.
Wat je nodig hebt
-
Deze stap is niet vertaald. Help het te vertalen
-
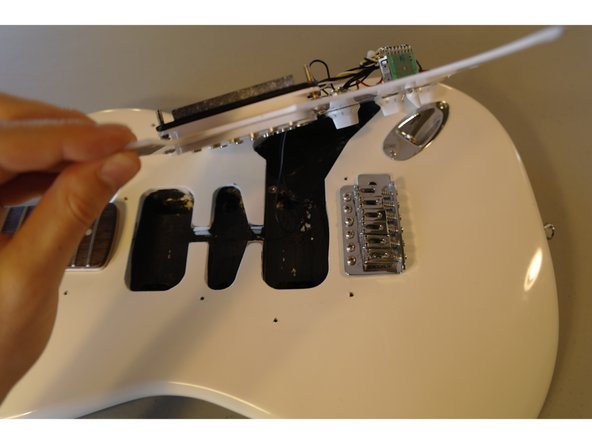
Unwind the strings by turning the tuning pegs.
-
Pull the strings out of the tuning peg holes.
-
Push the strings out through the back plate holes.
-
-
Deze stap is niet vertaald. Help het te vertalen
-
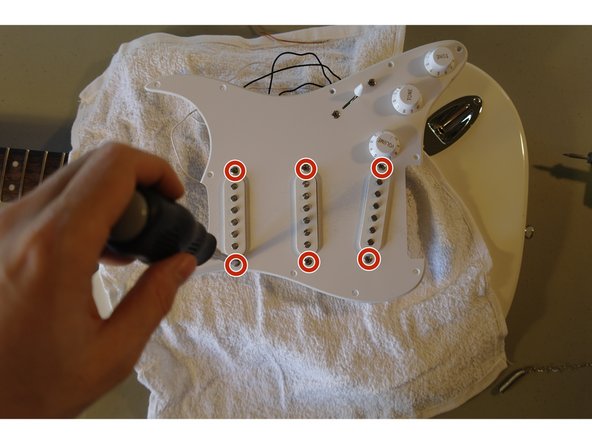
Remove the 11 screws holding the pickguard to the body of the guitar.
-
-
Deze stap is niet vertaald. Help het te vertalen
-
Lift up the pickup guard gently.
-
Flip the pickup guard to expose the wiring.
-
Place a towel underneath the pickup guard to protect your guitar's body.
-
-
-
Deze stap is niet vertaald. Help het te vertalen
-
Take note of where each pickup is wired.
-
Make sure to keep track of the negative and positive wires. Black wires usually indicate negative wires.
-
-
Deze stap is niet vertaald. Help het te vertalen
-
Desolder the pickups from the pickup selector switch using a quality soldering iron and soldering wick.
-
Desolder the pickups from the potentiometers.
-
-
Deze stap is niet vertaald. Help het te vertalen
-
Flip the pickup guard back to its original position.
-
Remove the screws holding the pickups to the pickup guard.
-
-
Deze stap is niet vertaald. Help het te vertalen
-
Flip the pickup guard to reveal the wiring.
-
Remove the pickups from the pickup guard. They should come out very easily.
-


Annuleren: ik heb deze handleiding niet afgemaakt.
4 andere personen hebben deze handleiding voltooid.
Team

Cal Poly, Team 10-5, Green Fall 2015 Lid van Cal Poly, Team 10-5, Green Fall 2015
CPSU-GREEN-F15S10G5
3 Leden
4 handleidingen geschreven