Ga door naar hoofdinhoud

Sony Xplod CDX-MP30 Power Supply Replacement

Wat je nodig hebt

  1. Sony Xplod CDX-MP30 Power Supply Replacement, Front Panel: stap 1, afbeelding 1 van 3 Sony Xplod CDX-MP30 Power Supply Replacement, Front Panel: stap 1, afbeelding 2 van 3 Sony Xplod CDX-MP30 Power Supply Replacement, Front Panel: stap 1, afbeelding 3 van 3
    • Press down the release button on the bottom left corner of the face plate.

    • Then remove the face plate carefully.

  2. Sony Xplod CDX-MP30 Power Supply Replacement, Main Panels: stap 2, afbeelding 1 van 2 Sony Xplod CDX-MP30 Power Supply Replacement, Main Panels: stap 2, afbeelding 2 van 2
    Gereedschap gebruikt in deze stap:
    Phillips #0 Screwdriver
    $5.49
    Koop
  3. Sony Xplod CDX-MP30 Power Supply Replacement: stap 3, afbeelding 1 van 3 Sony Xplod CDX-MP30 Power Supply Replacement: stap 3, afbeelding 2 van 3 Sony Xplod CDX-MP30 Power Supply Replacement: stap 3, afbeelding 3 van 3
    Gereedschap gebruikt in deze stap:
    Phillips #1 Screwdriver
    $5.49
    Koop
    • Using the Phillips #1 Screwdriver, unscrew the 2 thick screws (length - 7.69mm) located on both sides of the stereo.

    • Remove side-metal plates gently.

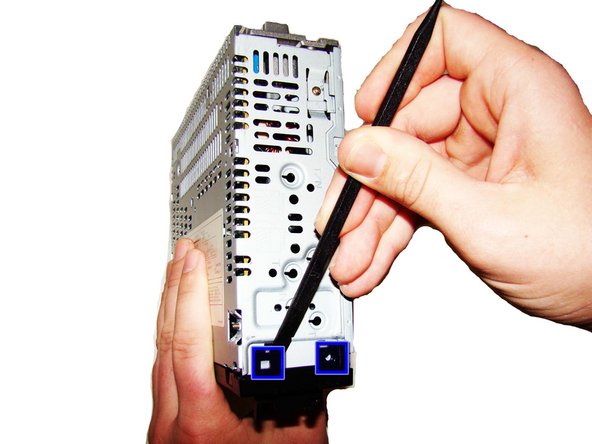
    • Use the Heavy-duty Spudger, insert the flat end under each of the black flaps indicated in the picture. Use leverage to pry and pop them loose.

  4. Sony Xplod CDX-MP30 Power Supply Replacement: stap 4, afbeelding 1 van 1
    • Remove the black front plate of the stereo.

  5. Sony Xplod CDX-MP30 Power Supply Replacement: stap 5, afbeelding 1 van 2 Sony Xplod CDX-MP30 Power Supply Replacement: stap 5, afbeelding 2 van 2
    Gereedschap gebruikt in deze stap:
    Phillips #0 Screwdriver
    $5.49
    Koop
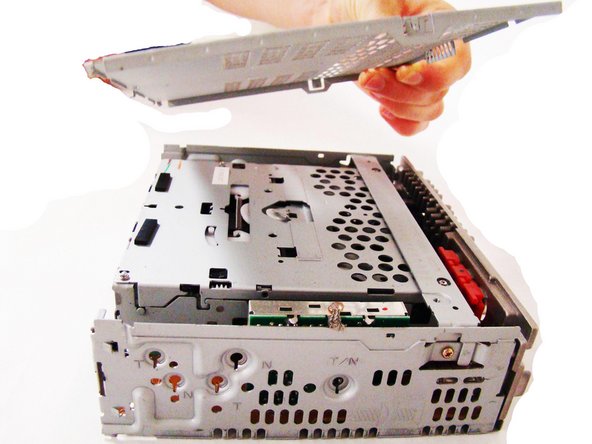
    • Using the Phillips #0 Screwdriver, unscrew the 1 gold screw (height - 7.47mm) on the top of the stereo.

    • Lift off the top plate.

  6. Sony Xplod CDX-MP30 Power Supply Replacement: stap 6, afbeelding 1 van 3 Sony Xplod CDX-MP30 Power Supply Replacement: stap 6, afbeelding 2 van 3 Sony Xplod CDX-MP30 Power Supply Replacement: stap 6, afbeelding 3 van 3
    Gereedschap gebruikt in deze stap:
    Phillips #0 Screwdriver
    $5.49
    Koop
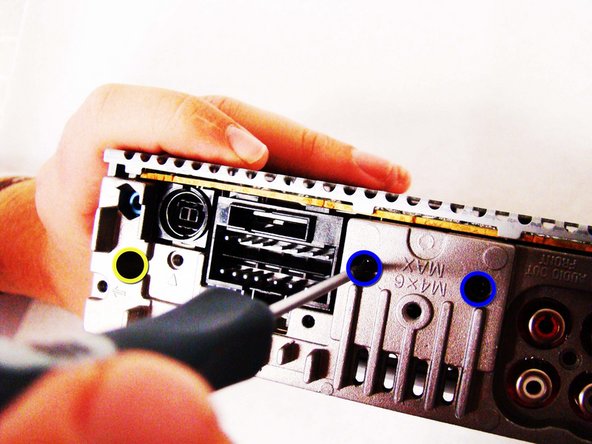
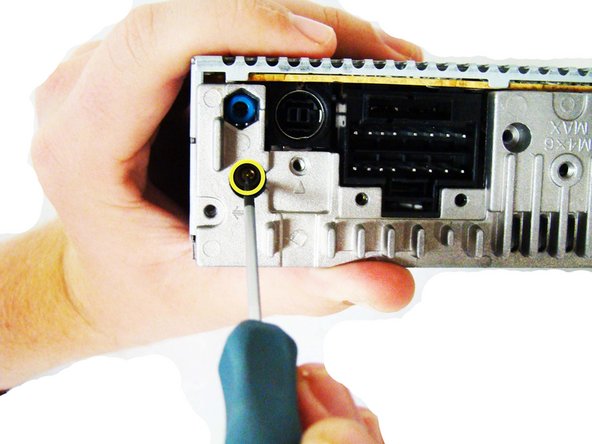
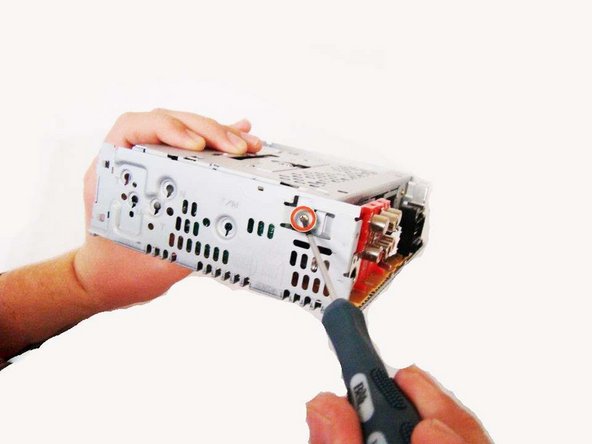
    • Using the Phillips #0 Screwdriver, unscrew the 8 gold screws (length - 9.26mm), located on the back side of the stereo.

    • Using the Phillips #0 Screwdriver, unscrew the 2 black screws (length - 13.27mm), also located on the back of the stereo.

    • Using the Phillips #0 Screwdriver, unscrew the 1 gold screw (length - 9.3mm), located on the bottom of a hole as noted in pictures (2) and (3).

  7. Sony Xplod CDX-MP30 Power Supply Replacement: stap 7, afbeelding 1 van 3 Sony Xplod CDX-MP30 Power Supply Replacement: stap 7, afbeelding 2 van 3 Sony Xplod CDX-MP30 Power Supply Replacement: stap 7, afbeelding 3 van 3
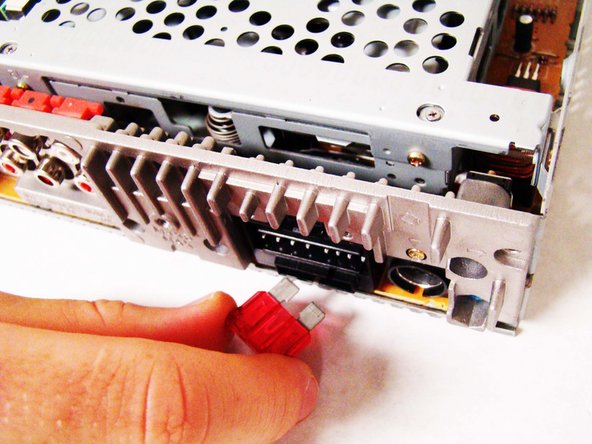
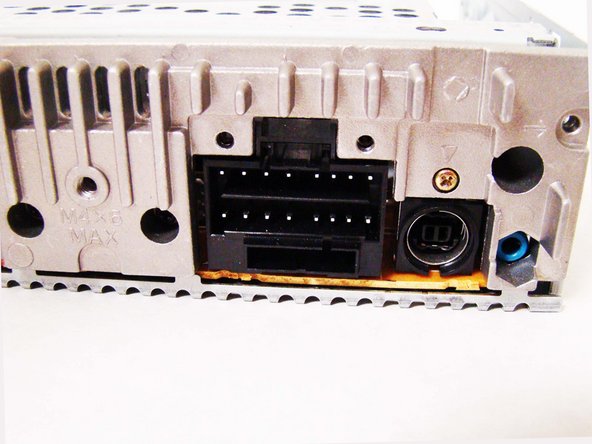
    • Carefully pull the fuse out of the back of the stereo.

  8. Sony Xplod CDX-MP30 Power Supply Replacement: stap 8, afbeelding 1 van 2 Sony Xplod CDX-MP30 Power Supply Replacement: stap 8, afbeelding 2 van 2
    • Firmly grip the body of the stereo and pull off the silver back plate.

  9. Sony Xplod CDX-MP30 Power Supply Replacement: stap 9, afbeelding 1 van 1
    Gereedschap gebruikt in deze stap:
    Phillips #0 Screwdriver
    $5.49
    Koop
  10. Sony Xplod CDX-MP30 Power Supply Replacement: stap 10, afbeelding 1 van 2 Sony Xplod CDX-MP30 Power Supply Replacement: stap 10, afbeelding 2 van 2
    Gereedschap gebruikt in deze stap:
    Phillips #0 Screwdriver
    $5.49
    Koop
    • Using the Phillips #0 Screwdriver, unscrew the 2 gold screws (length - 7.34mm) found on both sides of the stereo.

  11. Sony Xplod CDX-MP30 Power Supply Replacement: stap 11, afbeelding 1 van 3 Sony Xplod CDX-MP30 Power Supply Replacement: stap 11, afbeelding 2 van 3 Sony Xplod CDX-MP30 Power Supply Replacement: stap 11, afbeelding 3 van 3
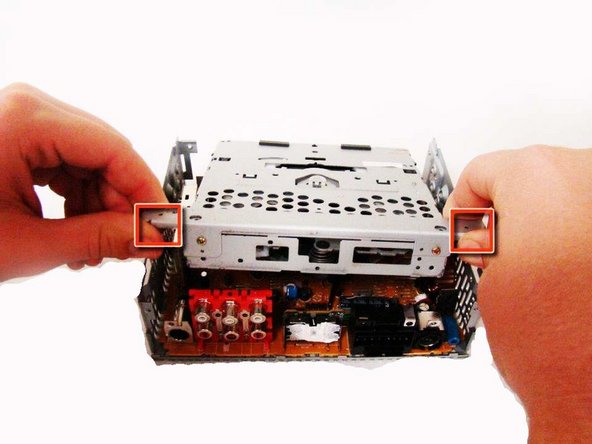
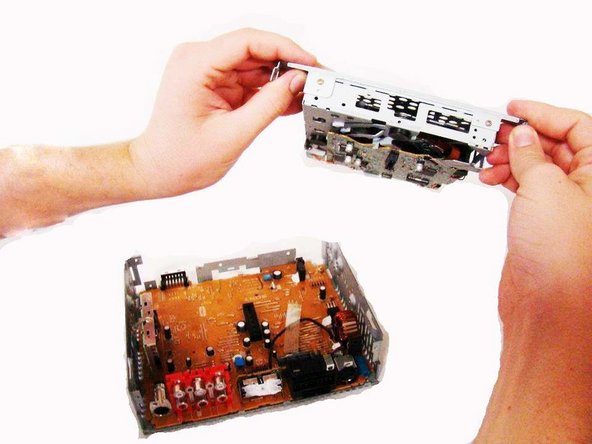
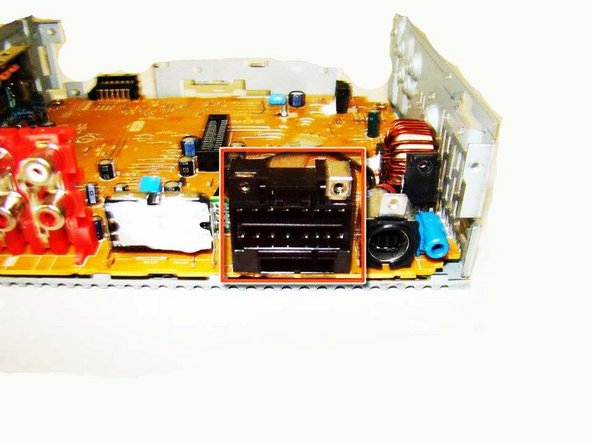
    • Grip the top portion of the stereo, where the CD-Drive is located, and gently pull up to release it, but you will not be able to lift it all the way out.

    • Grab the two tabs located near the back of the stereo, and gently pull the CD-drive front the rest of the device.

  12. Sony Xplod CDX-MP30 Power Supply Replacement, Power Supply: stap 12, afbeelding 1 van 2 Sony Xplod CDX-MP30 Power Supply Replacement, Power Supply: stap 12, afbeelding 2 van 2
Conclusie

To reassemble your device, follow these instructions in reverse order.

2 andere personen hebben deze handleiding voltooid.

Chao Chen

Lid sinds: 10/04/11

79 Reputatie

5 handleidingen geschreven

Team

Cal Poly, Team 5-35, Amido Fall 2011 Lid van Cal Poly, Team 5-35, Amido Fall 2011

CPSU-AMIDO-F11S5G35

4 Leden

8 handleidingen geschreven

0 opmerkingen

Voeg opmerking toe

Weergavestatistieken:

Afgelopen 24 uren: 2

Afgelopen 7 dagen: 3

Afgelopen 30 dagen: 5

Altijd: 7,222