Ga door naar hoofdinhoud

Sony Xperia Z2 Earpiece Replacement

Wat je nodig hebt

Video overzicht

  1. Sony Xperia Z2 Earpiece Replacement, Rear / Battery Cover: stap 1, afbeelding 1 van 3 Sony Xperia Z2 Earpiece Replacement, Rear / Battery Cover: stap 1, afbeelding 2 van 3 Sony Xperia Z2 Earpiece Replacement, Rear / Battery Cover: stap 1, afbeelding 3 van 3
    • Switch off the phone.

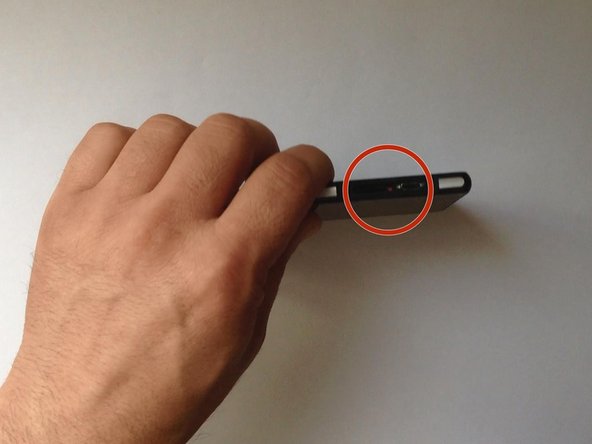
    • If you can't switch it off, you can use the OFF button near to the SIM card Tray.

    • Warm the Back Cover. You can use a hairdryer.

    • Be careful, the Back Cover is plastic.

  2. Sony Xperia Z2 Earpiece Replacement: stap 2, afbeelding 1 van 3 Sony Xperia Z2 Earpiece Replacement: stap 2, afbeelding 2 van 3 Sony Xperia Z2 Earpiece Replacement: stap 2, afbeelding 3 van 3
    • Use a small suction cup and plastic tools for separating the Rear panel.

    • There is Adhesive tape on the edges of the phone and some between the Battery and the Back Cover, as well. I found a small tab to pull just inside the top of the cover that removed the adhesive and released the back panel from the battery. Its that same style adhesive strip as used in the Iphone 5/5c/5s.

  3. Sony Xperia Z2 Earpiece Replacement: stap 3, afbeelding 1 van 2 Sony Xperia Z2 Earpiece Replacement: stap 3, afbeelding 2 van 2
    • Before installing the new cover, you must clean the phone from the old adhesive tape and install a new one (if your spare part has come without double sided adhesive tape).

  4. Sony Xperia Z2 Earpiece Replacement, Battery: stap 4, afbeelding 1 van 3 Sony Xperia Z2 Earpiece Replacement, Battery: stap 4, afbeelding 2 van 3 Sony Xperia Z2 Earpiece Replacement, Battery: stap 4, afbeelding 3 van 3
  5. Sony Xperia Z2 Earpiece Replacement, Logic Board: stap 5, afbeelding 1 van 2 Sony Xperia Z2 Earpiece Replacement, Logic Board: stap 5, afbeelding 2 van 2
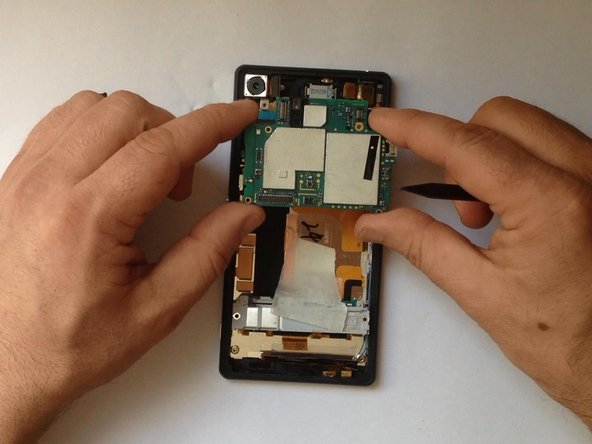
    • Disconnect one by one:

    • Magnetic Charging Dock Flex Cable

    • Volume / Power Button and Microphone Flex Cable

    • Main Camera

    • Audio Jack and Light Sensor Flex cable

    • Coaxial Antenna Cable

  6. Sony Xperia Z2 Earpiece Replacement: stap 6, afbeelding 1 van 3 Sony Xperia Z2 Earpiece Replacement: stap 6, afbeelding 2 van 3 Sony Xperia Z2 Earpiece Replacement: stap 6, afbeelding 3 van 3
  7. Sony Xperia Z2 Earpiece Replacement, Earpiece: stap 7, afbeelding 1 van 1
Conclusie

To reassemble your device, follow these instructions in reverse order.

7 andere personen hebben deze handleiding voltooid.

ZFix

Lid sinds: 12/09/13

191.278 Reputatie

330 handleidingen geschreven

Team

Master Techs Lid van Master Techs

Community

322 Leden

2.528 handleidingen geschreven

3 opmerkingen

Would be nice with a comment on how to remove the earpiece.

Since the phone is waterresistance the headjack and earpiece are taped to the body which makes that you need to buy a new sparepart, but look out on ebay that you get a part with tape to it.

Claes - Antwoord

After having done the removal of the earpiece you will have to, either buy a new adhesive for the earpice or a new earpiece. But be aware some spareparts are sold without adhesive.

Claes -

I accidentally torn apart one of the cables( vibrate cable:the brown one) I'm messed up! Vibration not working. What can I do? Where can I buy one of those cables? Please reply!

Mahtab - Antwoord

Voeg opmerking toe

Weergavestatistieken:

Afgelopen 24 uren: 0

Afgelopen 7 dagen: 0

Afgelopen 30 dagen: 1

Altijd: 7,608