Ga door naar hoofdinhoud

Sony Walkman NWZ-S764 Bluetooth module Replacement

Wat je nodig hebt

  1. Sony Walkman NWZ-S764 Bluetooth module Replacement, Removing the back cover: stap 1, afbeelding 1 van 3 Sony Walkman NWZ-S764 Bluetooth module Replacement, Removing the back cover: stap 1, afbeelding 2 van 3 Sony Walkman NWZ-S764 Bluetooth module Replacement, Removing the back cover: stap 1, afbeelding 3 van 3
    • Remove the two black 6.4mm Phillips screws from the back of the device.

  2. Sony Walkman NWZ-S764 Bluetooth module Replacement: stap 2, afbeelding 1 van 3 Sony Walkman NWZ-S764 Bluetooth module Replacement: stap 2, afbeelding 2 van 3 Sony Walkman NWZ-S764 Bluetooth module Replacement: stap 2, afbeelding 3 van 3
    • Using a plastic opening tool, work your way around the edges of the device, carefully prying off the front panel.

  3. Sony Walkman NWZ-S764 Bluetooth module Replacement: stap 3, afbeelding 1 van 2 Sony Walkman NWZ-S764 Bluetooth module Replacement: stap 3, afbeelding 2 van 2
    • Remove the two 2.8 mm phillips screws located on either side of the device near the top.

  4. Sony Walkman NWZ-S764 Bluetooth module Replacement: stap 4, afbeelding 1 van 2 Sony Walkman NWZ-S764 Bluetooth module Replacement: stap 4, afbeelding 2 van 2
    • Carefully pull the top piece away from the device.

  5. Sony Walkman NWZ-S764 Bluetooth module Replacement, Removing the Bluetooth module: stap 5, afbeelding 1 van 3 Sony Walkman NWZ-S764 Bluetooth module Replacement, Removing the Bluetooth module: stap 5, afbeelding 2 van 3 Sony Walkman NWZ-S764 Bluetooth module Replacement, Removing the Bluetooth module: stap 5, afbeelding 3 van 3
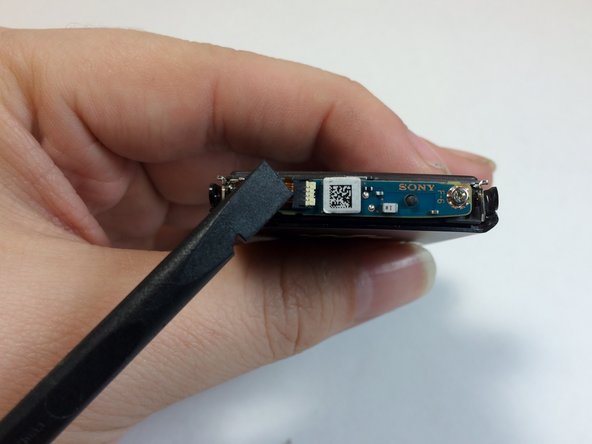
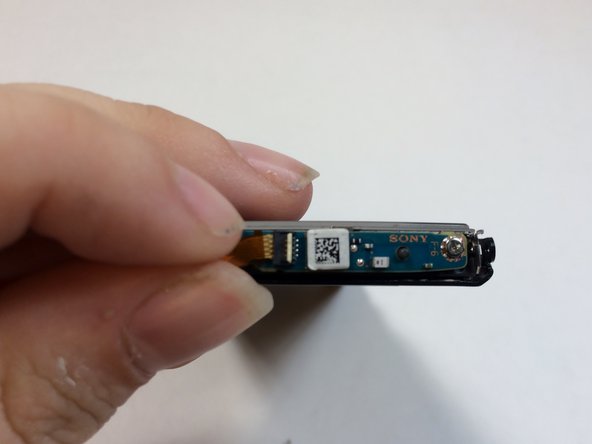
    • Use the flat end of the spudger to flip up the retaining flap for the bluetooth module.

    • Be sure to lift up on the retaining flap, and not the socket itself.

  6. Sony Walkman NWZ-S764 Bluetooth module Replacement: stap 6, afbeelding 1 van 3 Sony Walkman NWZ-S764 Bluetooth module Replacement: stap 6, afbeelding 2 van 3 Sony Walkman NWZ-S764 Bluetooth module Replacement: stap 6, afbeelding 3 van 3
    • Remove the two 1.8mm silver Phillips screws on the Bluetooth module.

    • Lift up on and remove the Bluetooth module.

    • The ribbon cable must first be removed in order to access the highlighted screw.

Conclusie

To reassemble your device, follow these instructions in reverse order.

John Ferguson

Lid sinds: 01/21/15

657 Reputatie

5 handleidingen geschreven

Team

USF Tampa, Team 4-2, Brown Winter 2015 Lid van USF Tampa, Team 4-2, Brown Winter 2015

USFT-BROWN-W15S4G2

4 Leden

6 handleidingen geschreven

0 opmerkingen

Voeg opmerking toe

Weergavestatistieken:

Afgelopen 24 uren: 0

Afgelopen 7 dagen: 1

Afgelopen 30 dagen: 9

Altijd: 641