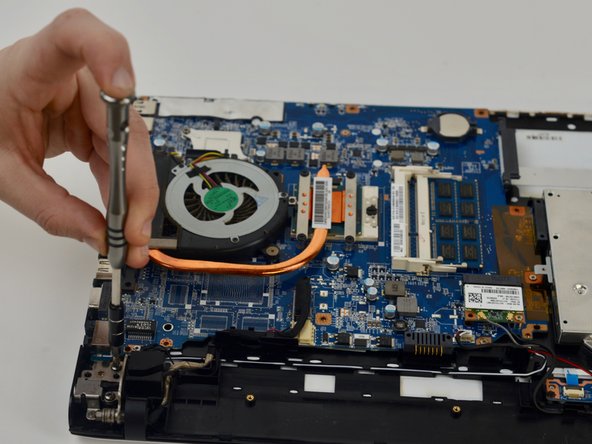
Ga door naar hoofdinhoud

Sony Vaio SVE151G11L Display Replacement

Wat je nodig hebt

  1. Sony Vaio SVE151G11L Display Replacement, Display: stap 1, afbeelding 1 van 1
    • Flip laptop over so the bottom is facing upwards.

    • Remove bottom of laptop.

  2. Sony Vaio SVE151G11L Display Replacement: stap 2, afbeelding 1 van 1
    • Remove antenna wires attached to the WiFi card using a plastic opening tool.

  3. Sony Vaio SVE151G11L Display Replacement: stap 3, afbeelding 1 van 1
    • Remove the other antenna wire.

  4. Sony Vaio SVE151G11L Display Replacement: stap 4, afbeelding 1 van 1
    • Remove the display cable by pulling upwards.

  5. Sony Vaio SVE151G11L Display Replacement: stap 5, afbeelding 1 van 1
    • Remove the power display cable with a plastic opening tool by pushing outwards.

  6. Sony Vaio SVE151G11L Display Replacement: stap 6, afbeelding 1 van 2 Sony Vaio SVE151G11L Display Replacement: stap 6, afbeelding 2 van 2
    • Remove 4 hinge screws with a Phillips #0 screwdriver.

  7. Sony Vaio SVE151G11L Display Replacement: stap 7, afbeelding 1 van 2 Sony Vaio SVE151G11L Display Replacement: stap 7, afbeelding 2 van 2
    • Lift upward on the hinges with a plastic opening tool to release them.

  8. Sony Vaio SVE151G11L Display Replacement: stap 8, afbeelding 1 van 1
    • Separate the bottom of the laptop from the monitor.

  9. Sony Vaio SVE151G11L Display Replacement: stap 9, afbeelding 1 van 1
    • Completely detach screen from the laptop.

Conclusie

To reassemble your device, follow these instructions in reverse order.

Één andere persoon heeft deze handleiding voltooid.

Azka Khanani

Lid sinds: 10/17/18

313 Reputatie

2 handleidingen geschreven

Team

UMass Dartmouth, Team S9-G9, Valliere Fall 2018 Lid van UMass Dartmouth, Team S9-G9, Valliere Fall 2018

UMASSD-VALLIERE-F18S9G9

4 Leden

12 handleidingen geschreven

0 opmerkingen

Voeg opmerking toe

Weergavestatistieken:

Afgelopen 24 uren: 0

Afgelopen 7 dagen: 6

Afgelopen 30 dagen: 18

Altijd: 884