Ga door naar hoofdinhoud

Sony Vaio PCG-4121GL Wifi Board Replacement

Wat je nodig hebt

  1. Sony Vaio PCG-4121GL Wifi Board Replacement, Battery: stap 1, afbeelding 1 van 2 Sony Vaio PCG-4121GL Wifi Board Replacement, Battery: stap 1, afbeelding 2 van 2
    • Remove the two 3mm Phillips #0 screws on the bottom of the computer that secure the plastic backing.

  2. Sony Vaio PCG-4121GL Wifi Board Replacement: stap 2, afbeelding 1 van 3 Sony Vaio PCG-4121GL Wifi Board Replacement: stap 2, afbeelding 2 van 3 Sony Vaio PCG-4121GL Wifi Board Replacement: stap 2, afbeelding 3 van 3
    • Pull the bottom plate towards yourself until it unhinges fully.

    • Once the plate is free from the backing remove it completely.

  3. Sony Vaio PCG-4121GL Wifi Board Replacement: stap 3, afbeelding 1 van 1
    • Look for the blue tab that is located to the bottom left of the battery.

  4. Sony Vaio PCG-4121GL Wifi Board Replacement: stap 4, afbeelding 1 van 3 Sony Vaio PCG-4121GL Wifi Board Replacement: stap 4, afbeelding 2 van 3 Sony Vaio PCG-4121GL Wifi Board Replacement: stap 4, afbeelding 3 van 3
    • Pull the blue tab towards yourself until you hear a click.

    • Once the blue tab is released, pull up on the battery.

    • Once the battery can move freely, take it out completely.

    • It may be helpful to have a spudger to make it easier to release the blue tab.

  5. Sony Vaio PCG-4121GL Wifi Board Replacement, WiFi Board: stap 5, afbeelding 1 van 2 Sony Vaio PCG-4121GL Wifi Board Replacement, WiFi Board: stap 5, afbeelding 2 van 2
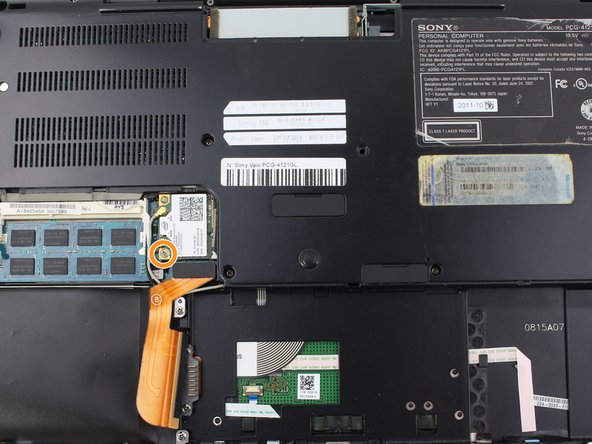
    • Lift up the two golden knobs on the left side of the WiFi board.

    • Remove the single 3mm Phillips #0 screw located on the WiFi board to the top left of the battery compartment.

  6. Sony Vaio PCG-4121GL Wifi Board Replacement: stap 6, afbeelding 1 van 2 Sony Vaio PCG-4121GL Wifi Board Replacement: stap 6, afbeelding 2 van 2
    • Once the screw and the golden knobs have been disconnected, pull the WiFi board out to the left.

    • Once the WiFi board is free from the device, remove completely.

Conclusie

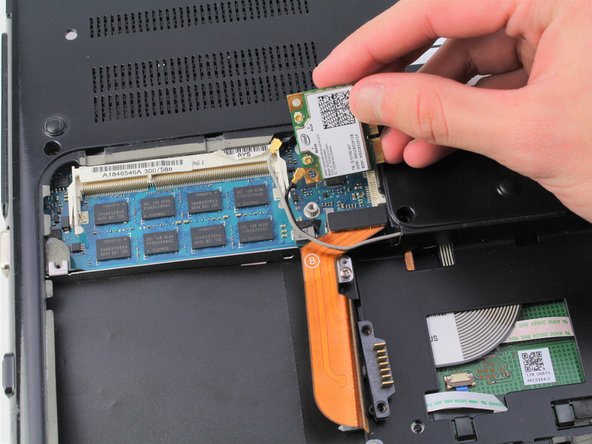
To reassemble your device, follow these instructions in reverse order.

Miguel Camarena

Lid sinds: 01/24/19

367 Reputatie

3 handleidingen geschreven

Team

Cal Poly, Team S2-G2, White Winter 2019 Lid van Cal Poly, Team S2-G2, White Winter 2019

CPSU-WHITE-W19S2G2

4 Leden

10 handleidingen geschreven

0 opmerkingen

Voeg opmerking toe

Weergavestatistieken:

Afgelopen 24 uren: 0

Afgelopen 7 dagen: 6

Afgelopen 30 dagen: 13

Altijd: 579