Ga door naar hoofdinhoud

Sony Vaio PCG-3C2L RAM Replacement

Wat je nodig hebt

  1. Sony Vaio PCG-3C2L RAM Replacement, Battery: stap 1, afbeelding 1 van 1
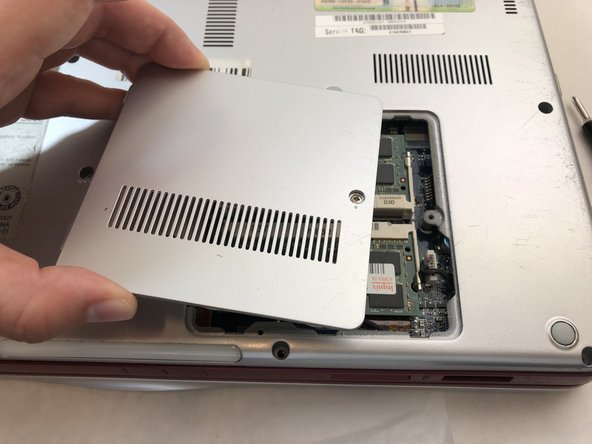
    • Turn your computer over so the bottom is facing up.

    • The battery should be in the top on the back of the computer.

  2. Sony Vaio PCG-3C2L RAM Replacement: stap 2, afbeelding 1 van 2 Sony Vaio PCG-3C2L RAM Replacement: stap 2, afbeelding 2 van 2
    • Initially, the "lock" button should be pushed all the way to the left. To unlock the battery, move the lock button from the left to the right.

  3. Sony Vaio PCG-3C2L RAM Replacement: stap 3, afbeelding 1 van 1
    • After unlocking the battery, hold the "release" button and push to the left.

  4. Sony Vaio PCG-3C2L RAM Replacement: stap 4, afbeelding 1 van 3 Sony Vaio PCG-3C2L RAM Replacement: stap 4, afbeelding 2 van 3 Sony Vaio PCG-3C2L RAM Replacement: stap 4, afbeelding 3 van 3
    • Keep the "release" button pressed.

    • Use the iFixit opening tool (or your hands) to lift the battery up.

  5. Sony Vaio PCG-3C2L RAM Replacement, RAM: stap 5, afbeelding 1 van 1
    • Flip the computer over so the bottom is facing up.

  6. Sony Vaio PCG-3C2L RAM Replacement: stap 6, afbeelding 1 van 2 Sony Vaio PCG-3C2L RAM Replacement: stap 6, afbeelding 2 van 2
    • Unscrew the panel screw with a Phillips #0 screwdriver.

    • The screw is captive, it does not get removed from the panel.

    • Remove the panel from the laptop.

  7. Sony Vaio PCG-3C2L RAM Replacement: stap 7, afbeelding 1 van 3 Sony Vaio PCG-3C2L RAM Replacement: stap 7, afbeelding 2 van 3 Sony Vaio PCG-3C2L RAM Replacement: stap 7, afbeelding 3 van 3
    • Inside the panel there will be two green panels with black rectangles on top. This is the RAM.

    • To remove the RAM, use your fingers to press the metal tabs on the white holders outwards.

    • At this point, the green panel will flip up slightly.

  8. Sony Vaio PCG-3C2L RAM Replacement: stap 8, afbeelding 1 van 3 Sony Vaio PCG-3C2L RAM Replacement: stap 8, afbeelding 2 van 3 Sony Vaio PCG-3C2L RAM Replacement: stap 8, afbeelding 3 van 3
    • With the green panel flipped up, use your hands to remove the RAM.

    • Do the same thing for the second green panel.

Conclusie

To reassemble your device, follow these instructions in reverse order.

0 opmerkingen

Voeg opmerking toe

Weergavestatistieken:

Afgelopen 24 uren: 1

Afgelopen 7 dagen: 5

Afgelopen 30 dagen: 16

Altijd: 1,121