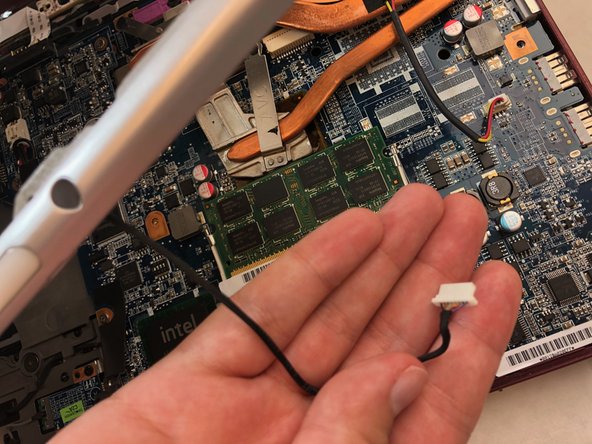
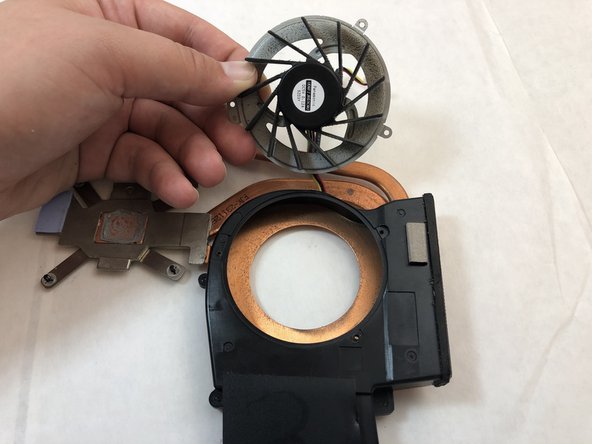
Ga door naar hoofdinhoud

Sony Vaio PCG-3C2L Fan Replacement

Wat je nodig hebt

  1. Sony Vaio PCG-3C2L Fan Replacement, Battery: stap 1, afbeelding 1 van 1
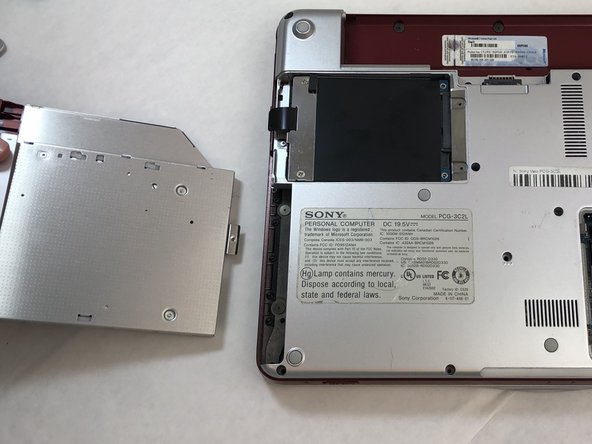
    • Turn your computer over so the bottom is facing up.

    • The battery should be in the top on the back of the computer.

  2. Sony Vaio PCG-3C2L Fan Replacement: stap 2, afbeelding 1 van 2 Sony Vaio PCG-3C2L Fan Replacement: stap 2, afbeelding 2 van 2
    • Initially, the "lock" button should be pushed all the way to the left. To unlock the battery, move the lock button from the left to the right.

  3. Sony Vaio PCG-3C2L Fan Replacement: stap 3, afbeelding 1 van 1
    • After unlocking the battery, hold the "release" button and push to the left.

  4. Sony Vaio PCG-3C2L Fan Replacement: stap 4, afbeelding 1 van 3 Sony Vaio PCG-3C2L Fan Replacement: stap 4, afbeelding 2 van 3 Sony Vaio PCG-3C2L Fan Replacement: stap 4, afbeelding 3 van 3
    • Keep the "release" button pressed.

    • Use the iFixit opening tool (or your hands) to lift the battery up.

  5. Sony Vaio PCG-3C2L Fan Replacement, Hard Drive: stap 5, afbeelding 1 van 1
    • Place the laptop so that the bottom is facing up.

  6. Sony Vaio PCG-3C2L Fan Replacement: stap 6, afbeelding 1 van 1
    • Using a Phillips #0 screwdriver, remove the two 3.5mm screws on the hard drive cover.

  7. Sony Vaio PCG-3C2L Fan Replacement: stap 7, afbeelding 1 van 2 Sony Vaio PCG-3C2L Fan Replacement: stap 7, afbeelding 2 van 2
    • Using a Phillips #0 screwdriver, remove the three 8mm screws on the hard drive casing.

    • Remove the black hard drive casing by pulling it off.

  8. Sony Vaio PCG-3C2L Fan Replacement: stap 8, afbeelding 1 van 3 Sony Vaio PCG-3C2L Fan Replacement: stap 8, afbeelding 2 van 3 Sony Vaio PCG-3C2L Fan Replacement: stap 8, afbeelding 3 van 3
    • Remove the hard drive by carefully sliding it out.

  9. Sony Vaio PCG-3C2L Fan Replacement, Fan: stap 9, afbeelding 1 van 1
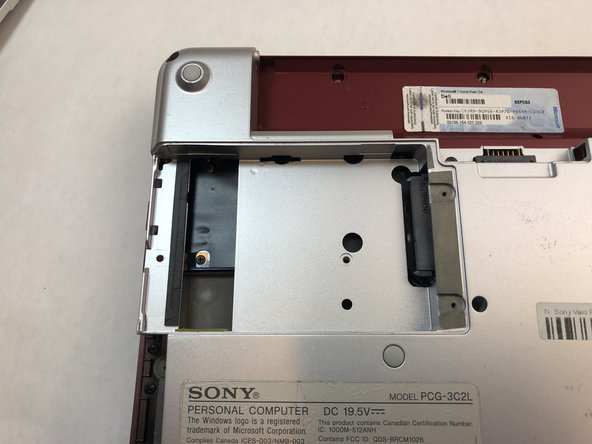
    • Remove the six 8 mm edge screws from the back panel using a Phillips #0 screwdriver.

    • Remove the two 8 mm corner screws from the back panel using a Phillips #0 screwdriver.

    • Remove the four 8 mm middle screws from the back panel using a Phillips #0 screwdriver.

    • Remove the three 2 mm screws from the back panel using a Phillips #0 screwdriver.

  10. Sony Vaio PCG-3C2L Fan Replacement: stap 10, afbeelding 1 van 1
    • Remove the 6 mm screw from the battery holder using a Phillips #0 screwdriver.

    • Remove the two 4 mm screws from the battery holder using a Phillips #0 screwdriver.

  11. Sony Vaio PCG-3C2L Fan Replacement: stap 11, afbeelding 1 van 3 Sony Vaio PCG-3C2L Fan Replacement: stap 11, afbeelding 2 van 3 Sony Vaio PCG-3C2L Fan Replacement: stap 11, afbeelding 3 van 3
    • Remove the CD cartridge from the back panel by sliding it out.

  12. Sony Vaio PCG-3C2L Fan Replacement: stap 12, afbeelding 1 van 3 Sony Vaio PCG-3C2L Fan Replacement: stap 12, afbeelding 2 van 3 Sony Vaio PCG-3C2L Fan Replacement: stap 12, afbeelding 3 van 3
    • Using your hands, pull up the back panel about two inches up from the rest of the laptop.

    • Disconnect the black wire connector.

    • Remove back panel.

    • Pull up the back panel slowly so the black wire connector does not break.

  13. Sony Vaio PCG-3C2L Fan Replacement: stap 13, afbeelding 1 van 2 Sony Vaio PCG-3C2L Fan Replacement: stap 13, afbeelding 2 van 2
    • Unscrew the four 4 mm captive screws from the fan casing using a Phillips #0 screwdriver.

    • Disconnect the black/red/yellow wire connector by gently pulling on the wire.

    • Remove the copper colored fan casing that contains the fan by pulling it off of the bottom of the laptop.

  14. Sony Vaio PCG-3C2L Fan Replacement: stap 14, afbeelding 1 van 1
    • Remove the three 3 mm fan casing screws from the fan casing using a Phillips #0 screwdriver.

  15. Sony Vaio PCG-3C2L Fan Replacement: stap 15, afbeelding 1 van 2 Sony Vaio PCG-3C2L Fan Replacement: stap 15, afbeelding 2 van 2
    • Remove the fan from the fan casing by sliding it out.

Conclusie

To reassemble your device, follow these instructions in reverse order.

0 opmerkingen

Voeg opmerking toe

Weergavestatistieken:

Afgelopen 24 uren: 2

Afgelopen 7 dagen: 2

Afgelopen 30 dagen: 6

Altijd: 751