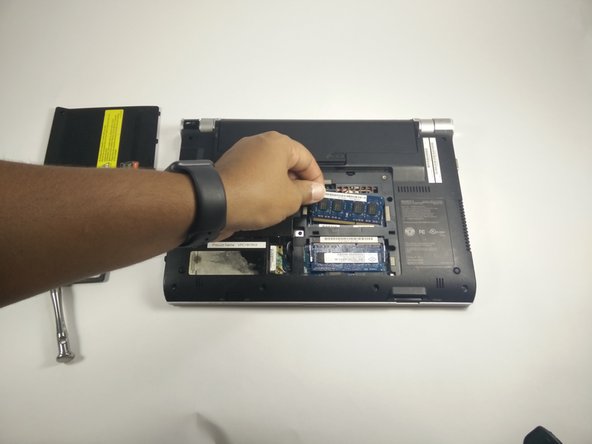
Ga door naar hoofdinhoud

Sony Vaio PCG-31311L RAM Replacement

Wat je nodig hebt

  1. Sony Vaio PCG-31311L RAM Replacement, RAM: stap 1, afbeelding 1 van 2 Sony Vaio PCG-31311L RAM Replacement, RAM: stap 1, afbeelding 2 van 2
    • Start with device closed, powered off, and upside down.

    • Locate 3 screws on the bottom plate and unscrew.

    • These screws do not detach from the plate.

  2. Sony Vaio PCG-31311L RAM Replacement: stap 2, afbeelding 1 van 2 Sony Vaio PCG-31311L RAM Replacement: stap 2, afbeelding 2 van 2
    • Use a plastic opening tool to pry up on the bottom plate.

    • Lift up and away from the device.

  3. Sony Vaio PCG-31311L RAM Replacement: stap 3, afbeelding 1 van 2 Sony Vaio PCG-31311L RAM Replacement: stap 3, afbeelding 2 van 2
    • Locate the 2 clips on either side of the RAM chip.

    • Push both of them out and away from the RAM chip. The RAM chip should pop up.

    • Slowly remove the chip from the device

    • Make note of which side the slot is on in order to correctly reinstall the RAM chip.

  4. Sony Vaio PCG-31311L RAM Replacement: stap 4, afbeelding 1 van 2 Sony Vaio PCG-31311L RAM Replacement: stap 4, afbeelding 2 van 2
    • Repeat Step 3 on the other RAM chip

Conclusie

To reassemble your device, follow these instructions in reverse order.

Tyler

Lid sinds: 08/24/16

45 Reputatie

5 handleidingen geschreven

Team

USF Tampa, Team 1-1, Lacy Fall 2016 Lid van USF Tampa, Team 1-1, Lacy Fall 2016

USFT-LACY-F16S1G1

5 Leden

10 handleidingen geschreven

0 opmerkingen

Voeg opmerking toe

Weergavestatistieken:

Afgelopen 24 uren: 1

Afgelopen 7 dagen: 5

Afgelopen 30 dagen: 14

Altijd: 949