Ga door naar hoofdinhoud

Sony Vaio Fit 13A Heatsink + Fan Assembly Replacement

Wat je nodig hebt

  1. Sony Vaio Fit 13A Heatsink + Fan Assembly Replacement, Back Cover: stap 1, afbeelding 1 van 2 Sony Vaio Fit 13A Heatsink + Fan Assembly Replacement, Back Cover: stap 1, afbeelding 2 van 2
    • Starting with the laptop top-down, locate and remove the twelve 1mm Phillips #0 screws securing the back cover to the main body of the computer.

  2. Sony Vaio Fit 13A Heatsink + Fan Assembly Replacement: stap 2, afbeelding 1 van 2 Sony Vaio Fit 13A Heatsink + Fan Assembly Replacement: stap 2, afbeelding 2 van 2
    • Use the Plastic Opening Tools or Metal Spudger to carefully loosen back cover from the body of the computer.

    • Be sure to avoid headphone jack when removing back cover by lifting cover away from computer and up.

  3. Sony Vaio Fit 13A Heatsink + Fan Assembly Replacement: stap 3, afbeelding 1 van 1
    • Lift off back cover to access inner components of computer.

  4. Sony Vaio Fit 13A Heatsink + Fan Assembly Replacement, Fan: stap 4, afbeelding 1 van 2 Sony Vaio Fit 13A Heatsink + Fan Assembly Replacement, Fan: stap 4, afbeelding 2 van 2
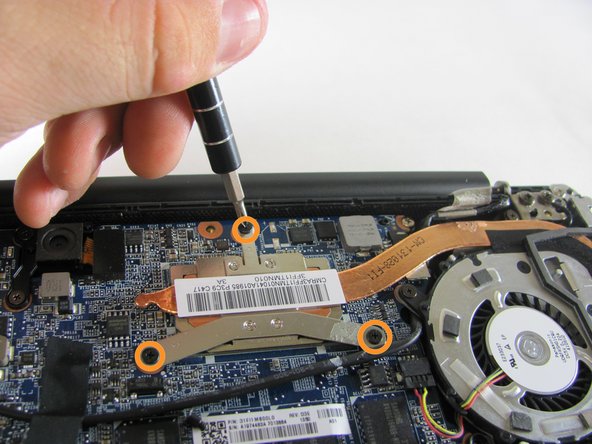
    • Remove the three 1mm Phillips #0 screws surrounding the fan.

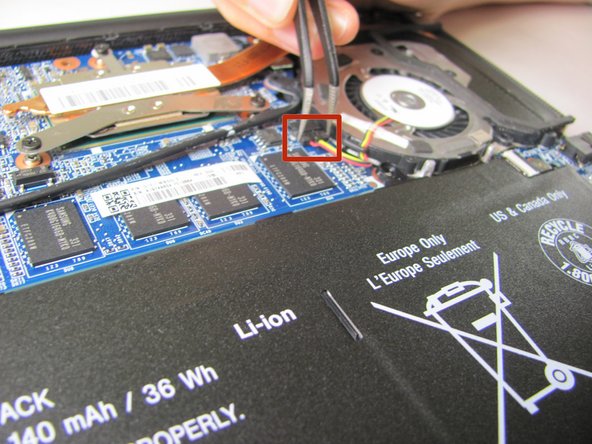
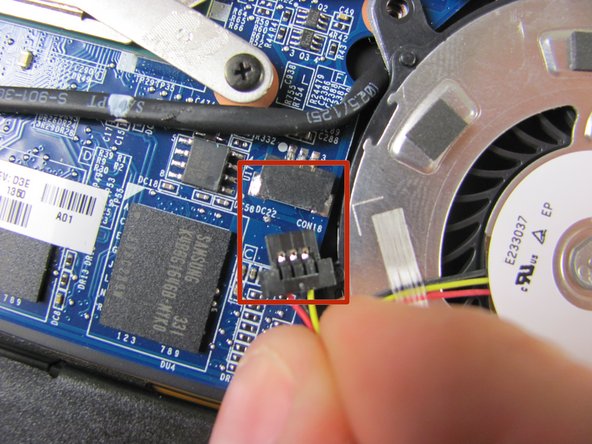
    • Loosen the three 1mm Phillips #0 screws. These screws will stay captive to the heatsink.

  5. Sony Vaio Fit 13A Heatsink + Fan Assembly Replacement: stap 5, afbeelding 1 van 3 Sony Vaio Fit 13A Heatsink + Fan Assembly Replacement: stap 5, afbeelding 2 van 3 Sony Vaio Fit 13A Heatsink + Fan Assembly Replacement: stap 5, afbeelding 3 van 3
    • Use tweezers to carefully unplug the fan connector.

  6. Sony Vaio Fit 13A Heatsink + Fan Assembly Replacement, Remove the Fan: stap 6, afbeelding 1 van 2 Sony Vaio Fit 13A Heatsink + Fan Assembly Replacement, Remove the Fan: stap 6, afbeelding 2 van 2
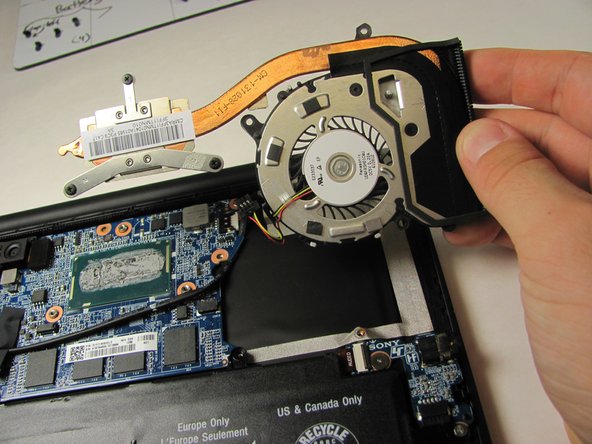
    • Use the Plastic Opening Tool to gently remove the heat sink and fan assembly from the computer.

    • Important: Follow the How to Apply Thermal Paste guide to replace the thermal paste before reassembling your device.

Conclusie

To reassemble your device, follow these instructions in reverse order.

4 andere personen hebben deze handleiding voltooid.

Marii

Lid sinds: 01/08/15

658 Reputatie

3 handleidingen geschreven

Team

Cal Poly, Team 21-19, Maness Winter 2015 Lid van Cal Poly, Team 21-19, Maness Winter 2015

CPSU-MANESS-W15S21G19

4 Leden

12 handleidingen geschreven

Één opmerking

Could you also maybe do a tutorial on Sony Vaio Fit 13? http://www.laptoppartstore.com/replace--... Any luck figuring out how the fan may be detached and re-attached to the heatsink? Also, I notice a very specific type of taping... where can one procure those?

Abhishek D - Antwoord

Voeg opmerking toe

Weergavestatistieken:

Afgelopen 24 uren: 0

Afgelopen 7 dagen: 1

Afgelopen 30 dagen: 5

Altijd: 4,521