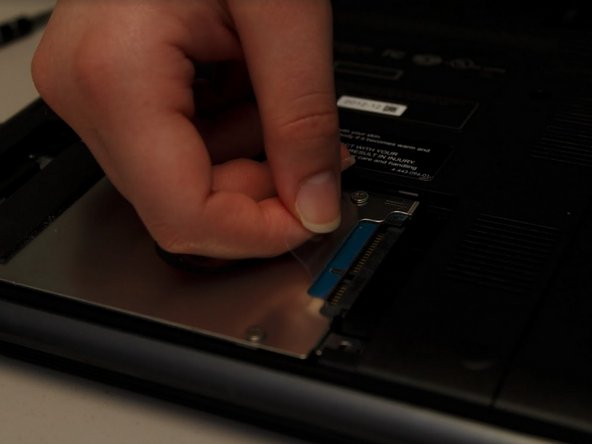
Ga door naar hoofdinhoud

Sony VAIO SVE14AJ16L Hard Drive Replacement

Wat je nodig hebt

  1. Sony VAIO SVE14AJ16L Hard Drive Replacement, Hard Drive: stap 1, afbeelding 1 van 1
    • Turn off your laptop before starting.

    • Turn the closed laptop upside down so that the bottom is facing you.

  2. Sony VAIO SVE14AJ16L Hard Drive Replacement: stap 2, afbeelding 1 van 2 Sony VAIO SVE14AJ16L Hard Drive Replacement: stap 2, afbeelding 2 van 2
    • Remove the two screws on the hard drive cover with a Phillips #0 screwdriver.

    • Remove the hard drive cover.

  3. Sony VAIO SVE14AJ16L Hard Drive Replacement: stap 3, afbeelding 1 van 3 Sony VAIO SVE14AJ16L Hard Drive Replacement: stap 3, afbeelding 2 van 3 Sony VAIO SVE14AJ16L Hard Drive Replacement: stap 3, afbeelding 3 van 3
    • Remove the two screws holding the hard drive in place with a Phillips #0 screwdriver.

    • Using the plastic tab, slide the hard drive out away from the main portion of the laptop.

    • Lift the hard drive out of the laptop using the tab.

  4. Sony VAIO SVE14AJ16L Hard Drive Replacement: stap 4, afbeelding 1 van 3 Sony VAIO SVE14AJ16L Hard Drive Replacement: stap 4, afbeelding 2 van 3 Sony VAIO SVE14AJ16L Hard Drive Replacement: stap 4, afbeelding 3 van 3
    • Remove the four screws holding the hard drive bracket to the hard drive using a Phillips #0 screwdriver.

Conclusie

To reassemble your device, follow these instructions in reverse order.

Één andere persoon heeft deze handleiding voltooid.

Dustin Smith

Lid sinds: 09/21/18

236 Reputatie

2 handleidingen geschreven

0 opmerkingen

Voeg opmerking toe

Weergavestatistieken:

Afgelopen 24 uren: 1

Afgelopen 7 dagen: 4

Afgelopen 30 dagen: 11

Altijd: 814