Deze versie kan foutieve bewerkingen bevatten. Schakel over naar de recentste gecontroleerde momentopname.
Wat je nodig hebt
-
Deze stap is niet vertaald. Help het te vertalen
-
Turn the laptop upside down so that the top is sitting on a flat surface.
-
If you are looking at the bottom of the laptop the battery is located on the front right side of the laptop; the opposite side from the floppy disk drive.
-
-
Deze stap is niet vertaald. Help het te vertalen
-
As shown by the arrow, slide the plastic cover up and then pull out and downwards.
-
You should now be able to pull the battery out.
-
-
Deze stap is niet vertaald. Help het te vertalen
-
Remove the four 16 mm screws bordering the edge of the laptop using a Phillips #0 screwdriver.
-
-
Deze stap is niet vertaald. Help het te vertalen
-
Remove the 4mm screw on the right rear side of the laptop next to the audio ports using a Phillips #0 screwdriver.
-
-
-
Deze stap is niet vertaald. Help het te vertalen
-
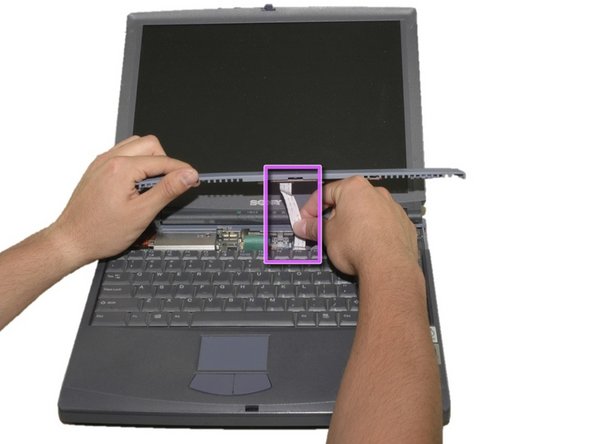
Slide the blue speaker grille (located above the keyboard) to the right and gently pull upward. The grille will still be connected by a white electrical strip.
-
Carefully pull out the white electrical strip. By doing this you will remove the speaker grille.
-
-
Deze stap is niet vertaald. Help het te vertalen
-
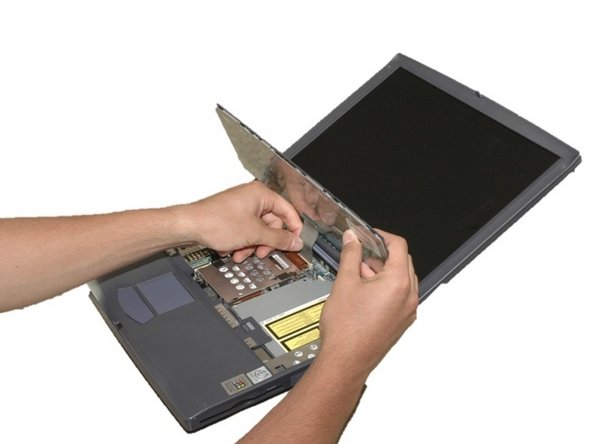
Remove the 4mm screw in the center using a Phillips screwdriver.
-
Carefully and slowly pull the green strip straight up (away from the laptop) to disconnect it. Make sure not to pull too hard to avoid breaking.
-
The keyboard can now be removed.
-
-
Deze stap is niet vertaald. Help het te vertalen
-
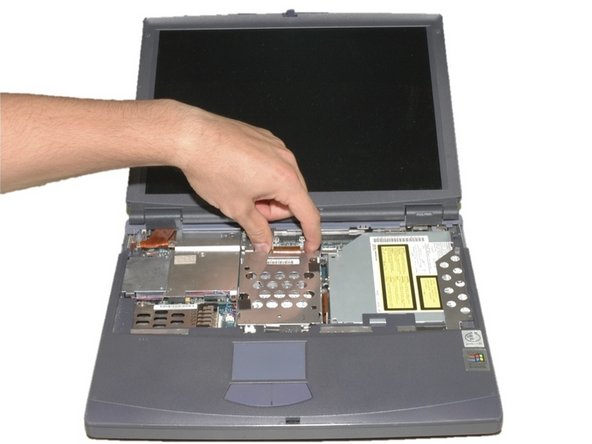
Remove the two 4mm Phillips screws in the center of the computer located on each side of the copper electrical strip.
-
-
Deze stap is niet vertaald. Help het te vertalen
-
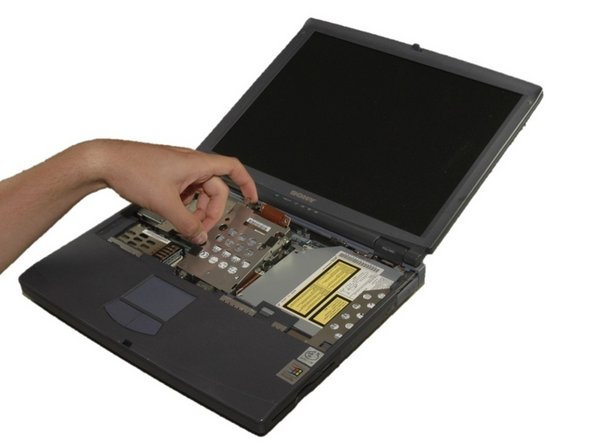
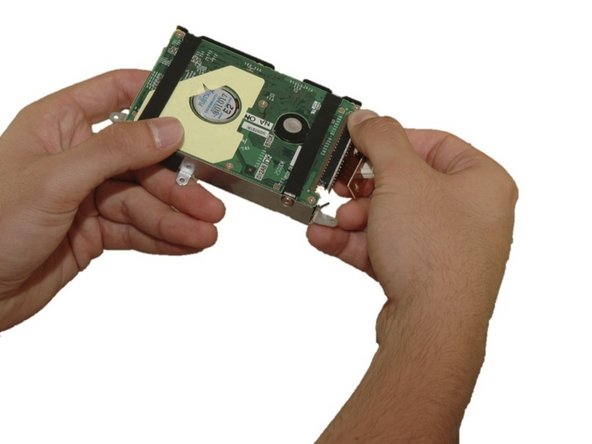
Remove the four 4mm Phillips screws around the hard drive cage.
-
Carefully lift the hard drive cage out.
-
Carefully disconnect the copper strip to pull out the hard drive.
-
-
Deze stap is niet vertaald. Help het te vertalen
-
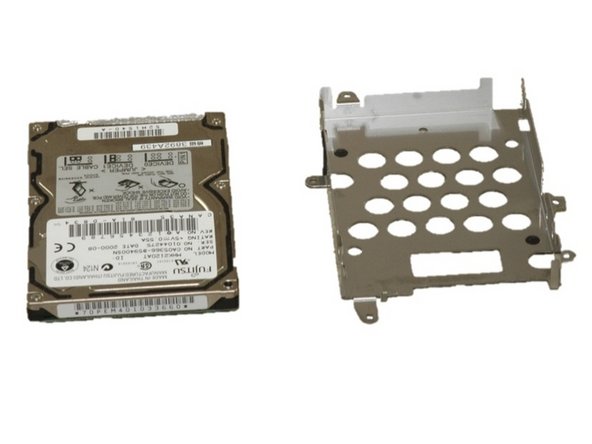
Remove the four 4mm Phillips screws that hold the hard drive in the hard drive cage.
-
Gently remove the hard drive from the cage.
-
Gently remove the copper electrical strip from the harddrive.
-


Annuleren: ik heb deze handleiding niet afgemaakt.
4 andere personen hebben deze handleiding voltooid.

Team

Cal Poly, Team 12-36, Maness Spring 2011 Lid van Cal Poly, Team 12-36, Maness Spring 2011
CPSU-MANESS-S11S12G36
4 Leden
16 handleidingen geschreven
2 opmerkingen
Complete Life Saver Thank you Very much for taking the time to Make an Easily Fallowed guide for this laptop. very very much Appreciated