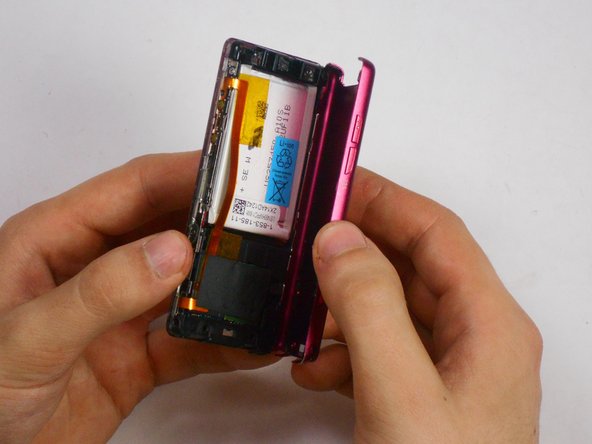
Ga door naar hoofdinhoud

Sony NWZ-E473 Front Button Replacement

Wat je nodig hebt

  1. Sony NWZ-E473 Front Button Replacement, Back Panel: stap 1, afbeelding 1 van 1
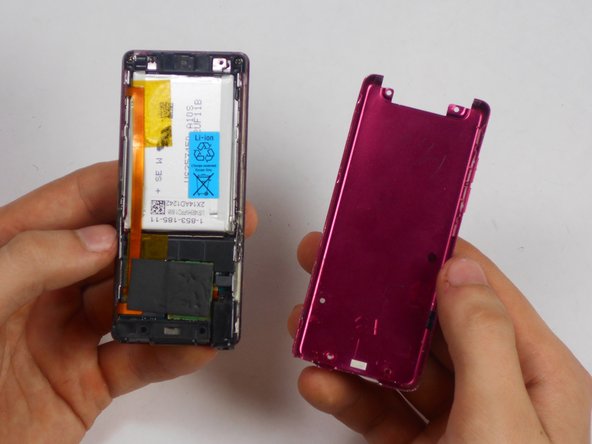
    • Use a Phillips #00 screwdriver to unscrew the two 5 mm screws located on the bottom of the back of the device.

  2. Sony NWZ-E473 Front Button Replacement: stap 2, afbeelding 1 van 1
    • Use a plastic opening tool to loosen the bottom portion of device.

  3. Sony NWZ-E473 Front Button Replacement: stap 3, afbeelding 1 van 1
    • Use a plastic opening tool to loosen the top panel of the device.

  4. Sony NWZ-E473 Front Button Replacement: stap 4, afbeelding 1 van 1
    • Use a Phillips #00 screwdriver to remove the two 3 mm screws located on the portion under the top panel of the device.

  5. Sony NWZ-E473 Front Button Replacement: stap 5, afbeelding 1 van 3 Sony NWZ-E473 Front Button Replacement: stap 5, afbeelding 2 van 3 Sony NWZ-E473 Front Button Replacement: stap 5, afbeelding 3 van 3
    • Remove the back plate from the device.

  6. Sony NWZ-E473 Front Button Replacement, Battery: stap 6, afbeelding 1 van 2 Sony NWZ-E473 Front Button Replacement, Battery: stap 6, afbeelding 2 van 2
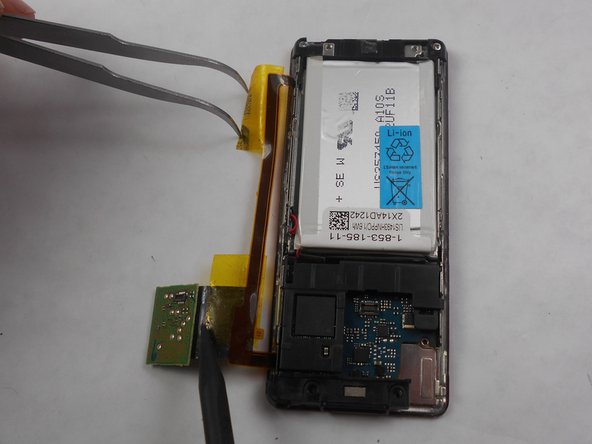
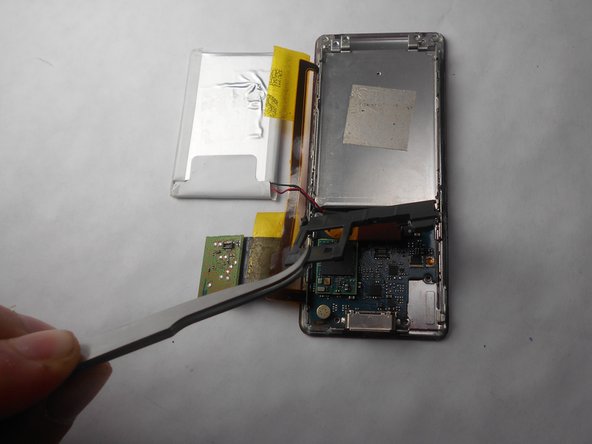
    • Peel back the layer of tape along with the processor, which is located just below the battery, using the tweezers and the spudger.

  7. Sony NWZ-E473 Front Button Replacement: stap 7, afbeelding 1 van 2 Sony NWZ-E473 Front Button Replacement: stap 7, afbeelding 2 van 2
    • Slide a prying tool underneath the top portion of the battery and lift it from the case.

  8. Sony NWZ-E473 Front Button Replacement: stap 8, afbeelding 1 van 1
    • Remove the stickers from the battery terminals, which are on the underside of the battery.

  9. Sony NWZ-E473 Front Button Replacement: stap 9, afbeelding 1 van 1
    • Use a soldering iron to remove the wires from the red and the black terminals.

  10. Sony NWZ-E473 Front Button Replacement, Screen: stap 10, afbeelding 1 van 1
    • Use a nylon spudger or tweezers to remove the plastic USB cover.

  11. Sony NWZ-E473 Front Button Replacement: stap 11, afbeelding 1 van 1
    • Use a Phillips #00 screwdriver to unscrew two 2 mm screws located on the top corners of the device.

  12. Sony NWZ-E473 Front Button Replacement: stap 12, afbeelding 1 van 1
    • Use a nylon spudger or tweezers to remove the plastic protective plate at the top of device.

  13. Sony NWZ-E473 Front Button Replacement: stap 13, afbeelding 1 van 2 Sony NWZ-E473 Front Button Replacement: stap 13, afbeelding 2 van 2
    • Remove the plastic protective frame located over the motherboard with tweezers and a spudger.

  14. Sony NWZ-E473 Front Button Replacement: stap 14, afbeelding 1 van 1
    • Remove screen connection from motherboard using tweezers and spudger.

  15. Sony NWZ-E473 Front Button Replacement: stap 15, afbeelding 1 van 1
    • Use a Phillips #00 screwdriver to remove two 3 mm screws at the bottom sides and two 1 mm screws at top sides of the device.

  16. Sony NWZ-E473 Front Button Replacement: stap 16, afbeelding 1 van 2 Sony NWZ-E473 Front Button Replacement: stap 16, afbeelding 2 van 2
    • Use a Phillips #00 screwdriver to unscrew two 2 mm screws, and remove the motherboard from the device with tweezers and a plastic opening tool.

  17. Sony NWZ-E473 Front Button Replacement: stap 17, afbeelding 1 van 2 Sony NWZ-E473 Front Button Replacement: stap 17, afbeelding 2 van 2
    • Disconnect the metal shielding plate from the front panel with tweezers or a plastic opening tool.

  18. Sony NWZ-E473 Front Button Replacement: stap 18, afbeelding 1 van 2 Sony NWZ-E473 Front Button Replacement: stap 18, afbeelding 2 van 2
    • Use a plastic opening tool to remove the screen from metal back plate.

  19. Sony NWZ-E473 Front Button Replacement, Front Button: stap 19, afbeelding 1 van 1
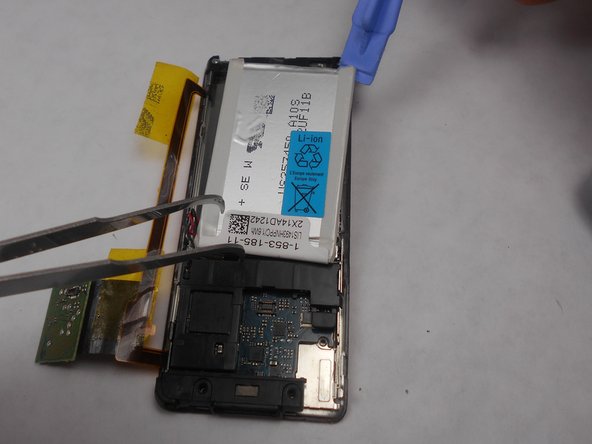
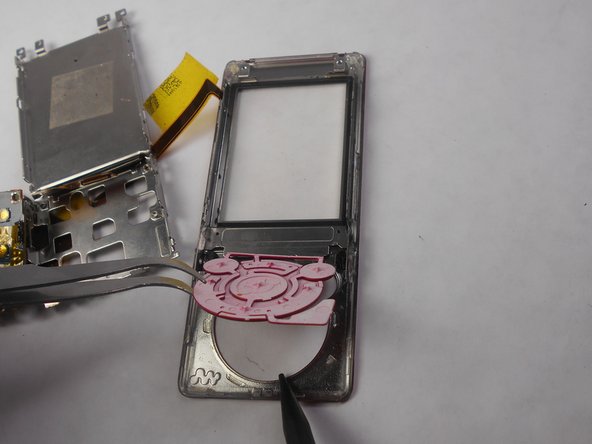
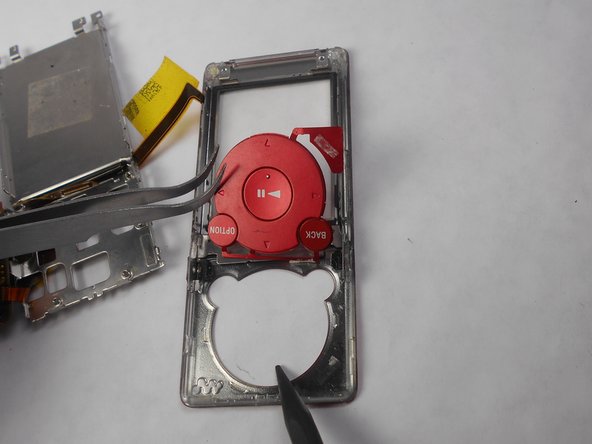
    • Ensure that button connection is completely separated from the buttons.

  20. Sony NWZ-E473 Front Button Replacement: stap 20, afbeelding 1 van 3 Sony NWZ-E473 Front Button Replacement: stap 20, afbeelding 2 van 3 Sony NWZ-E473 Front Button Replacement: stap 20, afbeelding 3 van 3
    • Remove buttons from front display panel by pushing button display from the front of the device

Conclusie

To reassemble your device, follow these instructions in reverse order.

Matthew Hintz

Lid sinds: 01/16/15

327 Reputatie

3 handleidingen geschreven

Team

USF Tampa, Team 17-6, Watkins Winter 2015 Lid van USF Tampa, Team 17-6, Watkins Winter 2015

USFT-WATKINS-W15S17G6

4 Leden

5 handleidingen geschreven

0 opmerkingen

Voeg opmerking toe

Weergavestatistieken:

Afgelopen 24 uren: 0

Afgelopen 7 dagen: 3

Afgelopen 30 dagen: 3

Altijd: 1,772