Ga door naar hoofdinhoud

Sony Handycam HDR-CX380 Lens Cover Panel Replacement

Wat je nodig hebt

  1. Sony Handycam HDR-CX380 Lens Cover Panel Replacement, Battery: stap 1, afbeelding 1 van 1
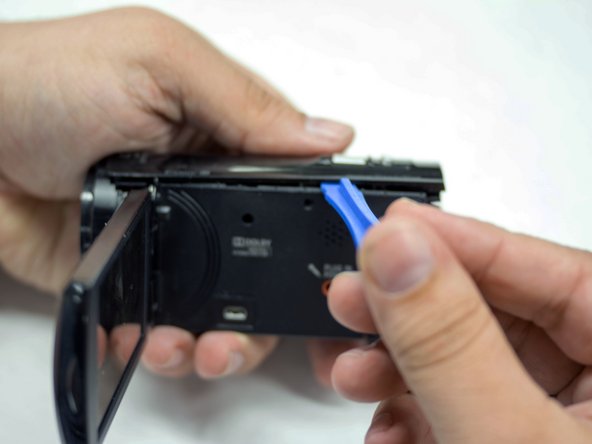
    • Rotate your camera such that the underside is facing you and the lens is facing the ground.

    • You should be able to see the camera's label, and it should be rotated 90 degrees counterclockwise.

  2. Sony Handycam HDR-CX380 Lens Cover Panel Replacement: stap 2, afbeelding 1 van 1
    • Using your left thumb, push down the slider to the left of the SD card slot.

    • When inserting a new battery or reinserting the one you removed, you can ignore this step.

  3. Sony Handycam HDR-CX380 Lens Cover Panel Replacement: stap 3, afbeelding 1 van 2 Sony Handycam HDR-CX380 Lens Cover Panel Replacement: stap 3, afbeelding 2 van 2
    • Using your right index finger and thumb, pull the battery toward you and then away from the camera.

  4. Sony Handycam HDR-CX380 Lens Cover Panel Replacement, Camera Shell: stap 4, afbeelding 1 van 1
    • Orient the camera with the battery side facing up.

  5. Sony Handycam HDR-CX380 Lens Cover Panel Replacement: stap 5, afbeelding 1 van 1
    • Remove the single 4.5 mm Phillips #00 screw.

    • Remove the single 5.5 mm Phillips #00 screw.

  6. Sony Handycam HDR-CX380 Lens Cover Panel Replacement: stap 6, afbeelding 1 van 2 Sony Handycam HDR-CX380 Lens Cover Panel Replacement: stap 6, afbeelding 2 van 2
    • With the blue plastic opening tools, gently pry the plastic casing surrounding the start/stop button free.

    • Remove the casing using your right thumb and index finger.

  7. Sony Handycam HDR-CX380 Lens Cover Panel Replacement: stap 7, afbeelding 1 van 1
    • Flip open the LCD panel to get to the side panel.

    • Remove the three 5.5 mm Phillips #00 screws.

  8. Sony Handycam HDR-CX380 Lens Cover Panel Replacement: stap 8, afbeelding 1 van 1
    • Turn the camera around to the grip side and remove the 5.5 mm Phillips Head screw using your J00 Phillips Head screwdriver.

  9. Sony Handycam HDR-CX380 Lens Cover Panel Replacement: stap 9, afbeelding 1 van 1
    • With the bottom of the camera facing up, remove the two 5.5mm Phillips #00 screws.

  10. Sony Handycam HDR-CX380 Lens Cover Panel Replacement: stap 10, afbeelding 1 van 2 Sony Handycam HDR-CX380 Lens Cover Panel Replacement: stap 10, afbeelding 2 van 2
    • Orient the camera so the bottom is facing you.

    • Use the blue plastic opening tools to gently ease the camera shell off of the camera.

    • Rotate the camera so the LCD side panel is facing you and gently pry the shell off from the camera.

  11. Sony Handycam HDR-CX380 Lens Cover Panel Replacement, Lens Cover Panel: stap 11, afbeelding 1 van 1
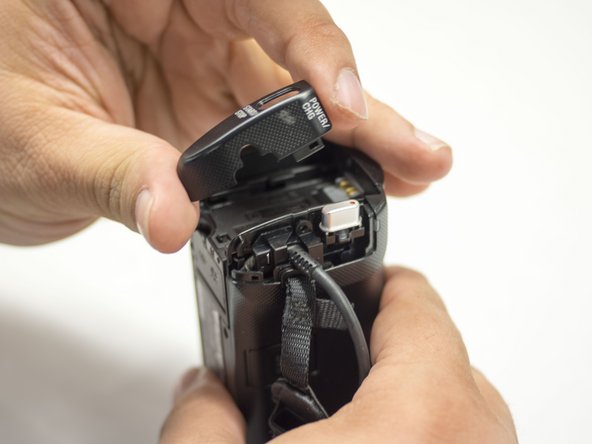
    • Orient the camera such that the lens is facing to your left.

    • Using your right hand to hold the camera, gently remove the lens panel from the camera with your left hand.

    • The camera should be oriented with the lens pointing to your left.

Conclusie

To reassemble your device, follow these instructions in reverse order.

Één andere persoon heeft deze handleiding voltooid.

John Santoro

Lid sinds: 02/04/16

729 Reputatie

5 handleidingen geschreven

Team

USF Tampa, Team 16-5, Blackwell Winter 2016 Lid van USF Tampa, Team 16-5, Blackwell Winter 2016

USFT-BLACKWELL-W16S16G5

3 Leden

16 handleidingen geschreven

0 opmerkingen

Voeg opmerking toe

Weergavestatistieken:

Afgelopen 24 uren: 0

Afgelopen 7 dagen: 1

Afgelopen 30 dagen: 7

Altijd: 524