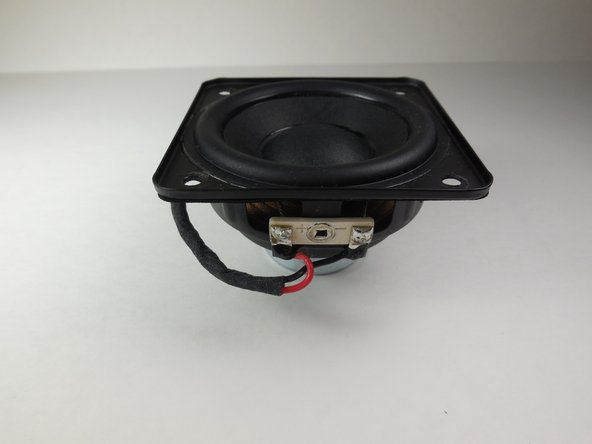
Ga door naar hoofdinhoud

Sony CPF-IP001 Subwoofer Replacement

Wat je nodig hebt

  1. Sony CPF-IP001 Subwoofer Replacement, Subwoofer Housing Disassembly: stap 1, afbeelding 1 van 2 Sony CPF-IP001 Subwoofer Replacement, Subwoofer Housing Disassembly: stap 1, afbeelding 2 van 2
    • Remove fourteen 8 mm Phillips #2 screws from the bottom of the subwoofer.

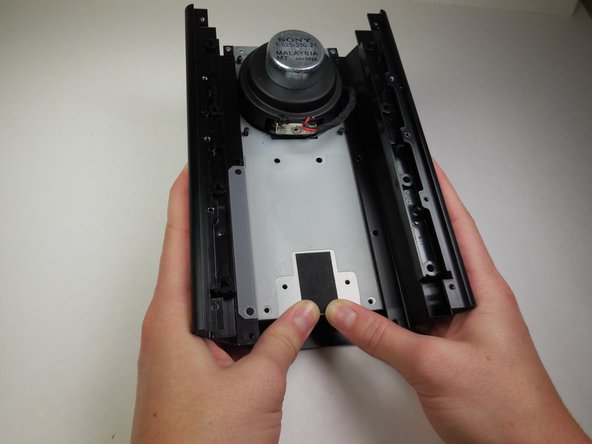
    • Once all of the screws are removed, the cover can be taken off using a metal spudger.

  2. Sony CPF-IP001 Subwoofer Replacement: stap 2, afbeelding 1 van 2 Sony CPF-IP001 Subwoofer Replacement: stap 2, afbeelding 2 van 2
    • Remove eight 14 mm Phillips #2 screws holding the circuit board in place.

    • Using the plastic opening tool, carefully remove the circuit board.

    • There will be 3 wires connected to the opposite side of the circuit board. Be careful not to pull the board out of the device too far and damage these wires.

  3. Sony CPF-IP001 Subwoofer Replacement: stap 3, afbeelding 1 van 2 Sony CPF-IP001 Subwoofer Replacement: stap 3, afbeelding 2 van 2
    • Remove the first of the three wires by squeezing the clip and pulling it out.

    • After disconnecting the first wire, the two attached wires can be more easily accessed.

  4. Sony CPF-IP001 Subwoofer Replacement: stap 4, afbeelding 1 van 3 Sony CPF-IP001 Subwoofer Replacement: stap 4, afbeelding 2 van 3 Sony CPF-IP001 Subwoofer Replacement: stap 4, afbeelding 3 van 3
    • Remove the wire furthest to the left by squeezing the clip and pulling it out.

    • Detach the third wire by carefully using the tweezers.

    • The circuit board is now completely detached and can be set aside.

  5. Sony CPF-IP001 Subwoofer Replacement: stap 5, afbeelding 1 van 2 Sony CPF-IP001 Subwoofer Replacement: stap 5, afbeelding 2 van 2
    • Remove six 8 mm Phillips #2 screws.

    • Slide the side panel with the power cord out from the housing.

    • The side panel with the power cord will come out as a whole unit with the subwoofer air tunnel.

  6. Sony CPF-IP001 Subwoofer Replacement, Subwoofer: stap 6, afbeelding 1 van 1
    • Remove two 8 mm Phillips #2 screws holding the side panel in place.

  7. Sony CPF-IP001 Subwoofer Replacement: stap 7, afbeelding 1 van 1
    • Remove eight 8 mm Phillips #2 screws holding the subwoofer tray to the housing.

  8. Sony CPF-IP001 Subwoofer Replacement: stap 8, afbeelding 1 van 2 Sony CPF-IP001 Subwoofer Replacement: stap 8, afbeelding 2 van 2
    • Using a metal spudger, slightly peel back the plastic the has been glued to the tray and the housing.

    • Slide the tray containing the subwoofer out of the housing.

  9. Sony CPF-IP001 Subwoofer Replacement: stap 9, afbeelding 1 van 2 Sony CPF-IP001 Subwoofer Replacement: stap 9, afbeelding 2 van 2
    • After removing the tray, flip it over and you will find four screws connecting the subwoofer.

    • Remove four 7.5 mm Phillips #2 screws.

  10. Sony CPF-IP001 Subwoofer Replacement: stap 10, afbeelding 1 van 2 Sony CPF-IP001 Subwoofer Replacement: stap 10, afbeelding 2 van 2
    • The subwoofer has now been removed from the device and can be replaced.

Conclusie

To reassemble your device, follow these instructions in reverse order.

3 andere personen hebben deze handleiding voltooid.

Mike Bolton

Lid sinds: 04/14/15

473 Reputatie

4 handleidingen geschreven

Team

Cal Poly, Team 6-14, Maness Spring 2015 Lid van Cal Poly, Team 6-14, Maness Spring 2015

CPSU-MANESS-S15S6G14

4 Leden

8 handleidingen geschreven

0 opmerkingen

Voeg opmerking toe

Weergavestatistieken:

Afgelopen 24 uren: 0

Afgelopen 7 dagen: 1

Afgelopen 30 dagen: 4

Altijd: 722