Ga door naar hoofdinhoud

Sony CPF-IP001 Buttons on Main Speaker Replacement

Wat je nodig hebt

  1. Sony CPF-IP001 Buttons on Main Speaker Replacement, Main Speaker Housing Disassembly: stap 1, afbeelding 1 van 1
    • Remove two 6mm Phillips #0 screws.

    • Remove two 7.5 mm Phillips #0 screws.

    • Remove seven 4 mm Phillips #0 screws.

  2. Sony CPF-IP001 Buttons on Main Speaker Replacement: stap 2, afbeelding 1 van 3 Sony CPF-IP001 Buttons on Main Speaker Replacement: stap 2, afbeelding 2 van 3 Sony CPF-IP001 Buttons on Main Speaker Replacement: stap 2, afbeelding 3 van 3
    • Remove six 4 mm Phillips #0 screws from the metal backing.

    • Remove six 5 mm Phillips #0 screws from the metal backing.

    • Using the plastic opening tool, remove the metal plate from the main speaker by gently pulling on it.

  3. Sony CPF-IP001 Buttons on Main Speaker Replacement: stap 3, afbeelding 1 van 2 Sony CPF-IP001 Buttons on Main Speaker Replacement: stap 3, afbeelding 2 van 2
    • Remove the plastic dock cover by using two fingers to push the attached metal piece forward and slide it out of the holes.

  4. Sony CPF-IP001 Buttons on Main Speaker Replacement: stap 4, afbeelding 1 van 3 Sony CPF-IP001 Buttons on Main Speaker Replacement: stap 4, afbeelding 2 van 3 Sony CPF-IP001 Buttons on Main Speaker Replacement: stap 4, afbeelding 3 van 3
    • Using the plastic opening tool, detach the wires connected to the metal plate

    • When disconnecting the wires, be careful not to pull on the wires themselves. Use the plastic opening tool and the connector to disconnect it.

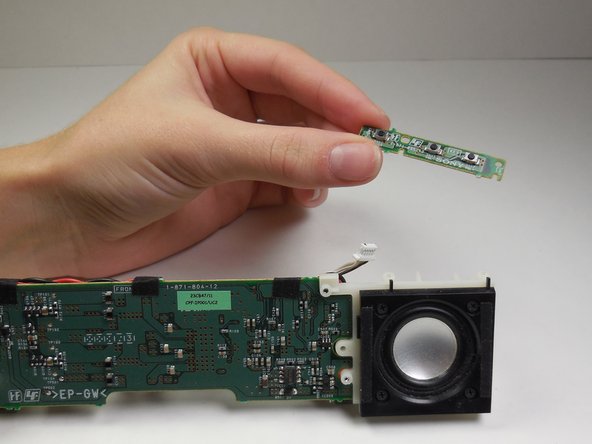
    • Use the plastic opening tool to remove wires connected to the circuit board on the far right.

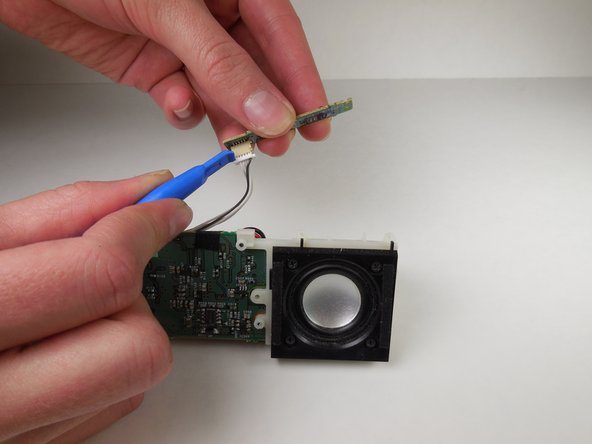
    • Use the tweezers to remove wires connected to the circuit board in between the two black wires.

    • Use the tweezers to press the release tab on the front and back of the plastic white wire head.

    • Once the tab is pressed on both sides, lift up to slide wire head out of socket.

  5. Sony CPF-IP001 Buttons on Main Speaker Replacement: stap 5, afbeelding 1 van 1
    • Remove two 5 mm Phillips #0 screws.

  6. Sony CPF-IP001 Buttons on Main Speaker Replacement: stap 6, afbeelding 1 van 3 Sony CPF-IP001 Buttons on Main Speaker Replacement: stap 6, afbeelding 2 van 3 Sony CPF-IP001 Buttons on Main Speaker Replacement: stap 6, afbeelding 3 van 3
    • Using the metal spudger, loosen the metal cap at the end of the speaker.

    • Slide down the loosened cap to remove it from the end of the speaker.

    • Simultaneously push down on the buttons and slide the speaker out from the casing.

  7. Sony CPF-IP001 Buttons on Main Speaker Replacement, Buttons on Main Speaker: stap 7, afbeelding 1 van 3 Sony CPF-IP001 Buttons on Main Speaker Replacement, Buttons on Main Speaker: stap 7, afbeelding 2 van 3 Sony CPF-IP001 Buttons on Main Speaker Replacement, Buttons on Main Speaker: stap 7, afbeelding 3 van 3
    • Remove two 6 mm Phillips #0 screws.

    • Gently lift the silver buttons up to remove.

  8. Sony CPF-IP001 Buttons on Main Speaker Replacement: stap 8, afbeelding 1 van 3 Sony CPF-IP001 Buttons on Main Speaker Replacement: stap 8, afbeelding 2 van 3 Sony CPF-IP001 Buttons on Main Speaker Replacement: stap 8, afbeelding 3 van 3
    • Using the plastic opening tool, disconnect the white connector from the circuit board.

    • Replace the broken circuit board with a new one.

Conclusie

To reassemble your device, follow these instructions in reverse order.

3 andere personen hebben deze handleiding voltooid.

Cole Stanley

Lid sinds: 04/14/15

290 Reputatie

1 Handleiding geschreven

Team

Cal Poly, Team 6-14, Maness Spring 2015 Lid van Cal Poly, Team 6-14, Maness Spring 2015

CPSU-MANESS-S15S6G14

4 Leden

8 handleidingen geschreven

0 opmerkingen

Voeg opmerking toe

Weergavestatistieken:

Afgelopen 24 uren: 0

Afgelopen 7 dagen: 0

Afgelopen 30 dagen: 0

Altijd: 290