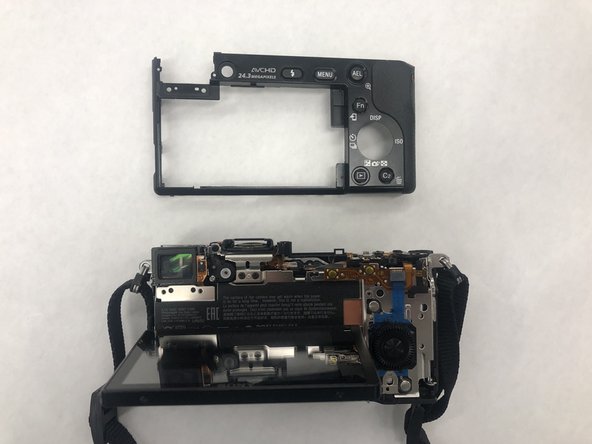
Ga door naar hoofdinhoud

Sony α6000 Motherboard Replacement

Wat je nodig hebt

  1. Sony α6000 Motherboard Replacement, Battery: stap 1, afbeelding 1 van 2 Sony α6000 Motherboard Replacement, Battery: stap 1, afbeelding 2 van 2
    • Begin by placing the camera facing upside down.

  2. Sony α6000 Motherboard Replacement: stap 2, afbeelding 1 van 2 Sony α6000 Motherboard Replacement: stap 2, afbeelding 2 van 2
    • Slide the notched locking bar on the battery compartment from LOCK to OPEN.

  3. Sony α6000 Motherboard Replacement: stap 3, afbeelding 1 van 2 Sony α6000 Motherboard Replacement: stap 3, afbeelding 2 van 2
    • Push the small blue bar horizontally off of the battery.

  4. Sony α6000 Motherboard Replacement: stap 4, afbeelding 1 van 2 Sony α6000 Motherboard Replacement: stap 4, afbeelding 2 van 2
    • Remove the battery.

  5. Sony α6000 Motherboard Replacement, Motherboard: stap 5, afbeelding 1 van 1
    • Remove the 1.75mm Phillips #00 screw from the left side of the camera.

  6. Sony α6000 Motherboard Replacement: stap 6, afbeelding 1 van 2 Sony α6000 Motherboard Replacement: stap 6, afbeelding 2 van 2
    • Remove the two 1.75mm Phillips #00 screws from inside the battery department.

  7. Sony α6000 Motherboard Replacement: stap 7, afbeelding 1 van 1
    • Remove the 1.75mm screw using a Phillips #00 head from underneath the flash.

  8. Sony α6000 Motherboard Replacement: stap 8, afbeelding 1 van 1
    • Carefully remove the ribbon of the flash from the socket by using a pair of tweezers.

    • The best known method to removing the ribbon is to use a pair of tweezers with a rubber tip. This will help to prevent damage to the ribbon.

  9. Sony α6000 Motherboard Replacement: stap 9, afbeelding 1 van 1
    • The top of the camera will be free and can be removed.

    • Set the top of the camera to the side.

  10. Sony α6000 Motherboard Replacement: stap 10, afbeelding 1 van 1
    • Remove the three 1.75mm Phillips #00 screws just below the eye sensor.

  11. Sony α6000 Motherboard Replacement: stap 11, afbeelding 1 van 1
    • Remove the 1.75mm Phillips #00 screw from underneath the SD card cover.

  12. Sony α6000 Motherboard Replacement: stap 12, afbeelding 1 van 1
    • Remove two 1.75mm Phillips #00 screws from the bottom of the camera.

  13. Sony α6000 Motherboard Replacement: stap 13, afbeelding 1 van 1
    • Remove the 1.25mm screw from the right side underneath the battery cover.

  14. Sony α6000 Motherboard Replacement: stap 14, afbeelding 1 van 1
    • Remove the 1.75mm Phillips #00 screw just to the right of the eye sensor.

  15. Sony α6000 Motherboard Replacement: stap 15, afbeelding 1 van 1
    • Set the eye sensor aside.

  16. Sony α6000 Motherboard Replacement: stap 16, afbeelding 1 van 1
    • Remove the back panel of the camera.

  17. Sony α6000 Motherboard Replacement: stap 17, afbeelding 1 van 1
    • Remove the two 1.25mm Phillips #00 screws near the top of the camera, just to the left of the eye socket.

  18. Sony α6000 Motherboard Replacement: stap 18, afbeelding 1 van 1
    • Remove the two 1.75mm Phillips #00 screws from the bottom of the camera.

  19. Sony α6000 Motherboard Replacement: stap 19, afbeelding 1 van 1
    • Remove the three 1.75mm Phillips #00 screws from the right side of the camera.

  20. Sony α6000 Motherboard Replacement: stap 20, afbeelding 1 van 1
    • Remove one ribbon that is attached to the selector wheel with a pair of tweezers.

  21. Sony α6000 Motherboard Replacement: stap 21, afbeelding 1 van 1
    • lift up the protector plate and remove one ribbon that is attached to the LCD screen with a pair of tweezers.

  22. Sony α6000 Motherboard Replacement: stap 22, afbeelding 1 van 1
    • Detach the LCD screen from the back portion of the camera and set it aside.

  23. Sony α6000 Motherboard Replacement: stap 23, afbeelding 1 van 1
    • Lift up the black cover to reveal the motherboard and ten ribbons.

    • With a pair of tweezers separate the ribbons from the motherboard by pulling them out of their sockets.

  24. Sony α6000 Motherboard Replacement: stap 24, afbeelding 1 van 1
    • Remove the four 1.25mm Phillips #00 screws located on the borders of the motherboard.

  25. Sony α6000 Motherboard Replacement: stap 25, afbeelding 1 van 1
    • Remove the power supply at the bottom right hand corner with a pair of tweezers.

  26. Sony α6000 Motherboard Replacement: stap 26, afbeelding 1 van 1
    • Lift the motherboard up and remove the last ribbon cable with a pair of tweezers.

  27. Sony α6000 Motherboard Replacement: stap 27, afbeelding 1 van 1
    • Remove the motherboard and set aside.

Conclusie

To reassemble your device, follow these instructions in reverse order.

3 andere personen hebben deze handleiding voltooid.

Rohn Albertson

Lid sinds: 07/14/19

635 Reputatie

2 handleidingen geschreven

Team

IUPUI, Team S2-G2, Harley Summer 2019 Lid van IUPUI, Team S2-G2, Harley Summer 2019

IUPUI-HARLEY-SU19S2G2

3 Leden

5 handleidingen geschreven

3 opmerkingen

I have been wondering what path I will take when I replace my battery contacts part and this looks like an ideal guide for how I can do it. I wondered why you don’t discharge the capacitor before removing ribbon cables. When I removed the top block off my nex-6 I did discharge the capacitor as what the service manual suggested before I removed the control dial and flash ribbon cables. Before I did it I found a youtube about using wires to the discharge contacts going to a light bulb to safely discharge the capacitor. The service manual suggests using a short jig R:1 k Ω/1 W but since I don’t have access to an electronics store nearby the youtube did the trick trouble free.

georgevp1 - Antwoord

I was successful with the dissembling the camera and will need to invest in a working logic board and maybe something that is part of the shutter. I was hoping the camera would be an easy fix but sometimes this isn’t this case.

georgevp1 - Antwoord

is there a way to fix the hdmi out port without buying a new mother board?

Nicholas Costanza - Antwoord

Voeg opmerking toe

Weergavestatistieken:

Afgelopen 24 uren: 6

Afgelopen 7 dagen: 17

Afgelopen 30 dagen: 54

Altijd: 3,469