Ga door naar hoofdinhoud

Sonos Connect Fuse Replacement

Wat je nodig hebt

  1. Sonos Connect Fuse Replacement, Bottom Part: stap 1, afbeelding 1 van 1
    • Remove the rubber pads and unscrew

  2. Sonos Connect Fuse Replacement, Continue to unscrew: stap 2, afbeelding 1 van 1
    • Take care not to damage the wires of the Wi-Fi antennas which are very bothersome.

  3. Sonos Connect Fuse Replacement, Unclip the top cover: stap 3, afbeelding 1 van 2 Sonos Connect Fuse Replacement, Unclip the top cover: stap 3, afbeelding 2 van 2
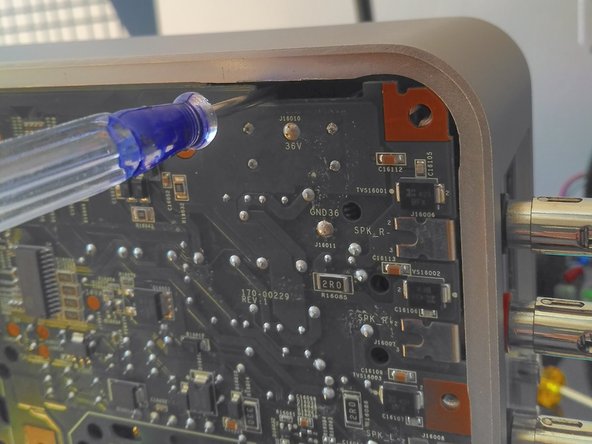
    • By using a screwdriver inserted through each of the 8 peripheral slots, you can access the clips of the top cover.

  4. Sonos Connect Fuse Replacement, Access under the top cover: stap 4, afbeelding 1 van 1
    • Continue unscrewing (there is a screw under the seal).

  5. Sonos Connect Fuse Replacement, Locate the fuse: stap 5, afbeelding 1 van 1
    • It's a soldered fuse. You will need to desolder it from the back in order to replace it.

  6. Sonos Connect Fuse Replacement, Replacement fuse: stap 6, afbeelding 1 van 1
    • About 1$

    • 250V 5A T fuse (time delay).

Conclusie

To reassemble your device, follow these instructions in reverse order.

Één andere persoon heeft deze handleiding voltooid.

Met dank aan deze vertalers:

fr en

100%

Deze vertalers helpen ons de wereld te repareren! Wil je bijdragen?
Begin met vertalen ›

YvesG

Lid sinds: 06/04/18

290 Reputatie

2 handleidingen geschreven

Één opmerking

Bravo

Ce tuto peux rendre service a des consommateurs abusés par la sociète Sonos .

Merci

bruno vinay - Antwoord

Voeg opmerking toe

Weergavestatistieken:

Afgelopen 24 uren: 2

Afgelopen 7 dagen: 19

Afgelopen 30 dagen: 51

Altijd: 1,976